Showing posts with label bread. Show all posts

Wednesday, June 25, 2014

Early Grey Sweet Rolls with Cherry and White Chocolate


Our family has expanded yet again. Yesterday marked four years to the day since my aunt's cousin immigrated here with her husband and son from Israel. Since that time they have had a daughter, who will be turning two at the end of July, and now her brother and his family have immigrated as well. I thought it only fair to properly greet the new additions to the family with some baked goods.

A few months ago my friend had asked me if I ever tried baking with Earl Grey tea before, too which I replied that I had not. Since that time the idea was in the back of my mind but I honestly hadn't given it much thought until yesterday. I found this recipe for a sweet roll that incorporates Earl Grey tea within the dough. The original recipe called for a combination of fresh raspberries and white chocolate but I didn't have any raspberries on hand so I substituted some frozen cherries instead.

I baked the rolls in the afternoon and later that evening brought them with me to the park as I met the new family members. They were extremely nice and appreciate of the gesture, commenting that they especially enjoyed that the rolls were not overly sweet. We spent a nice evening together with the kids playing on the playground before we parted our separate ways. I was so pleased to have met them and look forward to the future occasions and celebrations we will share together.

Earl Grey Sweet Rolls with Cherry and White Chocolate

For the dough:
  • 1 package (8 grams) yeast
  • 1 teaspoon sugar
  • ½ cup warm water
  • 1 egg
  • 2 tablespoons oil
  • ¾ cup warm water
  • 4 cups flour, sifted
  • ¼ cup sugar
  • ¼ teaspoon salt
  • 2 Earl Grey tea bags 
  1. In a small bowl, mix the yeast, a teaspoon of sugar and a ½ cup of warm water. Set aside to sit and foam.
  2. In another small bowl, whisk together the egg, 2 tablespoons of oil and ¾ cup of warm water. Set aside.
  3. In a large bowl, sift 4 cups of flour with sugar, salt, tea powder and whisk everything together.
  4. Make a well in the center. Pour in your yeast and egg mixtures and using a wooden spoon, stir until roughly combined.
  5. Dump your dough onto a lightly floured surface and begin to knead for 5-10 minutes (you may have to lightly flour your surface again if your dough becomes too tacky). Once the dough starts to feel smooth, place it in an oiled bowl and cover with a tea towel. Place in a warm area or in a turned off oven and let rise for an hour to an hour and a half, until the dough has doubled in size. 
For the filling:
Note: You can substitute any fruit such as raspberries, strawberries, blueberries, or cherries. If using frozen fruit, make sure to not thaw and pulse a few times in the food processor so the pieces aren't too big. Then add 1 tbsp corn starch to the fruit before spreading on the dough.
  • ¼ cup sugar
  • ½ cup white chocolate chips
  • 2 cups fresh or frozen fruit, chopped into pieces
To assemble:
  1. Once the dough has risen, roll out into a 10" x 18" rectangle.
  2. Scatter dough evenly with sugar, white chocolate chips and fruit. Be sure to leave the top inch of your dough free of any toppings so you are able to seal your roll.
  3. Starting at the bottom, begin to roll up the dough and berries using firm pressure. Seal the border using a light coating of water. 
  4. Cut the rolls about 1-1½" thick (depending on how many you want to make).
  5. Place the rolls, cut side down, in an 11" x 13" well-greased or parchment-lined baking dish. (I actually cut my rolls to be about 1" thick and was able to make 18 all together, putting 9 into two different pans). Cover with a tea towel and let rise for another half hour.
  6. Bake the rolls at 350 degrees Fahrenheit for 30 minutes. 
For the glaze:
Optional but I would highly recommend as it is delicious and adds a great final touch.
  • ½ cup powdered sugar
  • 2-3 tbsp milk or cream (depending on how thin or thick you want the glaze to be)
  1. In the last few minutes while the rolls are finishing baking, whisk together the powdered sugar and milk/cream until a smooth mixture comes together.
  2. As soon as the rolls are ready, coat them with the glaze immediately. If there is enough left (or you can make some extra) glaze them again in 5 minutes.

Sunday, March 18, 2012

Chinese Coconut Buns


It's no surprise that I like to bake, so when any of my friends have some sort of special occasion coming up I ask them about any favorite treats they might have so that I may make it for them. Last year one of my friends was celebrating her birthday and told me that she really enjoys honey buns, a sweet Chinese pastry. With this information I searched for "honey bun" recipes and prepared some to bring to class. Having never tried them myself I didn't actually know what a honey bun was...I just assumed they were buns soaked in honey, therefore I thought nothing wrong of the recipe I found for exactly that. However when I presented my friend with the buns I was surprised to learn that honey buns were actually supposed to be filled with a coconut filling. She still enjoyed the buns and thanked me for them, but I was disappointed that I hadn't baked the treat that she had imagined.

Fast forward almost one year and finally I was able to fulfill my friend's wish. Apparently here in Vancouver, and online in the blogosphere, the buns my friend was referring to are called coconut buns. A couple of weeks ago I randomly came across a recipe describing exactly what my friend wanted and I suggested to her that she come over to my house and we could bake them together. Last week we had the opportunity to do exactly that when she came over and made the coconut buns. I could tell she really liked them because she couldn't stop eating them and I made her promise not to consume all of them before the night was over. We had a good time together and I'm glad that she got to have her "honey buns" after all.

On a separate note, while baking the buns we decided to make only half with coconut (for her) and the other half of the dough I used to make a poppy seed roll (for my family who loves poppy seeds but not coconut). I have to say...I think I have found my new favorite sweet dough recipe. I was not extremely happy with my previous sweet dough because it tended to become quite dry, especially if the filling being used was not very moist. However this new recipe is excellent because the dough itself is quite moist and retains this quality after being baked, resulting in a fluffy bread that was especially great for the poppy seed filling. I will definitely be using this new sweet dough in the future.

Chinese Coconut Buns
Note: This recipe makes about 10-12 buns. Alternatively, the dough is enough for two sweet rolls with any desired filling.
 
For the dough:
  • 1 packet ( 2 1/4 tsp) instant yeast
  • 1/4 cup luke warm water
  • 1 tsp sugar
  • 1/2 cup milk
  • 1/2 cup (8 tbsp) unsalted butter, melted
  • 2 eggs
  • 3 1/2 cups flour
  • 1/3 cup sugar
  • 1 tsp salt
 For the coconut filling:
  • 1 cup unsweetened coconut flakes
  • 4-5 tbsp honey (depending on how sweet you want it)
  • 3 tbsp unsalted butter, melted
  • 1/2 tsp salt
  • 1 egg yolk 
  1. To make the dough, start by dissolving the yeast in the warm water and add the teaspoon of sugar. Stir it around and let it sit for about 10 minutes to proof the yeast.
  2. Meanwhile, in a large bowl sift together the flour, sugar, and salt. Add the milk, butter, eggs, and yeast mixture and mix until the dough starts to come together. If using a mixer switch to the dough hook and knead until the dough becomes smooth and elastic, otherwise knead on a lightly floured counter.
  3. Transfer the dough to a greased bowl covered with plastic wrap and a towel and store, covered, for at least an hour or until the dough doubles in a warm environment.
  4. While waiting, prepare the coconut filling by combining all of the ingredients in a food processor until it has a paste-like consistency.
  5. Once the dough is ready, divide into two. Split each half into 5-6 pieces about 3-4 ounces each.
  6. Roll each piece into a rectangle, about 3" x 5", and place 1 1/2 tablespoons of filling lengthwise down the center.
  7. Bring the long sides up over the filling and pinch the edges to seal the seams. 
  8. Place the buns, seam side down, on a greased baking tray (or lined with parchment paper) and set aside for 20 minutes to rise a little more. Afterward, lightly brush the tops with an egg wash (egg mixed with 1 tbsp of water) and sprinkle with some sesame seeds.
  9. Bake at 375 degrees Fahrenheit for 15-20 minutes, depending on the size of the buns, or until the tops are golden brown. Allow to cool for about 10 minutes.

Monday, February 14, 2011

Zucchini Fries


I have been wanting to make fries for quite some time, I just never seemed to get around to it. In truth, part of the reason was because I didn't actually want to fry them, I wanted to bake them. The problem with that is that the fries rarely turn out how you want them and it ends up being a disappointment. However, I put my doubts aside when I found this recipe because it was so easy I just couldn't resist trying it. I figured I really wasn't taking a risk because it required so little time to make and I already had the four ingredients required to make it.

Well, I am so glad that I gave this recipe a go! The zucchini fries tasted great! Everyone loved them and they were eaten up in a snap. Although they weren't crunchy like a fried zucchini would have been the texture of the coating gave it a different type of crunch. Also, the flavor of the bread crumbs mixed with the Parmesan cheese added to the otherwise subtle tasting zucchini. My one recommendation if making these fries is to eat them while they're hot and fresh from the oven because the zucchini tends to go limp once it cools down. Other than that, it's a great fast and easy way to make some fries and not feel guilty about eating a lot.

Zucchini Fries
Note: The original recipe calls for 1 packet of shake and bake and 1/4 cup grated Parmesan but based on my experience I found that I needed double the amount to ensure all of my zucchini had a nice coating. The recipe posted below reflects the amounts I used.
  • 1 lb (3-4) zucchini
  • 2 packets shake and bake coating mix
  • 1/2 cup grated Parmesan cheese
  • 1 large egg
  1. Trim the ends off the zucchini and then cut in half lengthwise. Cut each half into 1/4" sticks. I did this by cutting once across and four times across the entire length.
  2. Whisk the egg in a medium bowl and add the zucchini. Toss to coat evenly.
  3. Combine the bread crumbs and Parmesan cheese in a plastic bag (either the one provided or a ziploc bag) and add about 1/4 of the zucchini.
  4. Shake the bag until zucchini are evenly coated and then arrange zucchini on a pre-greased baking sheet. Repeat with remaining zucchini.
  5. Bake zucchini for 12-14 minutes at 450 degrees Fahrenheit or until the coating becomes golden brown. Halfway through baking, turn the tray 180 degrees to ensure even baking.

Wednesday, February 2, 2011

Lemon Poppy Seed Muffins


It's amazing how much more baking and cooking I am able to do in the first month of a school term before exams hit. Last weekend I decided to bake muffins for breakfast and wanted to try two different recipes. The first was for an apple cheddar muffin and the second was for a lemon poppy seed. I was hoping that the apple cheddar muffin would turn out to be more on the savory side, especially considering how little sugar the recipe called for, but unfortunately my expectations were not met. The muffin tasted neither cheesy nor like apples...it kind of just tasted like a sweet muffin. As such, I have decided not to post the recipe but for those still interested it can be found here.

As for the lemon poppy seed muffins...those were a hit! The lemon flavor definitely stood out and the glaze on top highlighted the lemon even more. The poppy seeds provided a nice little pop and I also thought they were quite visually appealing. As is my new obsession, I made the muffins in my mini muffin pan but I don't think anyone would have minded a larger, full size muffin. Still, I think the minis always come out looking cute and provide a nice little portion. For those who want more...simply take two :)

Lemon Poppy Seed Muffin
Note: The original recipe was intended for 12 regular muffins. I halved the recipe and was able to get 21 mini muffins. The recipe posted below reflects the quantities I used to make the minis.
  • 1 cup flour
  • 1/4 tsp salt
  • 3/4 tsp baking powder
  • 1/8 tsp baking soda
  • 1/4 cup unsalted butter, softened
  • 1/2 cup sugar
  • 1 lemon, juiced and zested
  • 1 egg
  • 1/2 cup sour cream
  • 1 tbsp poppy seeds
For the glaze:
  • 1 tbsp lemon juice (about 1/2 a lemon)
  • 3 tbsp powdered sugar
  1. Sift and whisk together the flour, salt, baking powder, and baking soda and set aside.
  2. Cream the butter, sugar, and lemon zest until light and fluffy. Beat in the egg.
  3. Stir in 1/3 of the flour mixture until just combined.
  4. Stir in the lemon juice and half of the sour cream until combined.
  5. Stir in half of the remaining flour mixture, then the rest of the sour cream, then the remaining flour, and finally the poppy seeds. Do not overmix with each addition.
  6. Line a muffin tin with paper liners or spray with non-stick cooking spray. Fill each cup to the top with the batter and bake at 350 degrees Fahrenheit for 15-20 minutes, or until an inserted toothpick comes out clean. Note: if making in regular sized muffin tins, bake for about 30 minutes.
  7. While the muffins are baking, assemble the glaze by mixing the lemon juice together with the powdered sugar.
  8. Once ready, remove the muffins from the oven and allow to cool for 5 minutes before lightly brushing the glaze over top. I found it easiest to just pick up the muffin, dip the top in the glaze, then swirl above the bowl to let the excess drip off before placing back upright.

Sunday, November 28, 2010

Chocolate Zucchini Bread


I have decided that I really like my mini muffin tins. They are actually quite convenient if you think about it. In today's diet conscious world, everyone is concerned with eating too much dessert. The mini muffin tin allows you to make perfect bite sized desserts that anyone can sample without feeling too guilty. Also, the little size makes the dessert look cuter than a big chunk on a plate.

The reason I am blogging about mini muffin pans is because I recently made this wonderful chocolate zucchini bread but had way too much batter. I didn't want to make two loaves...that would be overkill. Instead, I used half the batter in the loaf pan and then the other half to make twenty four little mini bites. It worked out great because I brought the mini bites with me to a birthday party and everyone loved them.

This recipe is perfect for chocolate lovers...it is honestly one of the chocolatiest breads I have ever tasted. The zucchini has the effect of moistening the bread though you can't taste it at all. In fact, had I not told everyone that there was zucchini in it, no one would have known. Apart from that, knowing that there is zucchini in it can allow you to trick yourself into thinking that you're being slightly healthy as you munch down the chocolatey goodness.

Chocolate Zucchini Bread
Note: I got a little overexcited when shredding my zucchini and ended up with 4 cups. This recipe is for the original amount which yields one loaf or 24 mini bites.

  • 2 cups shredded zucchini (1 medium zucchini should be enough)
  • 1 cup flour
  • 1/2 cup cocoa powder
  • 1 tsp baking soda
  • 1/4 tsp baking powder
  • 1/4 tsp salt
  • 1/2 tsp cinnamon
  • 1/2 cup yogurt or sour cream
  • 1 cup brown sugar
  • 2 eggs
  • 1 tsp vanilla
  • 3/4 cup chocolate chips
  1. Beat the sugar, eggs, and vanilla together. Add in the sour cream/yogurt and then the shredded zucchini. Mix until evenly combined.
  2. In a separate bowl, sift together the flour, cocoa powder, baking soda, baking powder, cinnamon, and salt.
  3. Add the dry ingredients to the wet and mix until everything is incorporated. Gently mix in the chocolate chips.
  4. Bake at 350 degrees Fahrenheit for 50-60 minutes, or until a toothpick inserted comes out clean.
  5. If baking the mini bites, bake at the same temperature for 15-20 minutes.

Saturday, September 11, 2010

Lemon Pull Apart Loaf


After making the challah for Rosh Hashanah, I had extra dough left over so I decided to give this recipe a try. I had actually been meaning to make it for quite some time but every time I made sweet dough my mom insisted that I make the fruit filled cream cheese braids because she fell in love with them. This time, however, I finally convinced her to let me give this recipe a try. The technique is actually really cool and it makes such a beautiful looking loaf, I just couldn't resist. My only qualm is that I wish it had a stronger lemon flavor, but that can be achieved by simply making more of the lemon filling and really slathering it on the dough.

Lemon Pull Apart Loaf
Note: This loaf uses half of the dough from the sweet dough recipe.
  • Sweet dough (recipe can be found on link above)
  • Zest of three lemons (use more if you want more filling)
  • 3 tbsp sugar
  • Melted butter
  • Juice of one lemon
  • 1 tbsp icing sugar
  1. Mix together the lemon zest and sugar and set aside.
  2. Roll out the dough into a large rectangle and cut into five strips.
  3. Brush the first four strips with melted butter and then spread with the lemon filling.
  4. Stack the strips on top of one another, making sure the plain strip is on top.
  5. Cut the strips into six equal sized blocks and arrange them, cut side up, side by side in a pre-greased 9" x 5" loaf pan.
  6. Cover the pan with plastic wrap and set aside in a warm, dry place for half an hour. Brush with an egg wash while you preheat the oven.
  7. Bake the loaf at 350 Fahrenheit for about 45 minutes. If it starts to get too brown on top cover it with aluminum foil to keep it from burning while the inside keeps baking.
  8. Once it's baked, transfer the loaf to a metal rack to cool. Mix together the lemon juice and icing sugar to create a simple glaze that you can pour over the top while its still hot.

Friday, September 10, 2010

Rosh Hashanah Challah


Shana Tova! That is the Jewish way of saying Happy New Year. Traditionally, Jewish families eat a special type of sweet bread on the Sabbath called challah. However, on Rosh Hashanah, the challah is even more special because it is baked in a round shape, meant to symbolize the cycle of a year.

When I searched for Rosh Hashanah challah recipes online, I came across one that had great reviews. The only complaint people had was that it seemed to take too long to rise. I decided to overcome that problem by doubling the yeast. I made sure to prepare the dough ahead of time so that I could make changes if need be...and it's a good thing I did. Even though the dough rose, I felt that there wasn't enough to make a challah big enough for the entire family.

I then decided to make a second challah, this time with a recipe I was more sure of. Although I didn't use a challah recipe, I used my sweet dough recipe instead, I filled the dough with apples and rolled it into a round shape.

Even though the first challah had great reviews online, I can't say I was that impressed with the taste. The recipe called for honey instead of sugar but in the end I felt it wasn't sweet enough. The apple challah, on the other hand, was sweet and moist and I was very glad that I had decided to make it at the last minute. Maybe the other challah wasn't great because I didn't stick to the recipe, though my only change was the additional yeast. In hindsight, maybe I should have added more honey as well...I don't know. For those interested in the recipe, I got it from epicurious...perhaps someone else will have better luck with it. I, on the other hand, will stick to the apple challah since it seemed to be a hit with the family.

Apple Challah
Note: I used only half the dough to make the challah, the other half I set aside and used in a different recipe.
  • Sweet dough (recipe same as for apple cream cheese braid)
  • 3-4 medium size apples, cored and peeled
  • Honey
  1. Cut the apples into small chunks and gently heat with some honey until nice and soft. I don't know how much honey I used, I just poured until I felt it was enough and the apples had a nice sweet taste to them.
  2. Roll out the dough into a rectangle about 20" x 15".
  3. Lay out half the apple chunks onto the middle third of the dough and fold the bottom third over. I recommend straining the apples to remove as much juice as possible, so that it doesn't seep out later.
  4. Pat the dough down around the apples and then lay down the rest of the apple chunks on top. Fold over the top third of the dough and pat down around the apples once again. Try to seal the dough around the sides and ends, but be careful not to rip it.
  5. Starting from one of the ends, carefully roll the dough into a loose cylinder. I emphasize the loose because if you press down hard, the dough will rip and apple chunks will fall out.
  6. Transfer the dough, with the smooth side facing up, to a pre-greased round cake pan. I used an 11" springform pan, because it's the biggest one I have, but you can probably get away with a 9". The dough won't fill up the whole pan but you can pat it down a little very gently. 
  7. Cover with plastic wrap and allow the dough to rest in a warm spot for half an hour. Afterward, brush with an egg wash while preheating the oven.
  8. Bake at 350 Fahrenheit for an hour. Once the dough starts to get golden on top, about half way into baking, cover it with aluminum foil so that the top doesn't get burnt while the inside bakes.

Sunday, August 8, 2010

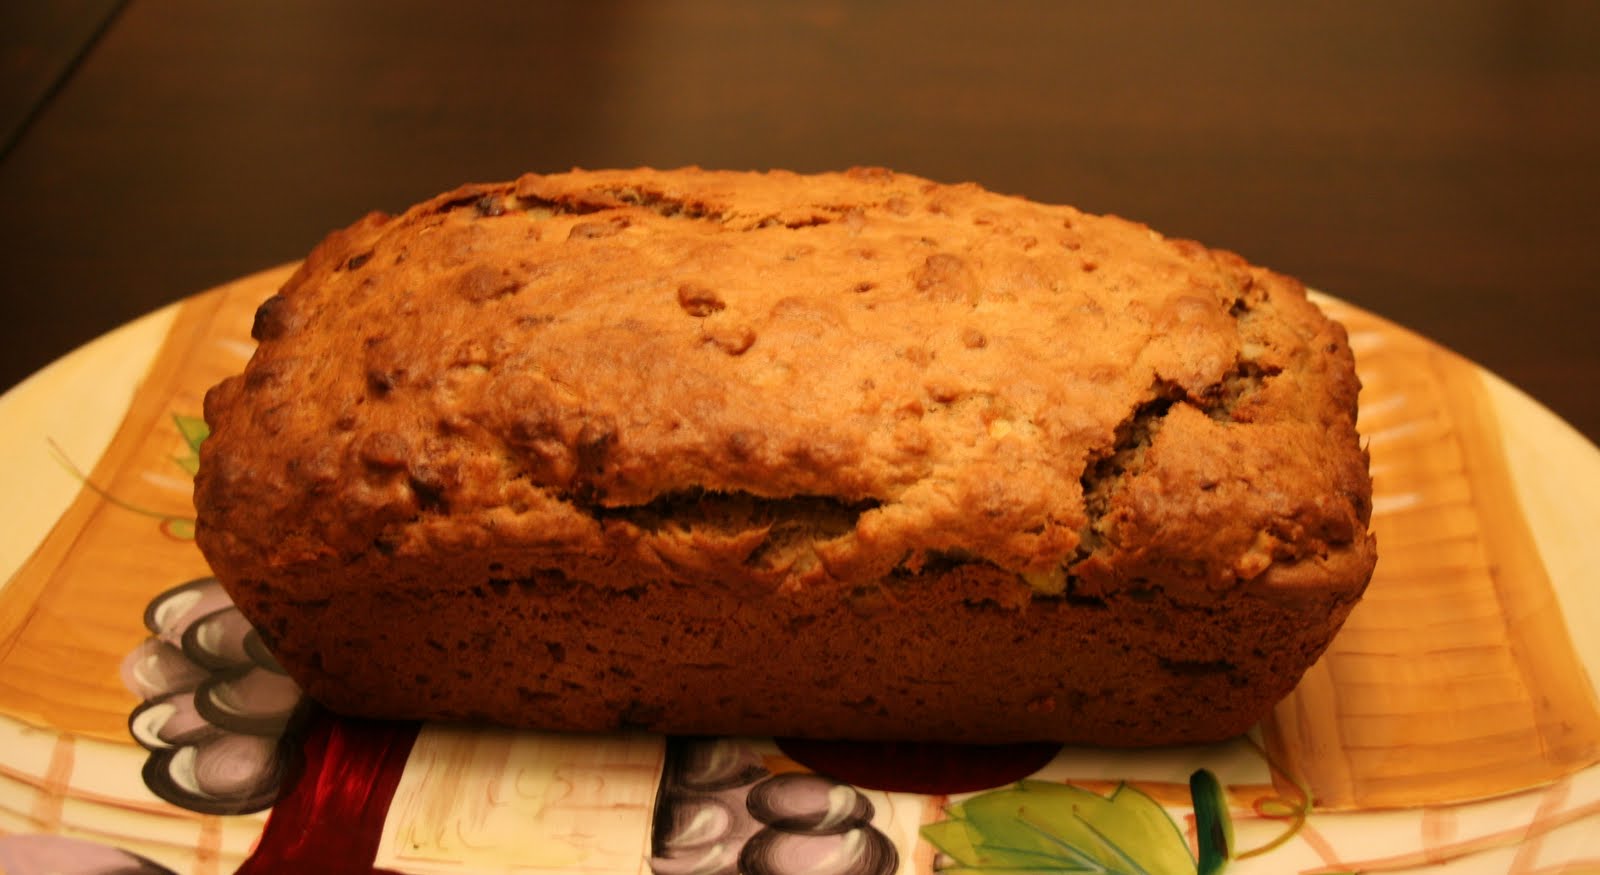
Banana Bread


I'm back!!! I enjoyed a wonderful trip to Israel but before I left I made this banana bread and ran out of time to post the recipe. This banana bread was actually something that I had planned on making for quite some time as a birthday present for my boss. He loves his banana bread and every single week sends me out for his coffee order and slice of bread. I decided that for his birthday, I would bake him his very own loaf so that he could take it home and enjoy it with his family. Little did I know that he would consume half of it before it even left the office.

In preparation for making this banana bread, I made one a week prior using a recipe I found online. Unfortunately, the recipe wasn't to my liking and so I rooted around in my cupboards until I found the recipe that I had used long ago and knew to be a success. This recipe is moist and full of banana flavor, without being too cakey, therefore making the "bread" part of its name a reality.

Banana Bread
  • 2 cups flour
  • 1 tsp baking soda
  • 1/4 tsp salt
  • 1/2 tsp cinnamon
  • 1/2 cup unsalted butter
  • 1 tsp vanilla
  • 3/4 cup brown sugar
  • 2 large eggs, slightly beaten
  • 2 1/3 cups mashed overripe bananas (about 4 bananas should be fine)
  • Optional: You can add chocolate chips and walnuts too, but I kept it out because my boss likes his banana bread plain without any additions.
  1. Combine the flour, baking soda, salt, and cinnamon.
  2. In a separate bowl, cream together the butter and sugar.
  3. Stir in the eggs and mashed bananas until well blended.
  4. Fold the banana mixture into the flour mixture and stir just until it is evenly moistened.
  5. Bake for one hour at 350 Fahrenheit.

Wednesday, June 30, 2010

Monkey Bread


I loved this recipe the minute I heard its name...monkey bread. Also known as pull apart bread, monkey bread gets its name from the fact that you eat it by pulling apart the little balls just like a monkey. When I first saw the recipe, I knew that fate was calling my name because the recipe called for one packet of quick rise yeast, and that's exactly how much I had in my pantry.

The dough is easy is to make and the process of rolling the balls in butter and then sugar coating them is fun. Be warned though: this recipe is not for impatient people. After making the dough initially, you must let it rise for 20 minutes before proceeding to sugar coat the balls. Then, you have to wait another hour for the dough to rise in the pan before baking for 30 minutes. Overall, the process is time consuming simply because you end up waiting for so long...but the taste is worth it.

The first time I made monkey bread, I did it with my brother after dinner one night. By the next morning the whole family had devoured it over breakfast. This time, I decided to do it with some friends and their kids...the monkey bread was consumed within 20 minutes of coming out of the oven. The great part about this recipe is that you can do it with kids and let them go crazy...there's no measuring involved when it comes to rolling the balls in butter and then sugar coating them. Also, the recipe leaves room for experimenting. For example, the first time I prepared the monkey bread I followed the recipe as stated. However, the next time I decided to put little chocolate chips into the center of each of the dough balls before sugar coating them. Each time the monkey bread tasted great, and the chocolate inside was a great surprise the second time around. The recipe can also be altered by sugar coating them with sugar and chocolate instead of sugar and cinnamon. The possibilities are endless!

Monkey Bread

For the dough:
  • 2 tbsp unsalted butter, room temperature
  • 1/4 cup warm water
  • 1/4 cup sugar
  • 1 envelope instant yeast
  • 3/4 cup warm milk
  • 1 tsp salt
  • 3 1/4 cups flour
  • 1 large egg
  1. Lightly grease a 10" bundt pan and large bowl.
  2. Put the warm water and a pinch of sugar into a small bowl and pour yeast on top. Stir until the yeast softens and completely dissolves.
  3. In the large bowl, mix the butter, sugar, milk, salt, and egg. Once evenly mixed, add the yeast mixture and fully incorporate.
  4. Gradually add the flour and mix until a dough forms. Cover with a towel and set aside in a warm place for 20 minutes.
For the coating:
  • 1/2 cup unsalted butter, melted
  • 3/4 cup brown sugar
  • 3 tsp cinnamon (you can play around here and add what you like...be creative)
  1. Tear off the dough into roughly 1" pieces and roll into a ball.
  2. Dip the dough ball into the melted butter and let excess liquid drip off before rolling around in sugar cinnamon mixture.
  3. Pile all of the sugar coated dough balls on top of one another in the prepared bundt pan. Cover with a towel and set aside in a warm place for an hour, or until the dough rises and fills the pan.


Note: If you want to use chocolate chips, simply flatten the piece of dough that you tear off, put 3-4 chocolate chips in the middle and then cover with the rest of the dough and shape into a ball before sugar coating.


Bake for 30-35 minutes at 350 Fahrenheit. Cool for 5 minutes in the pan before inverting onto a plate and devouring to your heart's delight.

Thursday, June 17, 2010

Olive Bread


As my tap class was getting ready for our annual year-end party, I volunteered to bring something that could be considered "real food"...ie. something that was not dessert. I decided to try and make this olive bread since it would go well with the pasta that someone else was bringing.

This was actually not my first time making this recipe, but it was the first time that I carefully read through the directions instead of briefly looking at them and being convinced that I had them memorized. The first time, after so confidently heading into my kitchen with the recipe committed to memory, I not only forgot to add the melted butter but I added the ingredients backwards. The result was an extremely dry looking bowl of ingredients, I can't even call it a dough or a batter. Once I figured out I was missing the batter I added it in, but it was too late. The dough clumped into pieces and refused to allow the butter to be incorporated completely. My friend and I decided to bake it anyways, since we already put the effort into assembling it, and ate it regardless.
 
This time I followed the correct order and I remembered to add the melted butter. I substituted some of the ingredients from the original recipe but I think the concept was still the same. Unfortunately, when I mixed the ingredients together the result was more of a dough than a batter as the recipe described. As a result, the bread was quite dense and now light and airy as I imagined it to be. I might try just using one cup of flour next time and see how that changes the texture. Luckily, it was still widely received in my tap class. Below is my adaptation of the recipe; the original recipe is courtesy of Laura Calder of the Food Network show French Food at Home, and can be found here.

Olive Bread

  • 1-1/2 cups flour
  • 1-1/2 tsp. baking powder
  • 1/2 tsp. ground pepper
  • 3 eggs, lightly beaten
  • 1/2 cup melted butter
  • 1/3 cup green olives, sliced and pitted
  • 1/3 cup Kalamata (black) olives, sliced and pitted
  • 1 cup feta cheese, lightly crushed, plus a little extra for sprinkling
  • Pinch of salt
  1. Heat the oven to 350ºF/180ºC. Butter and flour a loaf pan. (I used a 9" x 5" and sprayed it with Pam)
  2. Sift the flour and baking powder into a mixing bowl, and stir the salt and pepper through. 
  3. Beat the eggs into the flour. Beat in the melted butter. 
  4. Stir through the remaining ingredients to distribute evenly. 
  5. Transfer the dough into the pan, making sure it is spread evenly across. Sprinkle some feta cheese over the top and bake 55 minutes or until a toothpick inserted in the center comes out clean. 
  6. Cool slightly. Remove from pan. Slice, and serve.