Showing posts with label lemon. Show all posts

Saturday, September 13, 2014

Blueberry Pie

 
A few weeks ago we were celebrating my brother's birthday and he asked me to bake a pie. My mom said that she didn't think pie was good enough for a birthday so we agreed upon a cake instead. As a compromise, I promised him that I would make him a pie sometime in the near future. In that same week, my mom also bought a 10 lb box of blueberries, knowing they are my favorite berry and that the season was ending. As much as I love blueberries, it is difficult to eat 10 lbs on my own so I was looking for some recipe that would use up a significant amount. That's when I got the idea to make a blueberry pie, therefore fulfilling my brother's request and serving my blueberry purpose.

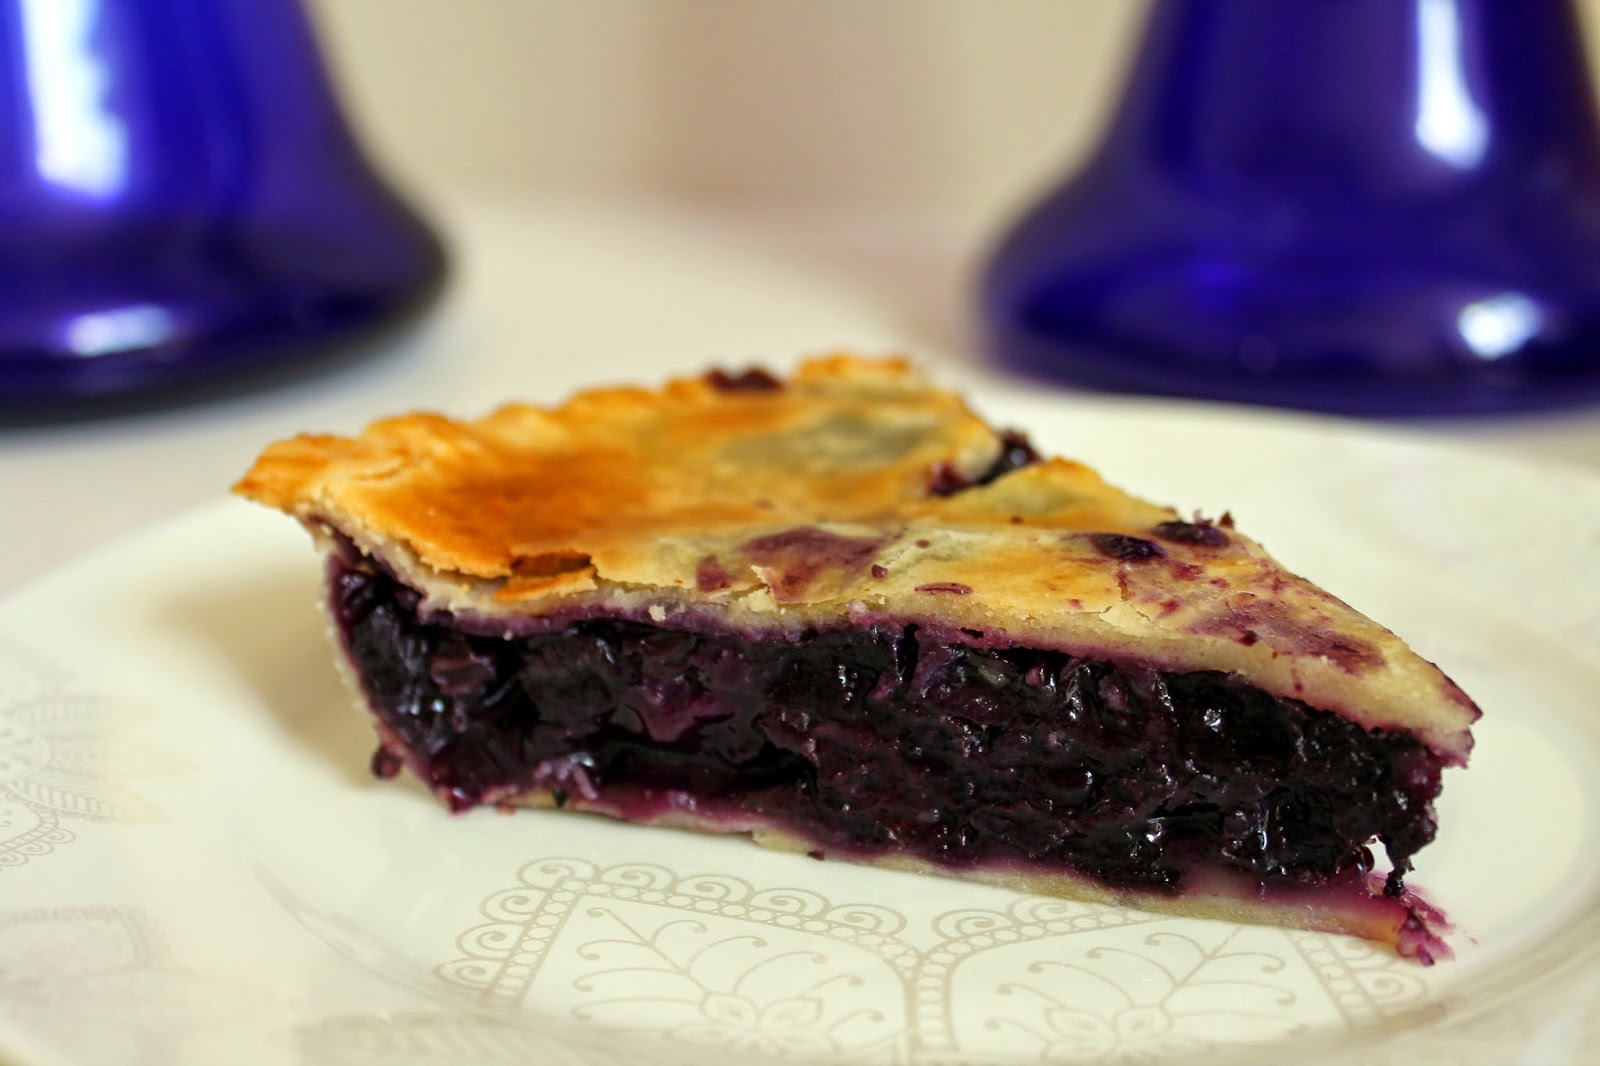
I've only baked a pie once before, almost two years ago when my friend asked me to help her make an apple pie. Unfortunately, since she took it home with her I never had the chance to taste it. This time I definitely made sure I had a nice big slice when I invited my cousins and grandparents over for dinner one evening. The pie was delicious and I enjoyed a slice for breakfast the next morning as well.

Blueberry Pie

For the dough:
Note: This is enough to make one 9" crust. To make the top layer double-up the ingredients.

  • 1¼ cups flour
  • 1 tbsp sugar
  • ¼ tsp salt
  • ½ cup (8 tbsp) cold unsalted butter, cut into pieces
  • 3-4 tbsp ice cold water
  1. Combine the flour, sugar, and salt and pulse a couple of times in a food processor. Add the chunks of butter into the processor and pulse until the butter pieces are roughly the size of walnuts. If you don't have a food processor use a pastry cutter or fork and knife to cut the butter into the flour.
  2. Transfer the dough mixture into a bowl and moisten with the water, starting with just a couple of tablespoons at first. Work the mixture until it forms a dough, adding water by the tablespoon only as needed if it feels dry.
  3. Form the dough into a small disk and wrap in plastic wrap. Refrigerate for at least 30 minutes or up to 24 hours before rolling it out.
For the filling:
  • 6 cups of fresh blueberries, rinsed and stems removed
  • ½ lemon, juiced and zested
  • ¼ cup flour
  • ½ cup sugar
  • 2 tbsp butter (unsalted), cut into small pieces 
To assemble:
  1. Combine all of the filling ingredients and set aside.
  2. Remove the dough from fridge and divide in half. On a floured work surface, roll out two equal discs about ⅛" thick. Lay one disc over a well-greased 9" pie pan and press down to line the dish with the dough.
  3. Pour the filling over the dough in the dish and dot with the pieces of butter.
  4. Cover the pie with the second piece of dough and use a fork to seal and crimp the edges all the way around. Trim any excess dough from the sides and use a knife to cut some slits in the dough to allow the steam to escape while baking.
  5. Blend an egg yolk with a few tablespoons of water and brush the egg wash over the top of the dough. 
  6. Bake at 425 degrees Fahrenheit for 15 minutes, then reduce the temperature to 350 degrees and continue baking for an hour until the blueberry juices are thickened and bubbling.
  7. Remove from the oven and transfer to a wire rack to cool before cutting.
Note: It may be helpful to cover the edges of the pie with aluminum foil as they brown faster than the middle. Also, put the pie dish on a baking tray so that it may catch any drippings. Although delicious when served warm, it is also harder to slice.

Friday, September 5, 2014

Lemon Blueberry Pancakes


Last month was the first time in the history of this blog that I did not have a single post. Part of the reason was because I traveled with my brother to Europe for two weeks to celebrate his graduation from high school. When we returned it was his birthday shortly after and I made many dishes including a roasted beet quinoa salad, stuffed mushrooms, and chocolate creme brulee for dessert. I did make one new thing: grape leaves stuffed with dried figs, goat cheese, and walnuts. Even though it was actually very well received I felt it was too simple to dedicate an entire post to.

However last weekend was Labor Day and for some odd reason I woke up very early on Monday morning in the mood for pancakes. Recently my mother had purchased a 10 lb box of blueberries because she knows that I love them and the season is coming to an end. I decided to use the blueberries in the pancakes and also make a blueberry compote topping.

The pancakes were very simple and also quite fluffy because of all the baking powder. I was quite pleased that it made a small batch perfect for two people to enjoy for breakfast. When my brother woke up he happily ate the pancakes along with me. Overall it was a nice relaxing morning and my pancake craving was fulfilled.

Lemon Blueberry Pancakes
Makes about 13 palm-sized pancakes
  • 1½ cups flour
  • 1 tbsp baking powder
  • 2 tbsp sugar
  • 1 lemon, juiced and zested
  • ½ tsp salt
  • 1 large egg
  • 2 tbsp oil
  • 1 cup milk
  • 1⅓ cups fresh blueberries (can use frozen as well)
For the blueberry compote:
  • 1 cup fresh or frozen blueberries
  • ¼ cup water
  • 2 tbsp sugar
  1. In a medium-sized bowl, whisk together the flour, baking powder, lemon zest, sugar, and salt.
  2. Add the egg, oil, milk, and lemon juice. Mix well until a batter forms. If it is too thick, add some extra milk, one tablespoon at a time.
  3. Gently fold in the blueberries, being careful not to break them.
  4. Heat a griddle or large skillet over medium heat. Once heated, reduce the temperature to medium low and pour cup of batter onto the cooking surface. Allow the pancake to cook until bubbles start to form on the top surface, about 20-25 seconds, then use a large spatula to gently flip the pancake over. Cook the other side until it is light and golden and fully cooked through. Repeat with remaining batter.
  5. Meanwhile, combine the ingredients for the blueberry compote in a small saucepan and bring to a boil. Once the cranberries start to pop, reduce the heat to a simmer and keep heating while making the pancakes. Stir occasionally until compote thickens, then remove from heat. 
Note: You may have to go through a couple of "test" pancakes before you achieve the right temperature on the griddle or skillet. Finished pancakes can be kept warm in the oven at 200 degrees Fahrenheit while the rest are cooking.

Monday, June 23, 2014

Dolmathes with Avgolemono Sauce


This past weekend was my brother's graduation from high school. Although he hasn't been little for a long time now I still can't believe how grown up he is and that he is moving on to the next chapter of his life. His graduation was on a beautiful sunny Saturday at UBC and we of course took many pictures of the proud graduate in his cap and gown.

The night before we hosted the family for a celebratory dinner. A few weeks ago my mother and I went to an Italian festival and while we were there we happened to stop by a local specialty grocery store and bought some grape leaves. The leaves were already cleaned and preserved in jars within a salty brine.

Our plan was to make a Greek dish called Dolmathes using the grape leaves. This popular dish is usually served as an appetizer and involves rolling some sort of filling, be it the traditional meat or a vegetarian option, in the grape leaves and then simmering them in stock until the filling is cooked through.

At first I was a little nervous because I had never worked with grape leaves before and I didn't know whether they would be difficult to handle. However I was pleasantly surprised with how easy it was to roll the grape leaves around the filling. Also we happened to buy grape leaves that were already de-stemmed so I didn't have to worry about that step either and only had to wash the brine off the leaves before using them.

There were so many grape leaves in the jar we still had extra left over, despite using over 1.5 lbs of ground beef for the filling and stacking the dolmathes in three layers within the pot. The dolmathes turned out great and were a big hit with the family, especially one of my cousins who raved about them and said she ate four in one go!

On a separate note, I recently noticed that my blog is now four years old. Usually I write a little post detailing what has happened in the last year but the truth of the matter is that my blog has taken a bit
of a backseat this past year. I still try new recipes and write about them when I have the chance but I no longer have the blog at the forefront of my thoughts.

I started this blog four years ago based on a friend's suggestion mostly as an entertaining way to keep track of my improvements in the kitchen. I would research many recipes online, always searching for new things to try or new techniques to teach myself. I still spend my free time perusing blogs and websites for recipes, but I'm also much more comfortable in the kitchen and like to experiment with my own creations. I also used to have a "monthly minimum" that I would try to meet but as my life has become more busy I've become more laid back and simply try to do as much as I can given my schedule.

I didn't know when I first started it how much I would enjoy writing my blog and what a great source it would become for new friendships. It's also a good conversation starter when introducing myself and talking about my hobbies. I don't know how long I will keep blogging and what form it may take in the future but for now I'm content with how things are and I will always be glad I followed my friend's suggestion way back when.

Dolmathes with Avgolemono Sauce
Note: Depending on the size of the grape leaves and the amount in the jar, the filling may have to be doubled.
  • 1 16 oz jar grape leaves
  • 1 lb ground beef or lamb
  • 1 cup uncooked rice (presoaked to soften and absorb some liquid)
  • ¼-½ cup fresh Italian leaf parsley, chopped
  • 1 large onion, chopped
  • 1 tsp dried dill
  • 1 tsp dried oregano
  • 2-3 tbsp olive oil
  • Salt and Pepper
  • 2 cups chicken or vegetable stock
  • 1 lemon, juiced
  • ¼ cup olive oil 
  1. Mix together all of the ingredients starting with the ground meat through the salt and pepper fo the filling and season to taste. Set aside.
  2. Drain the brine from the grape leaves and lay them flat in a large shallow bowl. Soak them for five minutes in hot water then drain and rinse off with cold water. (You may have to do this in batches in order for the leaves to be easier to handle.) Keep the leaves laying in cold water once rinsed.
  3. If the leaves have stems, cut off the stems then lay them on a flat surface, with the veins facing up.
  4. Place 2-3 tablespoons of filling onto the bottom third of the grape leaf.
  5. Roll up the bottom of the leaf to cover the filling, then bring in the sides, and then roll the rest of the way to the top.
  6. Place some torn up grape leaves (I used cabbage leaves because I didn't want to waste any of the grape leaves) on the bottom of a large pot. Lay the rolled dolmathes, seam side down, on top.
  7. Keep placing each side by side, filling the bottom of the pot in a single layer. Once filled, stack the next layer on top.
  8. Once all of the dolmathes have been rolled and stacked in the pot, pour the chicken stock, lemon juice, and olive oil over top. Add enough water so that the dolmathes are covered by about ½" of liquid.
  9. Put an inverted plate over top to apply some pressure on the dolmathes. Heat the pot on medium-high heat until boiling, then reduce to medium-low and continue to simmer for 35-45 minutes.
  10. To check for doneness remove one from the pot and slice in half to make sure the rice and meat have cooked through. The dolmathes can be served warm or at room temperature with the avgolemono sauce. 
To make the sauce:
  • 1 cup chicken or vegetable sauce
  • 1 lemon, juiced
  • 3 egg yolks
  • 1 tbsp butter

  1. Whisk the egg yolks together with the lemon juice.
  2. Add the stock and heat in a small saucepan over medium heat until boiling. Whisk the sauce often so that the egg yolks don't start to cook.
  3. Once boiling, reduce to a simmer and add the butter. Continue to heat until the sauce thickens slightly.

Sunday, November 3, 2013

Baked Fish en Papillote


A few nights ago I decided to finally act upon a cooking technique that I first learned about over two years ago. I had seen it come up a few times on tastespotting.com, my favorite site to browse for recipes, and thought that it sounded intriguing. But somehow it always remained on the back burner until a few weeks ago when my mom and I were watching Food Network and it was featured on Ina Garten's Barefoot Contessa.

The technique that I am referring to is called "fish en papillote" or "fish in paper". Basically the idea is to create a little packet, made of parchment paper, that includes the fish as well as some herbs and seasonings. The fish is baked in the paper packet and the steam that builds up inside allows for the fish to cook slowly and gently, absorbing all of the flavors of the herbs and seasonings inside.

I am so glad that I finally got around to trying this out! This technique is great for a number of reasons. Firstly, there is no strict recipe that needs to be followed...it can be done using any white fish and a number of different herbs and seasonings. I decided to make a somewhat Mediterranean style dinner and used halibut, lemon, capers, rosemary, and spinach. However I think it would also be great with some Asian flavors such as teriyaki, ginger, and soy.

Secondly, the packets can be prepared ahead of time and then refrigerated until ready to bake. For example, I made all of the packets on Friday and we ate some for that night but I saved the rest and baked them the next day when my grandparents came over for dinner. The fish tasted just as good when baked the following day and I put it in the oven straight from the fridge.

Finally, I think the technique is great for easy entertaining and small dinner parties. When the packets are ready and torn open they release a wonderful aroma and look beautiful with the fish inside. Also, the delicious juices are held within the packet and continue to provide fragrance and flavor to the fish.

Everyone in my family enjoyed the fish and I was quite pleased with how it turned out. I still can't believe it took me two years to try it but better late than never!

Baked Fish en Papillote
Note: This is an example of ingredients that can be put into the paper packet, therefore quantities are not important. Just be sure to follow the folding technique so that the paper packets are sealed and no steam escapes.
  • Individual white fish fillets (6-8 oz portions)
  • Lemon (sliced into rounds, zested)
  • Baby spinach
  • Fresh rosemary (can substitute with thyme or oregano)
  • ¼ cup unsalted butter, room temperature
  • 2 tbsp capers, chopped
  • Handful flat-leaf parsley, roughly chopped
  • 1 garlic clove, finely minced
  • Salt and pepper
  1. Combine the chopped capers, parsley, garlic clove, and lemon zest with the butter. Mix well until all of the ingredients are integrated in the butter. Wrap in plastic wrap and refrigerate until ready to use.
  2. Fold a large piece of parchment paper in half, lengthwise. Make one long cut diagonally along the bottom corner and two shorter diagonal cuts along the top. When unfolded it should resemble a heart.
  3. Place a handful of spinach in the center of half the paper heart. Spoon some of the prepared butter on top of the spinach, distributing a few pieces throughout.
  4. Lightly season the fish fillet with salt and pepper on both sides. Place the fillet on top of the spinach and then spoon some dabs of butter over the fish.
  5. Place a slice or two of the lemon on top as well as a half sprig of rosemary. 
  6. Fold the other half of the parchment over and starting from the bottom corner make small overlapping pleats all the way around to seal the edges completely. 
  7. Repeat with remaining fish fillets. Once ready, transfer all of the packets to a baking sheet and cook at 400 degrees Fahrenheit for about 15 minutes. (Generally about 12 minutes per inch of thickness). The parchment should puff up as the steam builds up inside.
  8. To serve, cut a small hole in the center of the packet and gently tear apart to the side. Make sure to tear centrally and lengthwise along the packet so that it stays mostly intact and the juices remain inside.

Tuesday, October 29, 2013

Hazelnut Napoleons with Lemon Curd and Berries


Ever since I made baked potato skins for my brother over a year ago, he has been asking me to make some sort of dessert using hazelnuts. When thinking of dessert and hazelnuts, naturally Nutella comes to mind but I wanted to make something that didn't necessarily involve chocolate. A week ago, while sitting in a waiting room, I was flipping through a magazine and came across a recipe for hazelnut napoleons spread with lemon curd and piled high with berries. I took note of the recipe and saved it for future use.

Little did I know that an opportunity to make it would come so quickly. During my parents' dinner party over the weekend I used phyllo dough to make spanakopita. I decided that since I already had the phyllo out I might as well use a few sheets to make the napoleons as well (though at a separate time as we already had two desserts that evening).

I made the lemon curd a few days later and assembled the napoleons one night for my mom, brother, and me to share. Although they looked nice with multiple layers they were a bit challenging to eat. Also, the flavor of the lemon curd was quite strong and overpowered the hazelnut. However my brother was still satisfied with his hazelnut craving because I made a second dessert as well. When making the hazelnut-sugar mixture I ended up with way too much. I decided to use the excess by sprinkling it over some store bought dough and rolling it into mini buns (kind of like cinnamon buns but with the hazelnut-sugar inside).

On a side note, I know that typically phyllo sheets are meant to be stuck together using melted butter however for the sake of convenience I usually use PAM as it is much easier and less messy. This time, I chose to actually make the spanakopita properly, as well as the napoleons, and used melted butter between the sheets. I have to admit the butter added a wonderful rich flavor and definitely improved the taste compared to previous times. I learned my lesson: sometimes convenience is good but if you have the time and energy, don't take shortcuts.

Hazelnut Napoleons with Lemon Curd and Berries

For the lemon curd:
  • 1½ lemons, zested and juiced
  • ½ cup sugar
  • 2 large eggs
  • ¼ cup unsalted butter, cut into pieces
  • Pinch of salt
  1. Combine the lemon zest with the sugar and mix well.
  2. Whisk in the eggs, one at a time, then add the lemon juice and salt.
  3. Heat the mixture over low heat for about 10 minutes, stirring constantly, or until it thickens.
  4. Whisk in the butter until completely incorporated but do not let the mixture boil. Remove from the heat, cover and refrigerate until ready to use.
For the napoleons:
  • 4 sheets phyllo
  • ⅓ cup whole hazelnuts, skinned and toasted
  • ½ cup sugar
  • ½ tsp cinnamon
  • ¼ cup unsalted butter, melted
  1. In a food processor, blend the hazelnuts until fine, being careful not to turn into a paste.
  2. Add the sugar and cinnamon and pulse a few times so as to mix everything together. 
  3. Working quickly, and with unused sheets covered under parchment/wax paper and a damp paper towel, brush the first sheet of phyllo with the melted butter and sprinkle ⅓ of the hazelnut-sugar mixture. 
  4. Repeat with the remaining layers, stacking on top of the first layer and pressing down lightly so they hold together.
  5. Cut the stack into 12 rectangles and transfer to a parchment-lined baking sheet. Bake at 350 degrees Fahrenheit for 10 minutes, or until the phyllo becomes crisp and golden brown. Remove from the oven and allow the rectangles to finish cooling in the pan.
To assemble: Place a phyllo rectangle on a serving plate and spread some of the prepared lemon curd carefully over the surface, topping with some berries of your choosing. Repeat using two more phyllo rectangles to create a stacked napoleon.

Monday, April 8, 2013

French Fraisier Cake


Already a year has flown by and once again I found myself celebrating my birthday with my friends and family. This year the celebrations were postponed by a week because I was working at the hospital, though on the day of my birthday I was able to go out to a nice Italian restaurant with my immediate family. We enjoyed a lovely dinner and I was reminded how special each and every person in my family is to me and how much I cherish the warm wishes and speeches they gave.

When it came to celebrating with my friends I invited everyone over for a pizza making party. I set out pre-made crusts and sauce, as well as a variety of toppings, and everyone made their own pizza. The evening actually provided a great opportunity for everyone to catch up as we are all in our last practicum at different hospitals and no longer see each other in school. Also, with graduation only months away we have fewer occasions during which we can all get together.

Just as in the past, I made my own birthday cake and looked forward to showing it off to all my friends. At first I had a hard time deciding on what to make...I wanted it to be different than what I have made before and learn something new. I also wanted something fruity because spring time always makes me crave fruits. When I saw this recipe for a French fraisier cake, which translates to French strawberry cake, I knew I hit the jackpot. I loved how elegant the cake looked with the strawberries all along the side. It also involved a new technique in order to create the visual effect.

This cake truly stood up to its name as I used two pounds of strawberries in total, from the outside
decoration to the filling. Despite its beautiful appearance it was not easy to slice but luckily my friend was able to help me and made sure I got a good picture. Another friend whose father owns a bakery gave me a helpful hint and suggested that next time I freeze the cake for a little bit prior to serving so that it is easier to cut. As I make more layered cakes I have noticed I have this problem quite often so I think I will try out her suggestion next time.

Even with all the slicing difficulties I am still quite happy with the end result. The cake looked beautiful and it tasted great too. I was actually surprised at how pronounced the lemon flavor of the cake itself was considering how many strawberries were in the cake. However the lemon and strawberry played wonderfully against each other and the vanilla pastry cream added extra sweetness. My friends were impressed and I was happy to have met their expectations.

French Fraisier Cake
Note: I used vanilla pastry cream for the filling (recipe found here) and topped the cake with a light layer of whipped cream

For the Meyer lemon genoise cake:
  • 1 cup flour
  • 2 tbsp butter, melted
  • 4 large eggs, room temperature
  • ½ cup + 2 tbsp sugar
  • 2 Meyer lemons, zested
  1. In a heatproof bowl, whisk together the eggs and sugar over a saucepan of lightly simmering water. Whisk constantly and continue to heat until the mixture is lukewarm to the touch, about 3-5 minutes.
  2. Remove mixture from the heat and beat on high speed until it has cooled and tripled in volume, about 3-5 minutes. It should look like softly whipped cream and form ribbons and fall back upon itself when lifting the beaters.
  3. Fold a quarter of the egg mixture into the melted butter to lighten it. 
  4. Add the lemon zest to the egg/butter mixture then fold back into the rest of the egg mixture.
  5. Sift a third of the flour onto the egg mixture, then gently but quickly fold together.  Repeat in thirds until the flour has been incorporated.  
  6. Gently pour the batter into a well greased 9" cake pan and bake at 350 degrees Fahrenheit for about 18-20 minutes, or until a toothpick inserted into the center comes out clean.
  7. Remove from the oven and cool for 10 minutes, then remove from the cake pan and let cool completely. 
For the simple syrup:
  • Juice of two Meyer lemons
  • ⅓ cup sugar
  • ⅓ cup water 
Combine all of the ingredients in a small saucepan and bring to a boil. Remove from the heat and cool completely before using.

To assemble:
Note: I lined the sides of the pan with plastic wrap before assembling so that nothing would stick and it made for a very clean presentation.
  • Meyer lemon cake from above
  • Meyer lemon simple syrup from above
  • Vanilla pastry cream
  • Whipped cream
  • 2 lbs strawberries
  1. Slice the genoise cake in half. Place the bottom half in the bottom of a 9" springform pan.
  2. Using a pastry brush, soak the cake with half of the simple syrup, making sure it is moist.
  3. Pick out about 12-15 strawberries of the same height and slice in half. Use them to line the perimeter of the cake, with the sliced side facing out. Make sure they are close together and can stand up on their own.
  4. Use half of the pastry cream to pipe a ring on top of the cake and then in between each strawberry, making sure to fill in any gaps of air. Use a spatula to spread the cream evenly across and between the strawberries.
  5. Cut the remaining strawberries into bit sized pieces and place on top of the pastry cream. Pipe the remaining pastry cream on top and spread over the strawberries.
  6. Place the second half of the cake on top and press firmly down. Brush the cake with the remaining simple syrup.
  7. Top the cake with the whipped cream and some strawberries as a garnish. Although not necessary, I recommend refrigerating or semi-freezing the cake so that the layers have time to set.
  8. Once ready to serve, remove the outside of the pan and peel away the plastic wrap. 

Saturday, January 12, 2013

Creamy Roasted Cauliflower and Leek Soup

 
I haven't made any new soups for a long time and I suddenly got the urge to do so last week. Winter time tends to make people crave warm and comforting flavors and I thought to tap into one of my favorite techniques, roasting vegetables, and incorporate it in a soup. I knew that cauliflower would taste soft and sweet after a simple roast in the oven and I thought it would pair well with leeks.

Originally my plan had been to season the soup with oregano and thyme but then my dad convinced me to use cumin, coriander, chili powder, and turmeric. I wish I had stuck to my first instincts because, although delicious, the delicate flavor of the cauliflower was lost to the overpowering spices. Ironically enough, he didn't actually try the soup because by the time he got around to it the rest of the family had eaten it up.

Interestingly, the soup inspired a conversation amongst my family members about creamy vs. chunky soups. My mom, though a lover of many of my pureed soups such as roasted tomato and pepper and red lentil tomato and coconut, prefers chunkier soups. She claims she likes to have pieces that she can see and combine on her soup for the perfect bite. My aunt, on the other hand, said she adores creamy soups and was intrigued by my latest creation. Personally, I think that I too like my soups on the chunky side but occasionally I enjoy eating a perfectly smooth soup as well. Next time I will try making the soup based on my initial plan with the oregano and thyme and leave it chunky. Still, I can't deny I enjoyed this soup as well and will probably repeat it sometime in the future.

Roasted Cauliflower and Leek Soup
  • 2 leeks (white parts only), chopped
  • 1 carrot, chopped
  • 2 stalks celery, chopped
  • 1 head cauliflower, florets cut into bite size pieces
  • 3-4 cloves garlic
  • 1½ tsp cumin
  • 1½ tsp coriander
  • 1 tsp chili powder
  • 1 tsp turmeric
  • Optional: ¼-½ tsp chili pepper flakes
  • 6 cups chicken or vegetable stock
  • ½ cup sour cream
  • 1 lemon, juiced
  • Olive oil
  • Salt and pepper
  1. Toss the cauliflower pieces and garlic cloves with some olive oil and salt and pepper. Arrange in a flat layer on a baking tray and roast in the oven for about 20 minutes at 400 degrees Fahrenheit. Stir about halfway through to ensure even baking and keep in the oven until the cauliflower starts to soften and becomes golden. 
  2. While the cauliflower is roast9ng, saute the leeks in a large pot over medium heat with some olive oil until they start to become translucent, about 3-5 minutes.
  3. Add the chopped carrot and celery to the pot and continue to saute until the vegetables soften, another 3-5 minutes.
  4. Add the cumin, coriander, chili powder, turmeric, and chili pepper flakes (if using) to the pot and mix through. 
  5. Once the cauliflower and garlic has finished roasting add it to the pot and mix to incorporate.
  6. Pour the stock into the pot and bring to a boil. Once boiling, reduce the heat to low and simmer the soup, covered, for 10 minutes or until the cauliflower starts to easily break down. Stir occasionally.
  7. Stir in the sour cream then using a hand blender or by transferring the soup in batches, puree the soup and return to the pot. Season to taste with the lemon juice, salt, and pepper.

Friday, December 28, 2012

Cranberry Lemon Squares


It seems as though my holiday break this year has been characterized by a few things, namely cooking and knitting. I have become slightly obsessed with knitting in the past month and have made several scarves as holiday gifts for friends and family. I have fallen into somewhat of a nightly ritual as I sit on the couch each evening watching Friends and knitting yet another scarf. I don’t know exactly how long this new obsession of mine will last…it could just be a passing thing or it could stick like my love of cooking. In any case I am quite proud of the results so far and everyone who received one of my scarves as a gift thanked me with kind words and lots of hugs.

Besides the knitting, I have also been in the kitchen quite a bit these past few weeks. I almost feel like it’s making up for lost time as I was so busy before. Along with cooking and baking some family favorites I have also had the chance to try out some recipes that I had been saving for a while.
One such recipe was for these cranberry lemon squares. I don’t know why cranberries are associated with the holidays considering they taste good year round. Maybe it has to do with the traditional cranberry sauce that most people eat with their holiday turkey this time of year. Regardless of the reason, the extra emphasis on cranberries during the holiday season makes me crave them in my cooking and baking. 

These little squares I baked up the other day were a perfect cranberry treat because of the wonderful combination of flavors. The sweet, buttery, lemon-zested crust was contrasted beautifully by the tartness of the cranberry filling. I greatly enjoyed these squares because they were quite similar to my grandmother’s berry crumb bars, but the fact that there were whole cranberries in the filling gave it an extra pop and burst of flavor in the mouth. Once again another holiday success!

Cranberry Lemon Squares 

For the dough:
  • 3 cups of flour
  • 1 tsp baking powder
  • ¾ cup sugar
  • 1 lemon, zested and juiced (juice reserved for filling)
  • 1 cup, cold unsalted butter, cubed
  • 1 large egg
  • 2-3 tbsp water
  • 1 tsp vanilla 
For the filling:
  • 1 bag fresh or frozen cranberries (about 500 grams)
  • ½ cup sugar
  • Reserved lemon juice
  • 2 tbsp corn starch
  1. Combine the ingredients for the filling and set aside. 
  2. Mix the flour, baking powder, sugar, and lemon zest.
  3. Using a food processor or mixer, slowly mix in the cubed butter pieces. The butter should become coated in the crumbly mixture and become the size of little peas. Don't overmix.
  4. Mix in the egg, vanilla, and a few tablespoons of water. The dough will remain crumbly but it should be easy to clump together.
  5. Press about ¾ of the dough down into a parchment-lined 9" x 13" pan. Spread the filling over top. The cranberries will not cover all of the dough but try to spread them out evenly all over the pan.
  6. Use your fingers to crumble the remaining dough over top of the filling. Don't press it down.
  7. Bake for 30-35 minutes at 375 degrees Fahrenheit or until the dough on top becomes golden.
  8. Remove from the oven and allow to cool to room temperature before slicing.          

Monday, November 26, 2012

Roasted Beet and Goat Cheese Salad


This salad is nothing new. In fact I have been making it for quite sometime but I never thought to blog about it because it seemed so simple. However after serving it repeatedly at multiple parties and always receiving rave reviews I decided it's time I include it on the blog.

This past weekend we had a big soiree at our house to celebrate my mom's birthday. In addition to this salad I also prepared stuffed mushroomspoached pears, and two chocolate mousse cakes (there were a lot of people so I made two of the same cake). The party was a great success and everyone was truly appreciative of all the effort that went into creating such a fabulous spread.

The beauty of the salad I made is how easy and simple it is, yet also very versatile. I love how roasting the beets brings out their inherently sweet flavor which is then complemented by the tanginess of the goat cheese. Then to top it all off there's the crunch provided by the toasted almonds. I will admit that at times I have substituted feta cheese in the past, which is also nice, though I prefer the goat cheese. Also I alternate between using baby spinach and arugula, or sometimes even both, depending on what I find at the grocery store. In any case, the star of the salad is definitely the beet; so long as it's there everything else falls into place.

Roasted Beet and Goat Cheese Salad
Note: The salad can be made in small or large portions, therefore I have listed the ingredients and steps but left quantities out.
  • Medium sized beets
  • Goat cheese
  • Baby arugula or spinach leaves
  • Sliced almonds
  • Lemon
  • Olive oil
  • Salt and pepper
  1. Prepare the beets by wrapping tightly in aluminum foil and arranging on a baking pan. Depending on the size, roast them for 45 minutes-1 hour. They are finished once a knife can easily slice through them.
  2. Allow the beets to cool then proceed to peel and slice them. I prefer slicing them into thin rounds, about ½ cm thick, then in half.
  3. While the beets are cooling, toast the almonds in a pan over low heat. Keep in mind it is easy to burn them therefore continuously stir them and remove from the heat as soon as you see them start to brown. Set aside in a separate bowl.
  4. Toss the greens with some lemon juice, olive oil, salt and pepper. Adjust the seasoning to taste but take care not to over mix as the greens will start to wilt if you work them too much. 
  5. Toss in the sliced beets and almonds and gently mix in. Use your hands to break off small chunks of goat cheese and sprinkle on top. Don't worry about mixing it in so long as there is enough to scooped up while serving.

Wednesday, October 3, 2012

Lemon Blueberry Cake


I spent this weekend happily baking and cooking away. I made a delicious quinoa salad which turned out to be a big hit but I didn't realize ahead of time how good it would be (my mistake) and therefore did not actually write down the recipe or take any pictures. However given how quickly it was eaten up I will be sure to make it again.

As for the baking, on Saturday I had my cousin over and we made the chocolate swirl buns I had made the previous weekend for the bake sale but did not have a chance to try. This time we made them for ourselves and they were so good...perfectly chocolatey and soft. She also helped me bake the cake layers for the lemon blueberry cake I was making for a big 4-in-1 birthday celebration. The cake featured two layers with a lemon curd filling and a lemon cream cheese frosting.

Since I don't tend to make many stacked and frosted cakes, usually choosing layered cakes that are all assembled in a single pan, I still tend to have technical difficulties. This time the process went pretty smoothly and I was quite pleased with the result. The cake traveled with me to school and thankfully the staff allowed me to store it in their fridge. After class we all went out to sushi for dinner and then enjoyed the cake for dessert. All of the birthday girls loved the cake and one friend even had seconds and thirds, despite being full. One of the birthday girls commented on the fact that the blueberries complimented the lemon flavor and created a good balance between tart and sweet. Overall I would say the celebration was a success and everyone left in happy spirits and with very full bellies.

Lemon Blueberry Cake
Note: The original recipe was for three 8" cakes. I kept the quantities the same and changed the baking time to make two 9" cakes. The original baking time was 25 minutes.
  • 2 cups + 6 tbsp flour
  • 2 tsp baking powder
  • ½ tsp salt
  • ½ cup sour cream
  • ½ cup milk
  • 1 tsp vanilla
  • 1 lemon, juiced and zested
  • 1 unsalted cup butter, room temperature 
  • 1½ cups sugar
  • 4 eggs 
  • 3 cups frozen blueberries (using frozen instead of fresh will help to keep the blueberries from sinking to the bottom of the cake)
  1. Sift together the flour, baking powder, and salt. Transfer one tablespoon of the mixture to a small bowl and coat the blueberries with it.
  2. Combine the sour cream, milk, vanilla, lemon juice, and zest. Mix well and set aside.
  3. Cream together the butter and sugar for about five minutes, or until pale yellow and fluffy. Beat in the eggs one at a time.
  4. Mix in the flour mixture and alternate with the milk mixture, starting and ending with the flour. Stir until just combined. Gently fold in the blueberries.
  5. Divide the batter evenly between two well-greased 9" pans. Bake at 350 degrees Fahrenheit for 55 minutes or until a toothpick inserted into the center comes out clean. Cool for 10 minutes in the pan before inverting the cakes onto wire racks to finish cooling.

Friday, January 27, 2012

Lemon and Rosemary Chicken


I made this chicken dish for dinner a couple of nights ago and it was one of the most successful dinners I have cooked in a while. That's not to say that my family doesn't enjoy my cooking but lately many of the items I have prepared have either been repeat recipes or new ones that were only "okay". However the enthusiasm my family showed with this chicken blew me away and made me very proud. In fact, I was sitting one night and eating it and said something along the lines of "Hmm, this actually tastes quite good", to which my brother immediately replied "Of course it tastes good, you're surprised?" That comment definitely made my night!

Equally well received as the chicken was the Israeli couscous I prepared alongside it. I've had Israeli couscous in the past but I never realized that it's actually just pasta in the shape of tiny little balls, reminiscent of pearl barley. I prepared it using chicken stock and then added fresh Italian flat leaf parsley and pine nuts. It wasn't anything too special but everyone loved it so much that it was finished within a day and I had to make more the next day. The overall meal turned out so well I think it won't be long before my family asks me to prepare it again.

Lemon and Rosemary Chicken
  • 8 boneless, skinless chicken thighs (cut into bite-sized pieces)
  • 1 large onion, chopped
  • 3-4 cloves garlic, minced
  • 2 zucchinis, cut in half lengthwise then sliced
  • 1 lemon (cut three slices then juice the rest)
  • 2-3 small branches of Rosemary
  • 2 cups chicken stock
  • Salt and pepper
  • Olive oil
  1. In a large pot, warm up some olive oil over medium heat then add the chicken and cook until nicely browned. Remove the chicken from the pot and set aside (the chicken doesn't have to cook all the way through).
  2. Drain the fat from the pot and heat a little more olive oil over medium heat. Saute the onion until translucent, about 3 minutes, then add the garlic, zucchini, lemon slices, and rosemary. Stir everything together and continue to cook until the zucchini softens, about 3-5 minutes.
  3. Return the chicken to the pot and add the chicken stock and lemon juice. Mix everything to incorporate all of the ingredients then turn the heat down and simmer for 30 minutes, stirring occasionally. Season to taste with salt and pepper.

Tuesday, January 17, 2012

Chocolate Almond Florentines


Almost everyone has New Years resolutions and a very common one is weight loss. I myself have included this as one of my resolutions this year, but I'd like to think that I'm coming at it from a practical standpoint. Let's face it: I like to bake. I know myself and I know that I cannot eliminate baking, and therefore consuming baked goods, completely from my life because it is very intrinsic and important part of who I am. However, in light of this and my acknowledgement of such, I know that I can take certain steps to maintain my goal of weight loss and still enjoy baking.

I'm not going to lie and say that these cookies are good for you...they're cookies therefore they contain sugar therefore they are most definitely not healthy. Still, the amount of sugar contained in these cookies is quite minimal compared to many other cookie recipes and that definitely helps. Also, the key is to remember that everything is good in moderation. For example, rather than bake so often I try to release my creative juices through more cooking and less baking, all the while focusing on healthy recipes. In addition, I look for outlets for my baking such as meetings or gatherings I know I will attend where my baked goods will be welcomed. This allows me to fulfill my desire to bake while not being tempted to consume more than I should.

In all honesty, I came across this recipe for florentines prior to the New Year but I hadn't had a chance to make them, despite buying all of the ingredients. Once the New Year hit, I realized that this recipe fit the bill for my new approach to baking and so I decided to bake them last weekend. I must say they are absolutely delicious! The smoky flavor of the almonds is well complemented by the orange and lemon zests. Different family members preferred the plain vs. chocolate dipped variations. I personally enjoyed the plain florentine because the citrus flavor really stood out however my mother and brother, both chocoholics, liked the chocolate florentines better. I found that by dipping only half of the florentine in chocolate the cookie encompassed the best of both worlds.

If you are like me and wanting to lose some weight but can't entirely give up the baked goods I would highly recommend making these florentines. They were easy to make, required few ingredients, and left me with a slightly less guilty feeling after eating them compared to many other cookies.

Chocolate Almond Florentines
  • 1 large egg white, room temperature
  • 1/3 cup powdered sugar
  • 1 3/4 cup sliced almonds
  • Pinch of flaky sea salt
  • Zest of 1/2 an orange
  • Zest of 1/2 a lemon
  • 1/2 cup semi-sweet chocolate, chopped
  1. Combine all of the ingredients except for the chocolate in a large bowl.
  2. Line a large baking sheet with parchment paper and brush very lightly with neutral oil, or spray with cooking spray.
  3. Place heaping tablespoon-sized mounds of the almond mixture onto the baking sheet about 2-3" apart. It helps to dip your hands or the spoon, if using, into cold water so that the almonds don't stick.
  4. Use a fork, dipped in the cold water, to flatten the mounds as much as possible, avoiding gaps in between the almonds.
  5. Bake at 300 degrees Fahrenheit for 10-15 minutes, depending on the size of the cookies. The cookies should be golden brown across the top and will start to give off a smoky smell. 
  6. Cool the cookies for a minute on the baking tray before transferring them to a metal rack to finish cooling and become crispy.
  7. Meanwhile, melt the chocolate in the microwave at 30 second intervals until smooth, mixing in between. 
  8. Once the cookies are crisp, dip half or the entire cookie into the chocolate and return to the wire rack so that the chocolate can harden.

Sunday, October 23, 2011

Carrot Zucchini Squares


About a month ago my friend made these carrot zucchini squares and brought one to class for me to sample. I have used zucchini only once before in baking when I made my chocolate zucchini bread and, though it tasted great, my family typically aren't fans of those types of desserts. However when I tried the carrot zucchini square made by my friend it tasted so delicious I immediately asked her for the recipe and convinced myself that at some point an occasion would arise where I could bake them.

Finally my opportunity came when my mom pointed out that we had a lot of zucchini in our fridge and they were going to go bad soon if we didn't use them up. For breakfast my mom made what we call "zucchini aladushki", which are like little fritters, but we still had plenty of zucchini left. I talked my mom into letting me make these carrot zucchini squares so that we wouldn't be letting food go to waste.

My brother was quite skeptical when he saw me prepping all of the ingredients because it contained so many things he doesn't like in his desserts--dried fruit, zucchini, ginger. However seeing as how this was a dessert, he obviously couldn't resist tasting one and he was shocked to find that he really liked it. In fact he told me that I had "beat him" by baking something that sounded so unappealing to him but in the end tasting amazing. 

The truth of the matter is that what makes these carrot zucchini squares so delicious is the combination of the moist cake with the crunch of the walnuts and the sweetness of the cream cheese frosting. Even my mom loved the squares, particularly noting the texture added by the walnuts and the slight lemony flavor of the frosting.

Later that evening, my aunt and uncle came over to our house to join us for an impromptu dinner. My uncle was delighted when he saw the carrot zucchini squares because apparently carrot cake is one of his favorite desserts. I never knew this about him and was pleased to discover that at least one person in my family appreciates more "savory baking". In fact at the end of the night I packed a container full to send home with him and he gave me one of the biggest smiles.

Carrot Zucchini Squares
Note: This recipe says it makes 36 squares but I cut mine into 24 nicely sized portions.
  • 1 1/2 cups flour
  • 1 tsp baking powder
  • 1/4 tsp baking soda
  • 1/2 tsp ginger
  • 2 eggs, lightly beaten
  • 1 1/2 cups shredded carrot (about 3 medium sized)
  • 1 cup shredded zucchini (about 1 medium sized)
  • 3/4 cup brown sugar, tightly packed
  • 1/2 cup raisins (I also added 1/2 cup craisins)
  • 1/2 cup walnuts, roughly chopped
  • 1/2 cup oil
  • 1/4 cup honey
  • 1 tsp vanilla
For the cream cheese frosting
  • 1 8 oz block cream cheese
  • 1 cup powdered sugar
  • 1 lemon, zested
  1. In a large bowl combine the flour, baking powder, baking soda, and ginger.
  2. In a separate bowl combine the eggs, shredded carrot and zucchini, brown sugar, raisins, craisins (if using them), walnuts, oil, honey, and vanilla.
  3. Add the carrot and zucchini mixture to the four mixture and stir until just combined.
  4. Pour the mixture into an ungreased 9" x 13" pan and spread out evenly. Bake for about 25 minutes at 350 degrees Fahrenheit, or until an inserted toothpick comes out clean.
  5. While the mixture is baking, beat together the cream cheese, powdered sugar, and lemon zest on medium speed until fluffy. 
  6. Cool the cake in the pan before spreading the prepared frosting and cutting into individual squares.


Saturday, October 15, 2011

Lemon Ricotta Pancakes


I am so excited to finally be posting a pancake recipe! I must admit that this is not the first time I have made these pancakes, but this is definitely the first that these, or any other pancakes I have made, turned out correctly. The thing is...I'm awful at making pancakes! I have tried several times, mostly over this past summer, and each time I was left with a disappointing mess. Even though the pancakes tasted good I could never quite figure out the technique behind the flipping and therefore my pancakes looked horrible...misshapen and uneven, sometimes burnt or pieced together. Today my flipping issues were finally put behind me and I made a giant stack of beautifully perfect pancakes.

The first time I made these pancakes they tasted delicious so I really wanted to try my hand at them again and after making moussaka earlier in the week I had extra ricotta cheese leftover. In fact, I had exactly the right amount called for in the recipe. I was awakened early this morning by a phone call and couldn't get back to sleep so I decided I would make the pancakes for breakfast for the entire family. I don't know why this time in particular I finally got the flipping technique down, and why it has eluded me in the past. It took me a while to get the pan to exactly the right temperature and time my flips so that I had a beautiful golden color every time.

Once I got my "flipping groove" on I dared myself to pour out two at a time. Previously, I had been working at a slow and steady pace, pouring one pancake at a time in the center of the pan and giving myself plenty of room to flip it over. However I decided that since I was doing such a good job with the one pancake I should at least attempt two. Luckily for me, my flipping skills withstood the little challenge and I continued to make the rest two at a time. At first it took me a little bit off guard as I had to figure out how to best flip one without messing up the other, but once I got the spacing down I was on a roll. Even though I was actually only using one hand to flip, somehow I found it reassuring to hold a spatula in each hand...it gave me a sense of balance. Every time I plated another pancake I let out a little squeal of joy; good thing everyone was still asleep and no one was watching me.

As far as the taste goes, I already knew that the pancakes would be well received by my family because they quite enjoyed them last time. The lemon flavor is really strong because the recipe calls for both the zest and juice of a lemon. Also, the pancakes are extremely light because the eggs are separated and the whites are beaten with sugar before being folded into the rest of the batter. This gives the pancakes a sense of airiness which offsets any graininess that one might think would come from the use of ricotta. I'm so happy that my pancakes finally turned out the way I imagined them to be. Hopefully my newly acquired flipping skills are here to stay and I will be able to post more pancake recipes soon!

Lemon Ricotta Pancakes
Note: This recipe makes about 24 palm-sized pancakes.
  • 1 cup ricotta cheese
  • 1 cup milk
  • 3 large eggs, separated
  • 1 lemon, zested and juiced
  • 1 1/4 cup flour
  • 3 tbsp corn starch
  • 1 tbsp baking powder
  • 1/4 tsp salt
  • 1/4 cup sugar
  1. In a large bowl, combine the ricotta, milk, egg yolks, lemon zest and juice and whisk together.
  2. Add the flour, corn starch, baking powder, and salt and whisk just until the dry ingredients are incorporated.
  3. In a separate bowl, beat the egg whites on medium-low speed until foamy. Increase the speed to medium-high and gradually add the sugar. Continue to beat until soft peaks form.
  4. Fold one third of the egg whites into the lemon ricotta mixture until completely incorporated. Gently fold or whisk in the rest of the egg whites until no more white streaks are present.
  5. Heat a griddle or large skillet over medium heat. Once heated, reduce the temperature to medium low and pour 1/3 cup of batter onto the cooking surface. Allow the pancake to cook until bubbles start to form on the top surface, about 15-20 seconds, then use a large spatula to gently flip the pancake over. Cook the other side until it is light and golden and fully cooked through. Repeat with remaining batter.
Note: You may have to go through a couple of "test" pancakes before you achieve the right temperature on the griddle or skillet. Finished pancakes can be kept warm in the oven at 200 degrees Fahrenheit while the rest are cooking.