Showing posts with label coconut. Show all posts

Thursday, May 21, 2015

Curried Cauliflower Soup


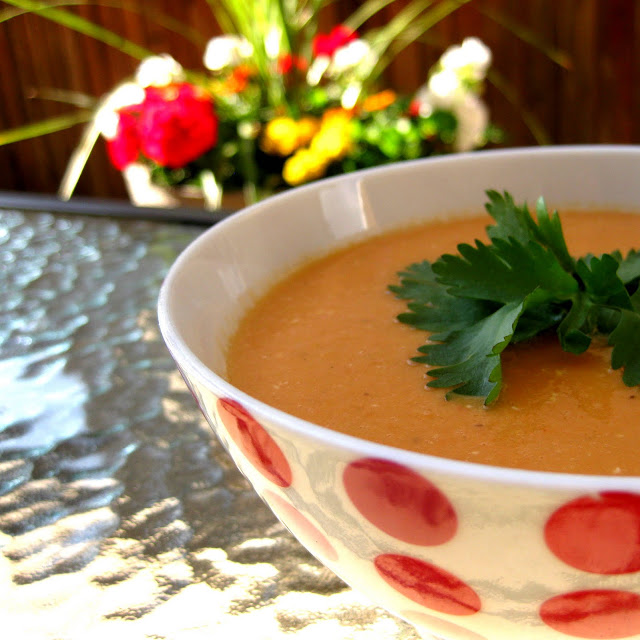
Over a month ago I made this delicious curried cauliflower soup, mostly because I had some leftover coconut milk I wanted to use up. The soup was very popular with my family but I never blogged about it because at the time I didn't think it was anything special so I never bothered to take a picture of it. However when my mom recently came back from her vacation she asked me to make it again and this time I decided it was worth writing about.

Even though I have made a similar roasted cauliflower soup in the past, this one turned out better. I think that one of the reasons why my family enjoyed this soup was because it was smooth but still had chunks in it. That is because after roasting the cauliflower, I set aside a quarter of it to add to the soup later. When I finished making the soup, I pureed it using my hand immersion blender, then added back the pieces. Personally I prefer chunky soups over completely creamy ones because I like to have something to bite into and chew. This met my expectations while still delivering an overall creamy texture thanks to the coconut milk.

Curried Cauliflower Soup
  • 1 head cauliflower, florets cut into bite size pieces
  • 1 large onion, diced
  • 3-4 cloves garlic, finely chopped
  • 1 tsp cumin
  • 1 tsp coriander
  • 1 tsp turmeric
  • 1 tbsp red curry paste
  • 6 cups chicken or vegetable stock
  • 1 can coconut milk
  • 1 lemon, juiced
  • Olive oil
  • Salt and pepper
  1. Toss the cauliflower pieces with some olive oil, salt and pepper, and the cumin, coriander, and turmeric. Arrange in a flat layer on a baking tray and roast in the oven for about 20 minutes at 400 degrees Fahrenheit. Stir about halfway through to ensure even baking and keep in the oven until the cauliflower starts to soften and becomes golden. 
  2. While the cauliflower is roasting, saute the chopped onion in a large pot over medium heat with some olive oil until the pieces start to become translucent, about 3-5 minutes. Add the chopped garlic and continue to saute for about 30 seconds, or until fragrant.
  3. Mix in the tablespoon of red curry paste then add ¾ of the roasted cauliflower pieces. 
  4. Pour the stock into the pot and bring to a boil. Once boiling, reduce the heat to low and simmer the soup, covered, for 30 minutes or until the cauliflower starts to easily break down. Stir occasionally.
  5. Add the coconut milk and stir through. Puree the soup using a hand blender or transfer in batches to a blender and return to the pot. 
  6. Add the remaining cauliflower pieces to the soup and season to taste with the lemon juice, salt, and pepper. 

Friday, May 30, 2014

Avocado Brownies


A week ago while we were sitting and eating my breakfast one of my brothers asked me to make black bean brownies again. Unfortunately we didn't have any black beans in the pantry and I didn't feel like going to the store just for one item. However the request inspired me to research more "healthy" brownie recipes and I found one for avocado brownies. I was intrigued because the recipe seemed relatively easy and I already had all of the ingredients.

While I was making the brownies my mother was very doubtful about how they would taste given the unusual ingredient list. I assured her that she was under no obligation to try them but in the end she decided to have a small piece. She was actually quite impressed with their taste, especially because they weren't too sweet and my mother prefers desserts that way.

My brother came over once I let him know the brownies were ready and he enjoyed them as well. After the fall out from the black bean brownies, I was hesitant to tell my other brother about the avocado and decided to just let him enjoy the brownies. Not only did he like them, but his friends came over the next day and ate them as well, no one the wiser about the mystery ingredient. To this day I still haven't told him...I decided that since he liked them and already ate them there's really no reason to go and disappoint him now.

Avocado Brownies
  • 4 oz (112 g) bittersweet chocolate
  • 1 tbsp coconut oil
  • 1 avocado
  • ¼ cup almond butter
  • ½ cup honey
  • 3 eggs
  • ¼ cup cocoa powder
  • 1 tbsp vanilla
  • 1 tbsp almond flour
  • 1 tsp baking soda
  • ½ tsp salt
  • Optional: ½ cup chopped nuts or chocolate chips
  1. Puree the avocado flesh in a food processor until absolutely no lumps remain.
  2. Melt the bittersweet chocolate together with the coconut oil in a small saucepan over low heat.
  3. Beat the melted chocolate mixture along with the pureed avocado and the rest of the ingredients on medium speed for about 2-3 minutes, or until well mixed.
  4. Stir in any add-ins such as chopped nuts or chocolate chips.
  5. Pour the batter into a well-greased or parchment lined 9" x 9" pan. Bake at 350 degrees Fahrenheit for 25-30 minutes or until a toothpick inserted into the center comes out clean.
  6. Allow to cool before slicing and serving.

Sunday, March 16, 2014

Coconut Brownies


About a month ago I made some black bean brownies as an experiment at home after a coworker had brought some in to work one day. While one of my brothers was horrified that I had tricked him with the brownies, the other was quite intrigued and asked if I could make some sort of dessert using coconut flour.

Shortly after I showed up to work and discovered that another nurse had brought some brownies that were made using coconut oil and flour. I immediately asked her for the recipe and excitedly brought it home. Last week my brother bought me some coconut flour and I finally had the chance to try out the recipe.

Although I tend to prefer fudgy brownies over more cakey ones, such as these, the brownies still tasted good. Both of my brothers enjoyed them and made suggestions of additions I could make next time, such as carob or chocolate chips or some nuts. I decided to leave additions out this time so that they could just taste the natural flavor of the brownie itself, which is quite coconut and almondy due to the coconut oil and almond butter. My one substitution was that I used half maple syrup and half honey because I didn't have the full amount of maple syrup called for in the recipe.

Because the recipe made a large amount I decided to bring some in to work the next morning to share with my colleagues. The brownies were well received and it felt nice to be able to spread a little extra cheer before the weekend. One of the nurses who is actually gluten-free fell in love with them and had three pieces! She raved about the brownies and begged me for the recipe, which I promised her would be posted on my blog.

Coconut Brownies
  • 1 cup coconut oil
  • 1 cup maple syrup (or 1 cup honey)
  • 5 oz (140 g) bittersweet chocolate
  • ¼ cup cocoa powder 
  • ¼ cup coconut flour
  • 4 eggs
  • 2 tsp vanilla
  • 1 tsp baking soda
  • 1½ cups almond butter
  1. In a small saucepan, combine the coconut oil, maple syrup/honey, and chocolate. Heat until the coconut oil and chocolate has completely melted.
  2. Remove from the heat an stir the cocoa powder into the mixture. Set aside to cool.
  3. In a large bowl, mix together the eggs, vanilla, and baking soda.
  4. Add the almond butter and mix well. Mix in the coconut flour.
  5. Add the chocolate mixture and mix until a uniform batter comes together.
  6. Pour the batter into a 9"x13" well-greased or parchment-lined pan.
  7. Bake for 30 minutes at 350 degrees Fahrenheit for 30 minutes or until a toothpick inserted into the center comes out clean. Allow to cool slightly before slicing and serving.

Wednesday, April 17, 2013

Thai Style Twice Baked Sweet Potatoes


When I told my mom last weekend that I was desperate to make this dish because I had the recipe bookmarked since November she laughed at me. I believe her exact response was, "Let this be your biggest problem." I understood her mockery and laughed alongside her but nonetheless I was determined to test the recipe and informed her that I was going to prepare it during the week regardless of whatever other food we already had in the refrigerator.

Once I made the dish and fed it to my mom and brother I finally felt good being able to cross it off my list of "recipes to try". Unfortunately the baked potatoes did not receive as good of a review as I was hoping; my brother typically doesn't like potatoes so I wasn't expecting much from him but I thought my mom would enjoy the dish. After eating the baked potato she said that she liked the Thai flavor but it was too sweet. Personally I enjoyed the sweetness, not surprising given my love of yams and sweet potatoes, but I could see her point and agreed that it was a little overwhelming considering how big each potato was. Next time I think I will try using russet potatoes and see if it receives a better reaction.

Thai Style Twice Baked Sweet Potatoes
Note: The sweet potatoes can be baked ahead of time and then the insides scooped out for the filling later.
  • 3 large sweet potatoes, washed and scrubbed clean
  • 2 red bell peppers, chopped
  • 1 medium-sized onion, chopped
  • 4 cloves garlic, minced
  • 1-1.5" chunk fresh ginger, minced
  • ⅓ cup coconut milk
  • 1 lime, zested and juiced
  • ½ lemon, juiced
  • 3 tsp Thai red curry paste
  • ¼-½ bunch cilantro, chopped
  • 4 green onions, chopped 
  • Olive oil
  • Salt and pepper
  1. Rub a little bit of olive oil onto the sweet potatoes and wrap each one tightly in aluminum foil.
  2. Bake at 375 degrees Fahrenheit for 60-90 minutes, depending on their size, or until they can be easily pierced with a fork. 
  3. Remove from the oven and once cool enough to handle slice each in half and scoop out the flesh, leaving about ¼" around the sides. Set the flesh and skins aside.
  4. In a large skillet, heat up the oil over medium heat and saute the chopped onions until translucent, about 3-5 minutes.
  5. Add the garlic and ginger and saute for another 30 seconds-1 minute, or until it is fragrant.
  6. Add the chopped bell peppers and continue to cook until the vegetables soften, about 5 minutes. Remove from the heat and set aside to cool slightly.
  7. Add the coconut milk, lime zest and juice, lemon juice, and red curry paste to the sweet potato flesh and mash until smooth and no lumps remain.
  8. Stir in the sauteed pepper mixture and then the green onions and cilantro. Mix well and season to taste with salt and pepper.
  9. Lay the sweet potato skins, skin side down, onto a lightly greased baking sheet (or covered in aluminum foil) and fill generously with the mixture. If you want, wet hands slightly and smooth out the tops to create little mounds.
  10. Put the sweet potatoes in the oven with the broiler on and leave inside for 2-3 minutes, or until the filling is heated through and the top becomes slightly dark and charred. Be careful not to over broil!

Thursday, February 28, 2013

Malaysian Laksa


A couple of weeks ago I attempted to make laksa, a popular Malaysian soup, after watching an episode of Jamie Oliver's 15 minute meals. Despite the delicious flavor, the soup took me longer than 15 minutes to make and did not actually turn out as soup but rather more like a shrimp and noodle dish.

After that experience, I was determined to make laksa and decided to look up some recipes. I soon realized that most of the recipes involved making a spice paste that was combined with a broth, typically seafood though it could be substituted for chicken or vegetable, and then preparing the rest of the ingredients separately. In the end it kind of became a "build your own adventure" type of soup with the garnishes served alongside the spiced broth.

I wasn't able to find the shrimp paste typically used as part of the spice paste so I combined elements from various recipes to create my own spice blend. I have to admit that I'm quite proud of the paste and resulting broth that I made. It was milder than what I usually make but this also made it more light and gentle tasting. Served alongside some chili garlic sauce it was perfect because each person could make it as spicy as they wanted.

In the past, I have had difficulties with the rice noodles absorbing too much liquid and the result no longer resembles a soup. This time I followed the packaged instructions and cooked the noodles separately. The only problem was that I found that the rice noodles did not absorb much of the flavor of the broth when it was simply ladled over top, rather than cooked in it. After consulting with my mom we collectively decided to add the noodles in their entirety to the broth and let it sit over night. As we suspected, the noodles ended up absorbing the liquid but at the same time became much more flavorful and delicious. Once again the laksa stopped being a soup but I was okay with that because it tasted good and that's what matters the most.

Malaysian Laksa
Note: These directions reflect the original way I made the soup. If desired, the noodles can be cooked directly in the broth but the result will most likely not be soup-like in consistency.
  • 2 cloves garlic
  • 1 thumb-sized piece of ginger
  • 1 tsp turmeric
  • 2-3 green onions
  • 1 tsp peanut butter
  • 1 tbsp chopped lemon grass
  • 1 tbsp fish or oyster sauce
  • 1 tbsp sesame oil
  • 1 tbsp chili garlic sauce
  • 4 dried Kaffir lime leaves
  • ½ bunch cilantro
  • 6 cups stock (seafood, chicken, or vegetable)
  • 1 400 mL can coconut milk
  • 300 g dried vermicelli rice noodles
  • Juice of 1 lime
  • Salt
  • Optional add-ins/garnishes: shrimp, chicken, bean sprouts, cilantro, lime wedges, chili garlic sauce
  1. In the bowl of a food processor combine the garlic, ginger, turmeric, onions, peanut butter, lemon grass, fish sauce, sesame oil, chili garlic sauce, kaffir lime leaves, and cilantro. Blend until completely pureed and a paste forms.
  2. In a large pot heat the stock. Once boiling, add the paste to the pot and mix well.
  3. Add the coconut milk to the pot and then the lime juice. Adjust seasoning if necessary with salt and more lime juice or fish sauce.
  4. Meanwhile, prepare the rice noodles by allowing them to soak for 8-10 minutes in hot water. Drain the water and set the noodles aside.
  5. To assemble the soup place a handful of noodles into a small bowl and top with desired add-ins and garnishes. Ladle soup broth over top and enjoy.

Sunday, March 18, 2012

Chinese Coconut Buns


It's no surprise that I like to bake, so when any of my friends have some sort of special occasion coming up I ask them about any favorite treats they might have so that I may make it for them. Last year one of my friends was celebrating her birthday and told me that she really enjoys honey buns, a sweet Chinese pastry. With this information I searched for "honey bun" recipes and prepared some to bring to class. Having never tried them myself I didn't actually know what a honey bun was...I just assumed they were buns soaked in honey, therefore I thought nothing wrong of the recipe I found for exactly that. However when I presented my friend with the buns I was surprised to learn that honey buns were actually supposed to be filled with a coconut filling. She still enjoyed the buns and thanked me for them, but I was disappointed that I hadn't baked the treat that she had imagined.

Fast forward almost one year and finally I was able to fulfill my friend's wish. Apparently here in Vancouver, and online in the blogosphere, the buns my friend was referring to are called coconut buns. A couple of weeks ago I randomly came across a recipe describing exactly what my friend wanted and I suggested to her that she come over to my house and we could bake them together. Last week we had the opportunity to do exactly that when she came over and made the coconut buns. I could tell she really liked them because she couldn't stop eating them and I made her promise not to consume all of them before the night was over. We had a good time together and I'm glad that she got to have her "honey buns" after all.

On a separate note, while baking the buns we decided to make only half with coconut (for her) and the other half of the dough I used to make a poppy seed roll (for my family who loves poppy seeds but not coconut). I have to say...I think I have found my new favorite sweet dough recipe. I was not extremely happy with my previous sweet dough because it tended to become quite dry, especially if the filling being used was not very moist. However this new recipe is excellent because the dough itself is quite moist and retains this quality after being baked, resulting in a fluffy bread that was especially great for the poppy seed filling. I will definitely be using this new sweet dough in the future.

Chinese Coconut Buns
Note: This recipe makes about 10-12 buns. Alternatively, the dough is enough for two sweet rolls with any desired filling.
 
For the dough:
  • 1 packet ( 2 1/4 tsp) instant yeast
  • 1/4 cup luke warm water
  • 1 tsp sugar
  • 1/2 cup milk
  • 1/2 cup (8 tbsp) unsalted butter, melted
  • 2 eggs
  • 3 1/2 cups flour
  • 1/3 cup sugar
  • 1 tsp salt
 For the coconut filling:
  • 1 cup unsweetened coconut flakes
  • 4-5 tbsp honey (depending on how sweet you want it)
  • 3 tbsp unsalted butter, melted
  • 1/2 tsp salt
  • 1 egg yolk 
  1. To make the dough, start by dissolving the yeast in the warm water and add the teaspoon of sugar. Stir it around and let it sit for about 10 minutes to proof the yeast.
  2. Meanwhile, in a large bowl sift together the flour, sugar, and salt. Add the milk, butter, eggs, and yeast mixture and mix until the dough starts to come together. If using a mixer switch to the dough hook and knead until the dough becomes smooth and elastic, otherwise knead on a lightly floured counter.
  3. Transfer the dough to a greased bowl covered with plastic wrap and a towel and store, covered, for at least an hour or until the dough doubles in a warm environment.
  4. While waiting, prepare the coconut filling by combining all of the ingredients in a food processor until it has a paste-like consistency.
  5. Once the dough is ready, divide into two. Split each half into 5-6 pieces about 3-4 ounces each.
  6. Roll each piece into a rectangle, about 3" x 5", and place 1 1/2 tablespoons of filling lengthwise down the center.
  7. Bring the long sides up over the filling and pinch the edges to seal the seams. 
  8. Place the buns, seam side down, on a greased baking tray (or lined with parchment paper) and set aside for 20 minutes to rise a little more. Afterward, lightly brush the tops with an egg wash (egg mixed with 1 tbsp of water) and sprinkle with some sesame seeds.
  9. Bake at 375 degrees Fahrenheit for 15-20 minutes, depending on the size of the buns, or until the tops are golden brown. Allow to cool for about 10 minutes.

Wednesday, March 7, 2012

Grilled Chicken Satays with Peanut Dipping Sauce


I have been begging my mom for a grill/griddle pan for the longest time. Normally these pans are really expensive because they are big, made of cast iron, and dual purpose with a grill on one side and flat top griddle on the other. So of course when I was in the States a couple of weeks ago and saw one on sale for only $20 I jumped at my chance. When I brought it back home my mom was less than thrilled because she thinks that they're too messy and doesn't support the idea of indoor grilling. She claims that I should just use the barbeque but there's no way that I'm going to stand outside in the cold for half and hour...no recipe is worth that in my opinion.

Having already bought the pan I was determined to prepare something that would make my mother see the error of her ways and be as thrilled as I was by the new acquisition. I wanted the first recipe I tried out to be something not too complicated since I actually don't have too much grilling experience...indoor or out. I settled on this recipe for chicken satays because it sounded tasty and not too difficult. The recipe called for chicken breasts but since I had thighs in the fridge I used what was on hand. In hindsight, I think it would have been easier to use the breasts in terms of grilling but the thighs worked too, just a little extra effort was involved in making sure the chicken was consistently cooked through with each piece.

I'm not going to lie...the grilling was messy. There was a lot of smoke involved during the actual cooking and afterward my arm got a good workout scrubbing the excess grease and oil off of the pan. Luckily my house has a "wok kitchen", typical of many houses in this neighborhood with its Asian influence, so I was able to close the door, open the window, turn the fan on and keep the smoke contained to my little kitchen. 

Although it took me a little while to get the hang of the grill, I was pretty good at it by the third batch of skewers that I laid down. As for the recipe itself...it got rave reviews! The marinate made the chicken very flavorful and the peanut dipping sauce complemented it extremely well. I can definitely see myself repeating this dish, perhaps even on the barbeque outside once warmer weather hits. I think I also proved to my mom that it is very feasible to indoor grill within our house and the results can be delicious. Now I'm looking forward to trying out the griddle side with some sort of pancake recipe.

Grilled Chicken Satays with Peanut Dipping Sauce
Note: This recipe makes about 15-20 satays, depending on how you cut and skewer the chicken. 
For the satays:
  • 2 large boneless, skinless chicken breasts or 15 thighs, cut into strips
  • 1 cup coconut milk
  • 1/2 lime, juiced
  • 2 tsp red curry paste
  • 1/2 tsp sesame oil
  • 1/2 tsp fish or oyster sauce
For the peanut dipping sauce:
  • 1/2 cup coconut milk
  • 1/2 lime, juiced
  • 1/2 cup peanut butter
  • 2 tbsp sweet chili sauce
  • 2 tsp soy sauce
  1. Combine all of the ingredients for the marinate ingredients for the satays then add the chicken pieces. Cover and refrigerate for at least 2-3 hours, though preferably overnight to allow the chicken to absorb more flavor.
  2. Once ready to grill, skewer the chicken pieces onto bamboo skewers. Place chicken on pre-heated grill over medium-high heat. Make sure to leave some space between the skewers so as not to overcrowd the chicken. Grill for about 15-20 minutes, making sure to rotate the skewers so that all sides are consistently cooked. The satays will be done once no longer pink inside or the internal temperature has reached 165 degrees Fahrenheit.
  3. Meanwhile, combine all of the ingredients for the peanut sauce and set aside. Once the chicken satays are ready, serve alongside with the sauce.

Tuesday, February 7, 2012

Thai Vermicelli with Shrimp and Vegetables


This dish was meant to be a soup. Last weekend my mom approached me and asked me to make tom kah gai, a Thai lemongrass and chicken soup. At first I was ready to do it but then I asked her if I could make a different Thai soup instead featuring coconut milk, shrimp, and vermicelli rice noodles. My mom, having discovered a couple of months ago that she actually loves coconut milk, agreed to the idea.

So on Monday I came home from class, having bought all my ingredients the day before, and proceeded to prepare the soup. Eventually, I was pleased with the flavors and consistency so I removed the pot from the burner and went upstairs to work on some homework. My mom came home half and hour later and called me down, asking why I hadn't made the soup. "What do you mean?" I asked, and pointed to the pot. She opened the lid and showed me that my once liquid soup had thickened and turned into a creamy noodle dish with shrimp and vegetables immersed throughout, but definitely not a soup.

We both still ate the dish and quite enjoyed the flavor, but I was disappointed that it hadn't come out as I intended it to. I think that the problem lay in the noodles; I had meant to buy the type of vermicelli that look like "glassy" noodles and remain clear within the soup. Instead, my clear rice noodles turned white once they were added to the pot, releasing their starches in the liquid and thickening the soup in the process. A friend of mine suggested buying the vermicelli made of bean curd instead and after some research I discovered that these bean noodles, also known as "glass noodles" are in fact what I should have been looking for. Next time I'll know better but for now I'm still happy because the noodles were eaten up in a cinch.

Thai Vermicelli with Shrimp and Vegetables
  • 1 large onion, chopped
  • 1 tbsp chili garlic sauce
  • 1 tbsp Ponzu sauce
  • 2 tbsp freshly grated ginger
  • 2 tsp chopped lemongrass
  • 1 lime, juiced and zested
  • 1 12 oz (400 mL) can coconut milk
  • 4 cups chicken or vegetable stock
  • 2 red bell peppers, sliced
  • 2 cups shelled edamame
  • 400 grams (about 30) pre-cooked shrimp 
  • 100 grams vermicelli rice noodles
  • 1/2 bunch cilantro, chopped
  1.  In a large pot over high heat saute the onion until translucent, about 3-5 minutes.
  2. Meanwhile, combine the chili garlic sauce, ponzu sauce, ginger, lemongrass, lime zest and juice and whisk together until homogenous.
  3. Add the mixture to the onions and stir to coat evenly.
  4. Add the coconut milk, stock, pepper, and edamame and stir well to combine. Bring the mixture to a boil then reduce to a simmer and continue to heat until the peppers soften.
  5. Meanwhile, in a separate skillet heat the shrimp on high heat for about 1-2 minutes, making sure all of the excess water drains from them.
  6. Using a slotted spoon, add the shrimp to the pot and stir through evenly.
  7. To prepare the noodles, soak them in some lukewarm water for 5-7 minutes then drain and rinse with cold water. 
  8. Add the noodles to the pot and gently stir to incorporate with the vegetables and shrimp. Use minimal stirring as the noodles tend to break easily. 
  9. Finish off by stirring in the chopped cilantro, saving some to garnish on top. Although the dish may be liquidy at first, it will definitely thicken once the noodles release their starches.

Sunday, January 29, 2012

Thai Red Curry Stir Fry with Tofu and Vegetables


When I first made this dish I resigned myself to not blogging about it because it hadn't turned out like I had envisioned it, but then after my mom tried it and I tasted it again the next day it grew on me. The truth is that I have always been tempted to cook tofu but the few times that I've done it have always resulted in mixed reviews. In fact just last week I tried to make Pad See Ew, my favorite Thai noodle dish, with tofu instead of chicken. Unfortunately, the noodles clumped together and in the end it became more of a egg-covered noodle dish with bits of tofu and broccoli surrounding it rather than an integrated meal.

Despite my failed attempt, I decided to try my hand at cooking tofu once again and asked my mom to purchase some more at the store. I thought that maybe if I went with extra firm tofu I wouldn't face the problem of having soggy tofu pieces. Also, the recipe I found seemed to have a lot of strong spices which I thought would help to give the tofu some flavor. It turns out I was right about the strong flavor...the red curry sauce with the coconut milk had a great creamy texture and a bit of a kick as well. However I was wrong about the tofu: it didn't absorb the flavor of the sauce and despite sitting overnight in the fridge it stayed pretty bland. While all of the vegetables had soaked in the spices the tofu remained unchanged; firm, but ultimately still just plain cubes made of soy.

After taking my two recent tofu experiences into account I think that I will step away from tofu for now. Knowing myself, I will probably come back to it at a later date a few months from now with new confidence that I can in fact prepare a great tasting tofu dish. But for now I'll stick to other proteins instead. Despite my disappointment with the tofu I still enjoyed the actual flavor of the dish and I think that next time I might make it with the vegetables alone or add some chicken in place of the tofu.

Thai Red Curry Stir Fry with Tofu and Vegetables
  • 2 large shallots or 1/2 large onion, chopped
  • 1 Japanese eggplant, halved lengthwise, then cubed
  • 1 small broccoli bunch, cut into florets (about 2 cups)
  • 1 tbsp red curry paste
  • 2 tsp fresh ginger, minced
  • 1 12 oz (400 mL) can coconut milk
  • 2 tbsp fish sauce 
  • 1 tbsp brown sugar
  • 2 bell peppers (red, yellow, or orange), thinly sliced
  • 2 stalks celery, sliced 
  • 1 lime, juiced and zested
  • 1 package (350g) extra firm tofu
  • Vegetable oil
  1. Prepare the tofu by removing from its packaging and rinsing slightly. Wrap in paper towels and then place under a heavy weight (such as a pot filled with water) for at least 30 minutes to remove excess moisture. Once drained, cut the tofu into small 1/2" cubes and set aside.
  2. In a large skillet heat the oil over medium heat until hot. Add the shallots or onion and cook until translucent, about 3 minutes.
  3. Add the eggplant and cook until soft, about 3-5 minutes.
  4. Add the red curry paste, fresh ginger, and coconut milk stir to incorporate. 
  5. Bring the mix to a boil for 1 minute then add the lime zest and juice as well as the fish sauce and brown sugar. Stir well to mix everything together.
  6. Add the peppers, celery, and broccoli and stir to coat evenly with the sauce. Reduce the heat to a simmer and cover.
  7. Meanwhile, brown the tofu cubes by lightly sauteing over high heat. You may use a little oil if you wish or the tofu can be "dry-fried". The important thing is to keep turning the tofu pieces so that they all become brown on the outside.
  8. Once the tofu cubes have browned add them to the skillet with the sauce and vegetables and stir well to coat.
Note: If using chicken instead start by cooking bite-sized pieces in the skillet until cooked through (no longer pink inside). Remove from the pan and drain the excess fat then continue with the rest of the recipe. Once the last vegetables have been added allow them to soften for about 5 minutes in the covered skillet before returning the chicken to the pan and mixing to incorporate.

Thursday, July 7, 2011

Red Lentil, Tomato, and Coconut Soup


I find it amazing how easily the weather can change on a dime. Just this morning I looked out the window and could see the clouds scattered all over the sky, bringing intermittent showers all day. However at about 4 o'clock the clouds disappeared and the sun came out in full force. Then in the evening the clouds returned and the rain came with them. Luckily we were having dinner during the brief sunny period and I managed to snap a nice photo of the soup that I made.

The inspiration for the soup came from my family's new found love of coconut milk, especially my mom. After my success with the Thai Tom Kah Gai Soup I wanted to try using the coconut milk again in another soup. Once again, tastespotting.com was my starting point and I browsed through many coconutty recipes before settling on one using red lentils. Although I didn't actually follow the recipe and used my own spices I liked the idea of using red lentils because they're quick and easy to cook.

When I tasted the soup I enjoyed it but I couldn't easily detect the coconut flavor over that of the lentils. The coconut milk added a certain creaminess but to me it just tasted like a yummy lentil soup. My mom, however, said that she could definitely taste the coconut and it added what she refers to as "Thai style" to the soup. I guess her palette is more refined than my own and she can detect subtleties in flavor. Even though I couldn't taste the coconut I still loved the soup and the rest of the family seemed to appreciate it as well.

Red Lentil, Tomato, and Coconut Soup
  • 1 medium onion, chopped
  • 2-3 cloves garlic, minced
  • 1 tsp ground cumin
  • 1 tsp ground coriander
  • 1 28 oz can crushed tomatoes
  • 1 12 oz (400 mL) can coconut milk
  • 6 cups (2 L) chicken or vegetable stock
  • 2 cups red lentils, rinsed and drained
  • 1 lemon
  • Olive oil
  • Salt and pepper to taste
  • Optional: 1/4-1/2 tsp red chili flakes
  1. In a large pot, saute the onion and garlic for 3-4 minutes over medium heat until the onion starts to become translucent.
  2. Add the ground cumin, coriander, and chili flakes, if using, and stir through.
  3. Add the tomatoes with their juices, coconut milk, stock, and lentils and bring the soup to a boil.
  4. Once boiling, reduce the heat to a simmer and cook for about 25-30 minutes until the lentils are soft and mushy. Keep the pot partially covered and stir the soup occasionally.
  5. Using a blender, puree the soup in batches then return to the pot. Add some lemon juice and season with salt and pepper to your liking.

Thursday, June 23, 2011

Tom Kah Gai


After my previous success with the thai curry mussels, I decided to challenge myself and recreate one of my favorite Thai soups: Tom Kah Gai, also known as chicken and coconut soup. The subtle flavors of lemongrass and ginger complement the coconut and red curry paste. I always love to order the soup whenever I go to Thai restaurants and I was encouraged by my family to try making it at home.

Traditionally, the soup actually calls for galanga instead of ginger and kaffir lime leaves however, despite living in an extremely Asian influenced city, I had difficulty finding all of the ingredients so I substituted fresh ginger root and lime zest instead. I don't think my soup suffered because of it and I definitely did not have the energy to go searching the city for two ingredients.

The actual preparation of the soup was not at all difficult and the whole thing was ready within half an hour. Personally, I found the hardest part to be properly cleaning and preparing the unfamiliar ingredients before tossing them into the soup. Luckily I was wise enough to ask the shop clerks how to handle the lemongrass and ginger and was very grateful to them for their explanations, including how big to cut the pieces.

Once I made the soup the whole family was eager to try it and I was curious to see if they thought it actually tasted like the real thing. The verdict: total success! Apart from my little brother, for whom the soup was too spicy, everyone had seconds and the soup was completely consumed down to the very last drop. Funny enough, my older brother did not see one of the Thai bird chiles floating around in the broth and he ate it whole, seeds and everything. My mom claimed she could see the steam coming out of his ears as we sat there and watched him turn bright red and start sweating. Fortunately he ate some watermelon and that seemed to help cool off the heat and he was able to resume eating the soup. At the end of the night, I was quite pleased with myself not only for making the soup but also for having the confidence to venture into unknown territory. Who knows what else I can do now...I guess only time will tell.

Tom Kah Gai
  • 1 stalk lemongrass
  • 1 medium onion, chopped finely
  • 2 cloves garlic, minced
  • 2 tbsp vegetable or olive oil
  • 1 tbsp Thai red curry paste
  • 6 slices fresh ginger, cut 1/4" thick
  • 6 Thai bird chiles
  • 2 limes, juiced + zest of one lime
  • 4 cups chicken stock
  • 1 400 mL can coconut milk
  • 2 skinless chicken breasts, cut into chunks
  • 2 cups oyster mushrooms, stems removed and caps quartered
  • 2 tbsp fish sauce
  1. Prepare the lemongrass by peeling the outermost layer and cutting the stalk into 2" long pieces. Whack the pieces with the flat side of the knife to crush them slightly.
  2. Peel the ginger and cut into disks about 1/4" thick. For a hotter tasting soup, cut up the Thai bird chiles, otherwise simply cut a slit down the side of each one.
  3. Heat the oil in a large pot over medium-high heat until hot then add the chopped onions. Saute until the onions are translucent, about 2-3 minutes, then add in the garlic and saute for one more minute.
  4. Add the lemongrass, curry paste, ginger, lime zest, and Thai bird chiles and continue to cook over medium heat for another 2-3 minutes.
  5. Add the chicken stock and bring the broth to a boil then reduce the heat to low and continue to simmer for 15 minutes.
  6. Add the coconut milk, chicken pieces, and mushroom caps and continue to cook for another five minutes or until the chicken is just cooked through.
  7. Add the lime juice and fish sauce and stir through. You might find that after tasting the soup it could use a little bit more lime juice or fish sauce, it depends on your own preferences.
  8. Garnish with some chopped cilantro and green onions.

Saturday, May 21, 2011

Thai Curry Mussels


People can be full of contradictions, and my family is no exception. I say this because there are certain foods that members of my family claim to dislike but will still eat in a particular form. This applies to my mother who doesn't like coconut yet is a big lover of Thai food, a cuisine which uses a lot of coconut infusion in many dishes. When ordering mussels in restaurants I tend to enjoy Thai style mussels and always find the broth to be quite tasty, as does my mother. So when my family asked me to prepare mussels for lunch one day I decided to try making it two different ways; one a repeat of my mussels in white wine and tomato broth and the other in a Thai broth.

I was a little concerned with how to use the coconut milk, a product I had never worked with in the past. In fact, as I opened the can I discovered that it wasn't at all liquidy like milk, but instead it was more like a paste. I did the best I could to create a flavorful broth and was reassured by the smell of it....my kitchen smelled just like a Thai restaurant.

Once the mussels were ready we all sat down and tried both versions. Everyone liked the mussels in the classic French broth, but to my surprise both my parents went crazy over the Thai style mussels. Both lovers of Asian flavors, they claimed it tasted authentic and they loved it even more than the other version. At the end of the meal my mom asked if I could start preparing more Thai dishes, such as soups, using coconut milk. I was so pleased that the mussels were a success and I managed to recreate such a powerful flavor combination.

Thai Curry Mussels
Note: If mussels are not already clean, please see previous post on how to properly clean them.
  • 2 lbs cultivated mussels
  • 1 tbsp butter
  • 1 tbsp olive oil
  • 2 large shallots, diced
  • 3 tbsp Thai red curry paste
  • 1 400 ml can coconut milk
  • 2 cups chicken, vegetable, or fish stock
  • 1 lime, juiced
  • 1 tbsp sugar
  • 1 tbsp soy sauce
  • 2 tsp fish or oyster sauce
  • 1 tsp chopped lemongrass
  • 1 tsp ground coriander
  • 1 cup cilantro, chopped
  1. In a large pot combine the butter and olive oil over medium heat until melted. Add the shallots and saute for about 5 minutes until they are soft.
  2. Add the red curry paste and half of the stock. Mix it around and use a spoon to break up the paste into the stock.
  3. In a small bowl combine the lime juice, sugar, soy sauce, fish/oyster sauce, and lemongrass.
  4. Once the curry paste is dissolved, add the rest of the stock, coconut milk, sauce mixture, coriander, and half the cilantro. Bring the broth to a boil and adjust the seasoning if necessary.
  5. Reduce the heat to medium and add the mussels to the pot. Cover with a lid and allow to steam for 8-10 minutes, or until all of the mussels have opened up. 
  6. Pour the mussels out onto a large dish with the broth overtop and discard any unopened ones. Top the mussels with the remainder of the cilantro and serve alongside some crusty bread.