Showing posts with label biscuit. Show all posts

Wednesday, January 16, 2013

Cheese and Chive Biscuits


Out in the food blogging community there is something called the Daring Bakers Challenge. Every single month a prominent food blogger proposes some sort of food item that everyone has to make. Generally it involves some sort of interesting technique or is considered a complicated item...hence the "challenge". Most times there are some sort of rules as well, such as how and what type of variations can be made. Each challenge lasts for the duration of the month and then starts all over again in the next month with a new featured food item.

I have never actually participated in the Daring Bakers Challenge nor do I know how the hosts get chosen, let alone if there are any winners. However when I browse tastespotting.com I can always tell when a new challenge has started because all of a sudden there will be many recipes all featuring the same type of food, just with different styles and variations.

As it happens, when I was looking for a good recipe for scones and biscuits to make for my family high tea I found out that it was the theme of the Daring Bakers Challenge exactly a year ago in January 2012. I decided to use the recipe provided by the host of the challenge and in the process I learned the difference between scones and biscuits. It turns out that what we call "scones" in North America are actually called "rock cakes" in England and Australia, and that which we call "biscuits" here are called "scones" over there. It's all trivial information but interesting when talking to someone from a different part of the world and finding out about these slight nuances.

For the high tea I wanted to stick with traditional flavors so I decided to make the biscuits using Gruyere cheese and chopped chives. According to the host he bookmarked over 288 recipes and tried 16 different batches before coming up with the best technique and recipe. In the end he had very simple instructions with plenty of pictures, which I appreciated. Since the techniques were not that hard or time consuming I decided not to skip any steps and follow all of his specific instructions.

It was nice to see the rationale explained behind each specific technique, such as triple sifting the dry ingredients in order to allow plenty of air to become incorporated into the mixture as well as evenly distributing the rising agents. Supposedly this gives the scones maximal lightness, though I can't honestly say whether my scones achieved this. They were extremely light and fluffy and very layered, thanks to the kneading technique also outlined in the recipe, but since I only made one batch I didn't have anything else to compare them to in order. I'll just have to trust that triple sifting the ingredients led to a better biscuit than if I had simply mixed the ingredients together.

In terms of taste the biscuits turned out deliciously and were especially enjoyed by my mother and brother. I was especially pleased that my mom liked the biscuits because she often complains that biscuits sold in stores are too hard, though I think her complaints are aimed more toward scones rather than biscuits. She said she loved the flaky layers and softness of the biscuits. Personally I enjoyed the subtly of the Gruyere cheese but my brother asked that next time I use a stronger cheese, such as cheddar, for a more intense and cheesier flavor. The great thing about the recipe is that it provides a base and can then be modified to individual preference.

Cheese and Chive Biscuits
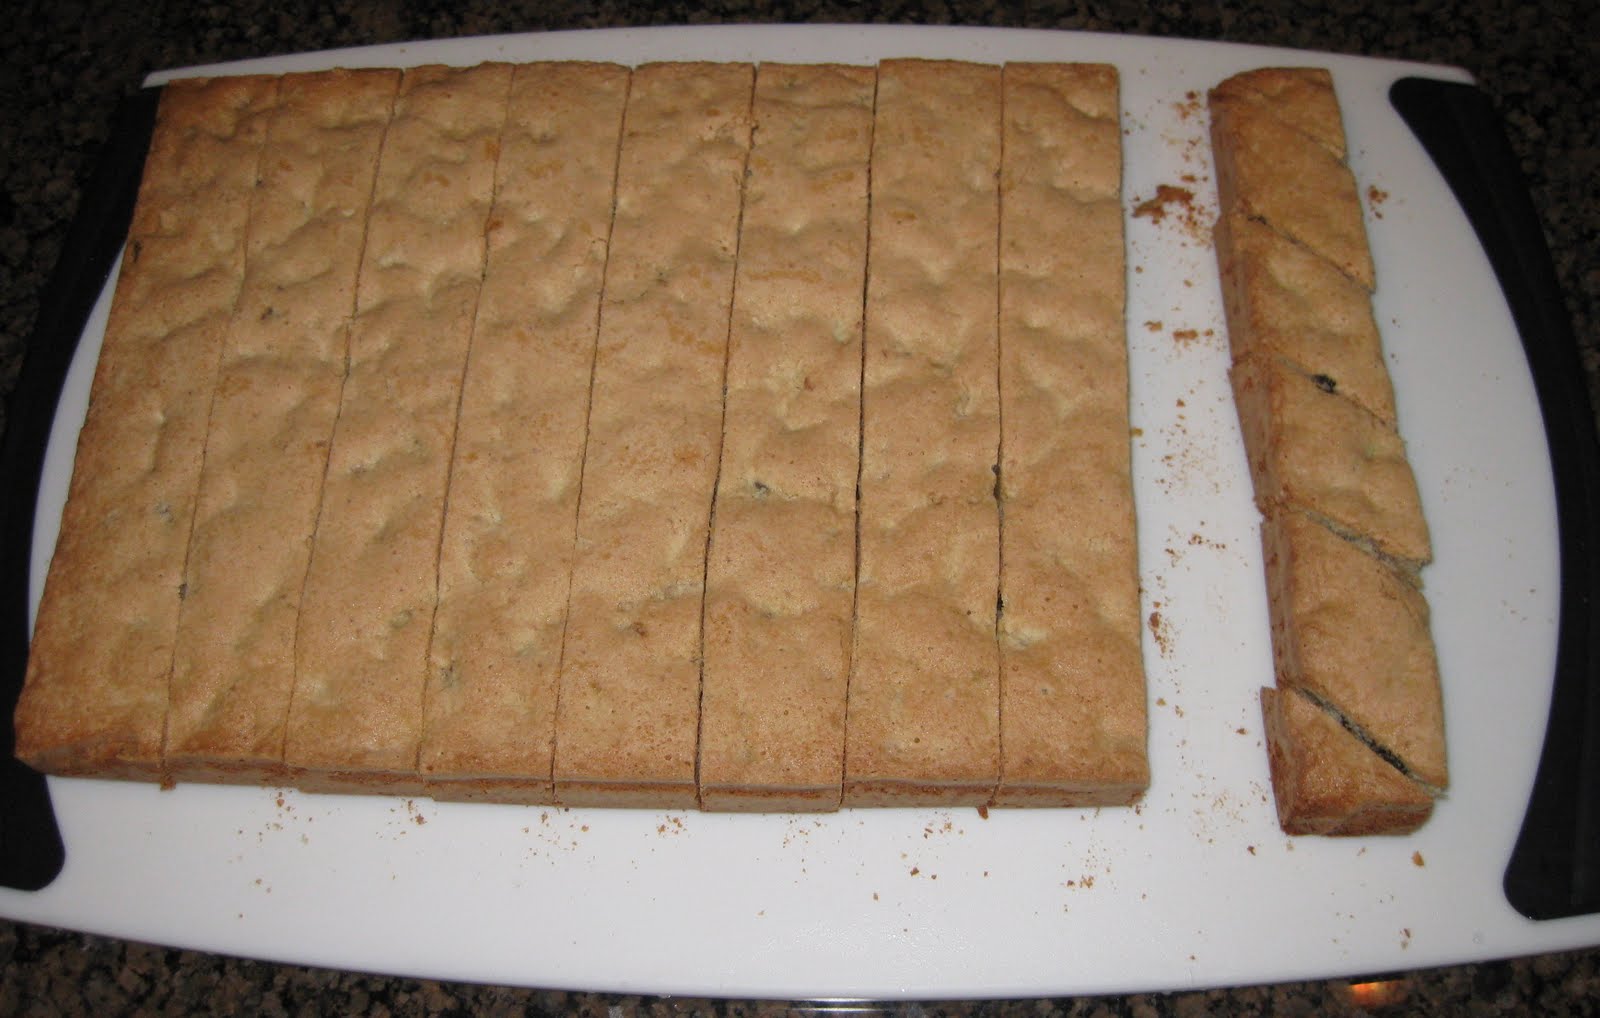
Note: This recipe makes about 16 palm-sized biscuits.
  • 2 cups flour
  • 4 tsp baking powder
  • 1 tsp baking soda
  • 1 tsp ground mustard seeds (dry mustard powder)
  • ½ tsp salt
  • 1 cup freshly grated cheese (any variety)
  • 4 tbsp chives, finely chopped
  • 4 tbsp cold unsalted butter, cut into pieces
  • 1 cup cold milk
  1. Triple sift the flour, baking powder, baking soda, dried mustard, and salt together into a large bowl.
  2. Add the grated cheese and chopped chives and mix in with the dry ingredients.
  3. Rub the butter pieces into the dry ingredients until the mixture resembles large, beach-sized sands pieces and the butter is well coated with the flour.
  4. Add the milk to the mixture and mix until it just starts to form a wet and sticky dough. Turn the dough out onto a lightly floured surface and gently shape it into a ball.
  5. To achieve a layered effect, gently knead and press down on the dough to form a large rectangle. Fold it into thirds on itself then turn 90° and repeat the process 3-4 times.
  6. On the last turn pat the dough down so that it is ¾"-1" thick. Use a well-floured 2"-3" biscuit cutter (depending on how big you want them) to cut out the biscuits. Sprinkle with a little bit of cracked pepper and place on a parchment or wax paper lined baking tray 2" apart.
  7. Bake for 8-10 minutes at 475 degrees Fahrenheit. Take the biscuits out of the oven as soon as the tops turn golden and immediately remove from the tray and place on a plate or cooling rack to prevent the bottoms from burning.

Monday, January 14, 2013

Cranberry and Orange Scones


This past Saturday I hosted a high tea for all of the female members of my family. One of the many items I prepared were these cranberry and orange scones. If you have ever had the pleasure of attending high tea you would know that the food selection almost always includes some sort of sweet and fruity scone served alongside jam and cream.

I decided to go to my favorite food blog Annie's Eats and use her recipe for cranberry scones, but pair it with orange rather than lemon because I had only recently baked some cranberry lemon squares over the holidays. The nice thing about the recipe was that the scones could be made in advance and then baked once the time came, ensuring they were hot and fresh from the oven when serving them.

Everyone seemed to enjoy the scones, especially my aunt and grandmother. They were perfectly tender and crumbly and the sprinkled sugar on top added a nice crust. I truly felt that I properly represented this traditional high tea goodie and was impressed with how it turned out so well.

Cranberry and Orange Scones
Note: This recipe makes 15-20 palm-sized scones.
  • 2½ cups flour
  • ½ cup + 3 tbsp sugar
  • 1 tbsp baking powder
  • ½ tsp salt
  • 1 orange, zested
  • 6 tbsp cold unsalted butter, cut into pieces
  • 1¼ cups fresh or frozen cranberries, coarsely chopped
  • 1 large egg + 1 egg yolk
  • 1 cup heavy cream
  1. In the bowl of a food processor (or a large bowl) combine the flour, half cup of sugar, baking powder, salt, and orange zest. Pulse a few times to briefly blend together.
  2. Add the pieces of butter and continue to pulse until the mixture becomes mealy and the butter pieces become the size of large peas. If you don't have a food processor use a fork or or your hands.
  3. In a separate bowl combine the chopped cranberries with the three tablespoons of sugar and mix to ensure the cranberries are evenly coated. Stir the cranberries into the flour and butter mixture.
  4. Combine the whole egg, egg yolk, and cream and whisk to blend in a small bowl.
  5. Add the liquid mixture to the dry ingredients and stir gently with a spatula or wooden spoon until the dough starts to come together.
  6. Turn the dough out onto a lightly floured surface and gently knead it just so that it stays together. Be careful not to overwork the dough.
  7. Shape the dough into a round disk and gently pat it down so that it is about ½"-1" thick, depending on how thick you want the scones to turn out. Use a well floured biscuit cutter to punch out small 2"-3" rounds (also dependent on how big you want them). 
  8. Gather the scraps and gently mold together and repeat the process with the remaining dough. Alternatively the dough can simply be patted down and then cut regularly into triangular wedges or squares.
  9. The shaped scones can be refrigerated, frozen, or baked right away. If freezing, flash freeze them on a baking tray directly in the freezer then put into freezer-safe bags and store. If refrigerating, arrange on a baking tray and cover with plastic wrap. 
  10. Once ready to bake, brush the tops with the leftover egg white and sprinkle them lightly with some additional sugar. Place them about 2"-3" apart on a baking sheet lined with parchment or wax paper and bake for 15-20 minutes at 400 degrees Fahrenheit, or until they are a touch golden. (If baking from the freezer they may require an extra 3-5 minutes.)

Sunday, December 9, 2012

Holiday Treats


For the past few years I have made a habit out of putting together little boxes filled with holiday treats for my family. At first I started off small...a box filled with chocolate truffles. Then the following year I added to it with some chocolate crinkle cookies and berry crumb bars. This year I decided to swap out the truffles and add cranberry bliss bars and almond biscotti.

It was definitely a big undertaking to bake so much in a relatively short time period but I broke it up over two days and it all worked out. I will admit that at one point the kitchen looked quite disastrous with many different mixing bowls, ingredients, measuring cups, and baking trays spread out everywhere. Luckily my mom helped me with the packaging and she also tied up the boxes very nicely for me.

Everyone in my family was quite appreciative of the treats and I received many thanks and compliments. I can honestly say that I love the holiday season and the general joyfulness that can be felt everywhere. Therefore I love to do my part to spread the holiday cheer and brighten everyone's holidays just a touch more. Happy Holidays :)

Tuesday, December 4, 2012

Almond Biscotti


The idea of making biscotti has truthfully never been quite appealing to me because it seemed like a time consuming process. This, coupled with the fact that most members of my family aren't huge biscotti fans anyway, led me to ignore most biscotti recipes I have seen in the past.

Last summer, however, one of the things I learned to make during my trip to Italy was this biscotti. The recipe was very easy and actually not as time consuming as I thought; although the biscotti had to bake twice each time was only fifteen to twenty minutes. Also because the loaves were sliced while still hot from the first baking they were actually very easy to cut into pieces, unlike my delicious but difficult to slice fruit and nut crisps.

During my trip to Italy I not only picked up some new recipes but I also brought back some ingredients, one of which was Italian baking soda. When I first showed this to my mom she scoffed and questioned my need to buy specific baking soda from Italy. "Isn't ours good enough?" she asked me. Although there is nothing wrong with our baking soda I was fascinated by the fact that the one we used in Italy already had vanilla mixed into it, therefore no additional vanilla extract had to be added to the biscotti.

Up until last week my Italian baking soda had been sitting, unopened, in the kitchen cupboard. Finally I put it to use when I baked these biscotti. I think the person most surprised by the biscotti was my mom; she did not expect the biscotti to still be soft and chewy rather than hard like a rock as is typical of biscotti sold in stores here. Also she enjoyed the fact that each bite held a new "surprise" as she called it with the chunks of chocolate, almonds, hint of cinnamon, orange, and lemon. I was glad she enjoyed it so much, in addition to the rest of the family, and I think I will be baking it again soon for my holiday treat boxes.

Almond Biscotti
Note: Although I used my special Italian baking soda I was provided with a recipe that uses regular baking soda and vanilla, which is reflected below.
  • 1 cup whole almonds, lightly toasted
  • 4 oz (112 g) chocolate, roughly cut into chunks
  • 1 orange, zested
  • 1 lemon, zested
  • ½ cup unsalted butter, melted
  • 1 cup sugar + extra for sprinkling
  • 3 large eggs, lightly beaten
  • 1 tsp almond extract (can be substituted with almond liquor)
  • ½ tsp cinnamon
  • ¼ tsp salt
  • 1½ tsp baking soda
  • 2¾ cups flour
  • 1 egg white
  1. In a large bowl combine the melted butter, sugar, orange and lemon zests. Add the vanilla and almond extract (or liquor).
  2. Mix in the beaten eggs and almonds.
  3. In a separate bowl sift together the flour with the cinnamon, salt. If working with liquor add the baking soda last to the dough, right before the chocolate, otherwise sift with the other dry ingredients.
  4. Add the dry ingredients to the wet and mix together until a dough forms. Using your hands, work in the chunks of chocolate into the dough.
  5. Split the dough in half and form into two long logs about 3" wide. Lay the logs onto a large baking sheet covered in parchment or wax paper. Make sure to leave space between the logs as they will widen as they bake.
  6. Pat down the logs so they have a flat surface and use a pastry brush to spread the egg white over top. Generously sprinkle sugar over the surface.
  7. Bake the biscotti for 15-20 minutes at 400 degrees Fahrenheit or until the tops of the logs start to crack and become a light golden color. 
  8. Remove from the oven and cut diagonally into long pieces while still warm. The best way to do this is to cut straight down rather than use a sawing motion. 
  9. Lay the cut pieces, cut side facing up, back on the tray and return to the turned off but still warm oven for 15-20 minutes. If you like the biscotti softer take them out sooner, if you like them crunchier leave them in for longer.

Sunday, February 5, 2012

Orange Pancakes with Cranberry Compote


I woke up this morning with a major pancake craving and, being me, I obviously wanted to try a new recipe. Lately I have been very much into making things with cranberries, such as my red wine poached pears with cranberry sauce (made several times now by request from my mom and brother) and other baked goods. I particularly enjoy the combination of sweet orange with tart cranberry and when I found a pancake recipe utilizing this perfect pairing I jumped on the chance to make it.

The pancakes turned out extremely airy and light with a gentle undertone of citrus. They were good, but the cranberry compote definitely put the pancakes over the edge. I started on the compote at the same time as the pancakes, which gave the cranberries plenty of time to pop open and release their juices. It was actually quite fun to listen to the little popping noises and watch the process. As I continued to make the pancakes, I left the compote to simmer and reduce, making it really thick and syrup-like. The end result spread nicely over the pancakes and provided a great contrasting tart flavor.

The reaction from my family also made breakfast quite entertaining. My mom complained that I can't make such delicious pancakes for breakfast because pancakes are not diet-friendly. Of course that didn't stop her from eating one "just to try". My brother decided to try every possible permutation of eating the pancakes with butter, maple syrup, the cranberry compote, and fresh orange slices. In the end, after 10 pancakes, he determined that the best tasting ones were those topped with either the cranberry compote alone or fresh orange slices, but not in combination. I was happy he found his "ultimate pancake" and quite amused in the process, having fulfilled my own cravings as well.

Orange Pancakes with Cranberry Compote
Makes about 25 palm-sized pancakes
  • 2 cups flour
  • 2 tsp baking powder
  • 1 tsp baking soda
  • 1/2 tsp salt
  • 3 tbsp sugar
  • 2 eggs, lightly beaten
  • 2 cups yogurt
  • 4 tbsp unsalted butter, melted and slightly cooled
  • 1/2 cup orange juice
  • Zest of one orange
For the Cranberry Compote:
  • 1 cup fresh or frozen cranberries
  • 1/4 cup orange juice
  • 2 tbsp sugar
  1. Whisk together the flour, sugar, baking powder and soda, and salt and set aside.
  2. In a separate bowl, combine the eggs, yogurt, butter, orange juice and zest.
  3. Add the wet ingredients to the dry and mix gently just until combined. The batter will be lumpy. If needed, thin out the batter with a little orange juice and milk.
  4. Heat a griddle or large skillet over medium heat. Once heated, reduce the temperature to medium low and pour 1/3 cup of batter onto the cooking surface. Allow the pancake to cook until bubbles start to form on the top surface, about 20-25 seconds, then use a large spatula to gently flip the pancake over. Cook the other side until it is light and golden and fully cooked through. Repeat with remaining batter.
  5. Meanwhile, combine the ingredients for the cranberry compote in a small saucepan and bring to a boil. Once the cranberries start to pop, reduce the heat to a simmer and keep heating while making the pancakes. Stir occasionally until compote thickens, then remove from heat. Feel free to add some extra sugar if compote is too tart.
Note: You may have to go through a couple of "test" pancakes before you achieve the right temperature on the griddle or skillet. Finished pancakes can be kept warm in the oven at 200 degrees Fahrenheit while the rest are cooking. 

Monday, January 30, 2012

Fruit and Nut Crisps


I made these crisps over the weekend and was planning on bringing them with me to a "wine and cheese" social but they took longer to make than I anticipated so I made cinnamon rolls instead and saved these for home. My mom was quite ecstatic actually when she found out that we would be keeping the crisps for ourselves. She looked at me in disbelief as she said "We get to keep them, all of them?...You're not taking them anywhere?" She was skeptical because lately I have been on a baking streak but all of the baked goods were made for various functions I was attending, and therefore not for my family to eat.

Despite not bringing the crisps to the social everyone greatly appreciated the cinnamon rolls and they turned out to be the only dessert item at the event. The next day I finished baking the crisps and I am so pleased with how they turned out. These crisps are exactly like the fancy crackers that people splurge on at $7-$8 a box containing about only twenty total. In fact when my friend came over and tried one she commented that they tasted even better than the store-bought variety.

The great thing about making these yourself is that you are in complete control of the flavors and ingredients. The base recipe can be added upon using any combination of fruits, nuts, and seeds. As pictured above, I made two different varieties: dried cherry, cranberry, pistachio (left) and almond, raisin, rosemary, pumpkin seed (right). Both sets turned out very crunchy (and obviously crispy) but the rosemary one was more popular. Even so, the crisps were eaten quite fast as my brother noted that they were kind of addictive...it was hard to stop after just one.

Fruit and Nut Crisps
Makes about five dozen.

Base Recipe
  • 2 cups flour
  • 2 tsp baking soda
  • 1/2 tsp salt
  • 2 cups buttermilk
  • 1/4 cup brown sugar
  • 1/4 cup honey
  • 1/4 cup ground flax seed
  • 1/4 cup sesame seeds
Suggested Add-Ins
  • 1/2 cup roasted pumpkin seeds, sunflower seeds
  • 1/2 cup chopped almonds, hazelnuts, walnuts, pistachios, pecans....
  • 1/2 cup raisins, dried cherries, cranberries, apricots, figs, dates....
  • 1 tbsp chopped fresh rosemary, thyme, mint, basil....
Pick any combination to add focusing on at least one nut and fruit addition (though more is also good)
  1. In a large bowl combine all of the base ingredients until a batter forms. 
  2. If making two different varieties, split the batter in half and mix the desired add-ins into each half.
  3. Pour out the batters into two 8" x 4" greased loaf pans and bake at 350 degrees Fahrenheit for 30-35 minutes, or at until the loaves are golden and springy to the touch.
  4. Remove the loaves from the pans and cool on a wire rack. Once significantly cool, wrap each loaf in plastic wrap and stick into the freezer.
  5. After several hours or even the next day, remove the loaves from the freezer and slice as thinly as possible. Place the slices in a single layer on an ungreased baking tray and bake for 15 minutes at 300 degrees Fahrenheit. Flip each slice over and return to the oven for another 10 minutes, or until crisp and deeply golden.
Note: The loaves are much, much easier to slice if they are cold therefore I suggest preparing the loaves well in advance and keeping them in the freezer until ready to bake the second time. If tightly wrapped, the loaves can stay in the freezer for up to two months. Simply partially thaw them on the counter before beginning to slice and bake.

Wednesday, November 23, 2011

Red Wine Poached Pears with Cranberry Sauce


For my mom's birthday this year we had a small gathering at our house with family and friends. Of course with Russians, a small gathering isn't actually that small and the food is prepared to feed an army, not the twenty or so people who come. I spent the majority of my weekend preparing food for the party, including my zucchini and carrot ribbon salad and sundried tomato wonton cups (using phyllo instead of wonton wrappers for the shells). My mom also asked me to make my white chocolate and raspberry swirl cheesecake, but instead of a swirl I made a design with rings of hearts on top (I have updated the cheesecake post to include the new picture).

Even though I was already baking a cake, I wanted to feature a lighter dessert option for those who wanted it after such a heavy meal. After discussing with my mom we settled on the idea of poached pears. In the past, I have used poached pears to top my french pear tart with almond cream but I have never made the pears themselves into the stars of the dish. This time, I decided to poach the pears in red wine, along with orange juice and some spices, and then use some of the poaching liquid to create a sauce with cranberries to be served with the pears.

I must say...the pears turned out beautifully. They weren't as red as I had hoped they would be, more of a pink hue, but I think that's because I split one bottle of wine between two pots and added a lot of water and juice. However the taste more than made up for the lack of color. The pears were soft, but not mushy, and the tart cranberries paired nicely with the sweetness of the pears. Surprisingly my brother, a cheesecake lover, proclaimed that the pears tasted even better than the cake and was extremely disappointed to discover that they were all eaten by the end of the night. Considering how easy they were to prepare, and their popularity with the crowd, I definitely will be making these again!

Red Wine Poached Pears with Cranberry Sauce
  • 6 pears, peeled with stems still on (I used bosc)
  • 1 bottle fruity red wine
  • 2 cups orange juice
  • 1 orange peel
  • 1 cinnamon stick
  • 1/2 cup honey (a little more if you want it sweeter and depending on the wine you choose)
  • 1 12 oz bag frozen cranberries, unsweetened
  1. Place all the pears in a pot large enough to fit them in a single layer. Make sure not to overcrowd the pears; use two pots if necessary.
  2. Pour the bottle of wine and orange juice into the pot. Pour in water until the pears are submerged in the liquid. They may start to float, just make sure there is enough liquid so that they are completely covered if you press down on them.
  3. Put the orange peel and cinnamon stick in the pot. Stir in the honey as well.
  4. Heat the pot over low heat for 30-40 minutes to allow the pears to simmer slowly. Turn them occasionally so that they develop even color and softness. Once the pears can be easily pierced with a fork, remove them from the poaching liquid and set aside.
  5. Pour out the poaching liquid from the pot but reserve about 2 cups. Add the frozen cranberries, unthawed, to the reserved liquid and simmer the sauce over low heat for about 15-20 minutes, or until the cranberries start to break.
  6. Serve the pears with the warm sauce poured over top.
Note: I saved my poaching liquid so that I could make another batch or cook something else in it...it was so delicious I didn't want to waste it.

Thursday, August 11, 2011

Berry Crumb Bars


When I was a little girl my grandmother used to make these little cookie-like bars for dessert which we called "rombiki" or "rhombus" when translated. They were named as such because she always cut them in the shape of diamonds. My mom always called the cookies "tzorti" or "grated" because the crumb topping comes from grating part of the dough over top of the berry preserves. Regardless of their name, I used to absolutely love these cookies and would eat them in great quantities whenever my grandma made them.

Every time my grandma made these cookies, she always used the same platter to serve them, stacking them carefully on top of each other in a beautiful way and then sprinkling them with powdered sugar. A couple of months ago, after my grandfather passed away, we were clearing out his house and found the platter on one of the kitchen shelves. After seeing it I was filled with my childhood memories of my grandmother and decided that I wanted to make her cookies and serve them on the platter, just as she would.

I had actually tried making these cookies once before in the past, a long time ago before I became the culinary lover I am today. My friends and I were working on a school project about Russia and the former Soviet Union and we all thought it would be fun to hand out a treat during our presentation. Seeing as my family is Russian it was agreed that I should provide some sort of recipe and I settled on these cookies. Unfortunately, I had great difficulty with the last step in which part of the dough is grated on top of the preserves to create a crumb topping. I don't recall now what exactly the problem was, just that I could not manage to grate the dough no matter how hard I tried. It refused to create a crumb topping and instead broke into large chunks. As far as I remember, my mom came home later that evening and helped me make a new batch which I brought to school the next day.

This time around the rombiki turned out wonderfully! The crumb topping was exactly like I remembered from my grandmother's cookies and the berry preserve to dough ratio turned out just right. I was so proud of myself for making the cookies as my grandma would have and I served them just like she did, minus the powdered sugar, piled beautifully on the exact same platter. I could tell that it reminded my mom of her mother as well and it made me happy that I could inspire good memories amongst my family with my baking. As I served the rombiki I imagined the pride my grandmother would have had knowing that her granddaughter was trying to keep her memory alive, and hopefully the joy she would have felt as well.

Berry Crumb Bars
  • 2 large eggs
  • 1 1/2 cups sugar
  • 1 cup butter, softened and cut into pieces
  • 1 tsp vanilla
  • 3 cups flour
  • 1/4 tsp baking powder
  • 1 large sized jar of preserves, any flavor
  1. In a large bowl beat together the eggs and sugar. Beat in the butter pieces and then vanilla and mix until even and creamy in consistency.
  2. In a separate bowl combine the flour and baking powder. 
  3. Add the dry mixture to the large bowl in 2-3 batches and work into a uniform dough.
  4. Set aside 1/4 of the dough and press the remaining 3/4 onto a 9" x 13" cookie sheet lined with parchment paper. Make sure you press firmly down and distribute the dough evenly across the entire sheet.
  5. Spoon the preserves over the dough so that the entire sheet is covered but not too thickly. You want the layer to be thin enough that you can still see the dough underneath in a translucent fashion.
  6. Grate the remaining dough over top of the layer of preserves. If having difficulty with the grating, add a little more flour to the dough to make it easier to handle and less sticky.
  7. Bake at 350 degrees Fahrenheit for 35-40 minutes, or until the crumb topping starts to develop a light golden color.
  8. Use the parchment paper to lift the entire thing off of the cookie sheet and onto a cutting board. Allow it to rest for five minutes before proceeding to cut it into 2" wide strips lengthwise and then diagonally across. It is the same technique as used for cutting mazurki, which can be found here. It is best to cut it into individual pieces while it is still hot because, although messy, later when the entire sheet sets it hardens and becomes difficult to cut into.

Wednesday, June 23, 2010

Walnut and Raisin Biscuit


I think that there are few women out there who don't have some early kitchen memories involving mothers or grandmothers and delicious smells. I am lucky enough to not fall into that category as I have plenty of lovely memories of my mom and grandma baking and cooking and letting me help with the occasional task. Of course, as you grow up and try to recreate those once loved recipes, you find that they never turn out quite the same way. Still, the process of going through those same steps and coming out with a great product brings a certain sense of pride and happiness.

To this day my mom still makes these yummy biscuits which are known as mazurka in Russian. Although I have helped her many times, somehow doing it on my own leads to them tasting slightly different. A couple of weeks ago my economics class was set to have a lecture on the beach, and girls were responsible for bringing food. I decided that I would make these biscuits because they are very light and easy to make ahead.

As with many of my mom and grandma's recipes, this one was in Russian and required me to translate it before I began. I will admit that my Russian reading skills are elementary at best, but I do have them and occasionally use them. After translating the recipe, I decided I would call my mom to double check that I had gotten the ingredients and portions correct. When I read off my translation, my mom informed me that I had mistaken one tablespoon of flour for one cup. I replied by telling her that I was pretty sure the word on the page said cup, but she insisted that it was one tablespoon and that I must not have understood the abbreviation correctly. I thanked her for pointing out my mistake and proceeded to prepare the biscuits.

While making the biscuits, I kept having a nagging feeling that something wasn't right. My mixture was quite liquidy and not at all the thick consistency that I knew it should be. As I folded in the walnuts and raisins and poured the mixture into the pan, I knew that something had gone wrong. Still, I continued to follow the instructions and baked the biscuits. In the end, all of the walnuts and raisins sank to the bottom and the biscuit turned out more spongy than crispy.

I showed my biscuits to my mom and she agreed that they had not turned out correctly. Although the taste was the same, the texture was definitely different. I relayed to her step-by-step everything I did and she confirmed that I had done everything right. So what was the problem? We decided to consult the original recipe and decided that apparently it was my mother's memory and not my Russian skills that had led me askew. The recipe did indeed call for one cup of flour, not one tablespoon, and would have led to a much thicker mixture had I added the one cup. We laughed about the mix-up and my mom apologized for mistrusting my translating abilities. I still ended up bringing the biscuits to the picnic because they still tasted good...and I had nothing else prepared anyway. However, I'm pleased to say that I tried making the biscuits again for Father's Day, this time using one cup of flour, and they turned out just right with a crunchy texture.


Walnut and Raisin Biscuits
  • 4 eggs
  • 1 cup sugar
  • 1 cup flour
  • 1 1/2 cup walnuts, chopped
  • 1 cup raisins
  • Dash of vanilla
  1. Preheat oven to 325 F. Line a 13" x 9" pan with parchment or wax paper. Make sure to create crisp and defined edges, otherwise the biscuits will sink into the folds in the cracks. If you want, you can sprinkle some flour over the paper for ease of peeling it off later, but it's not necessary.
  2. Beat the eggs and sugar together on high speed until the mixture is nearly doubled in size and a pale yellow, almost white. Add the vanilla, about a cap full. Keep beating until you notice the mixture cannot get any thicker, between 5-7 minutes.
  3. Reduce the speed to low and gradually add the flour to the mixture. Beat until all of the flour is incorporated and the mixture is white in color.
  4. Once all of the flour has been thoroughly mixed in, gently fold in the walnuts and raisins.
  5. Pour the mixture out into the pan and, using a spatula, spread and smooth it out. Make sure that you spread it into the corners evenly because the mixture will not spread on its own.
  6. Bake for 45-50 minutes, or until it is a light, golden brown on top.
Once out of the oven, immediately invert the pan and peel off the paper. It is easiest to do this while it is still hot. Invert once again onto a cutting board so that the top is facing up.


Cut the biscuit lengthwise with each strip measuring approximately two fingers in width.