Friday, December 23, 2011

Ricotta Gnocchi with Chives


This recipe has been bookmarked on my computer for so long it's not even funny. The inspiration came to me months ago when I went to the store and actually bought pre-made gnocchi. For those who do not know, gnocchi are little dumplings hailing from Italy and typically served in place of pasta. Traditionally, gnocchi are made from a potato-based dough however I decided to make mine using ricotta cheese. I did this primarily for two reasons: I do not own a potato ricer, the tool used to mash the potatoes into the proper consistency for making the dough, and I had read online that it is more difficult to make gnocchi for the first time using potatoes without them feeling too heavy. Therefore I decided to proceed with the ricotta cheese because I wanted an easier and tastier product. It turns out that what I made is actually called gnudi, as I learned from watching Iron Chef America the next night on Food Network.

Now there are certain kitchen gadgets that I own, such as a zester, a pizza stone, a cookie scoop, but I do not own a gnocchi board and I don't particularly feel like investing in one either. So of course I was thrilled when I found a technique online that allowed me to create the well-known ridges in my gnocchi without the use of a gnocchi board. However when I started to make the actual gnocchi, the extra step of making the ridges started to seem pointless to me because you could hardly see them and it didn't enhance the taste in any way. In order to save time I decided to skip that step and simply cut the rope of dough into little pieces.

In the end, I have to admit, that the dozen or so gnocchi that had the ridges in them did look more appealing. Although they tasted the same, once in the boiling water the gnocchi puffed up and the ridges became more prominent. In the future, I think I will add the ridges if I have time or am concerned about the presentation, otherwise I will skip that step like I did this time. As for the taste...they were delicious! Everyone in the family enjoyed them and I think the chives in particular added a nice flavor. To finish off the Italian meal, I made the gnocchi alongside my chicken parmesan and I used my recipe for pizza sauce to make a nice marinara for both dishes.

Ricotta Gnocchi with Chives
  • 1 lb ricotta cheese
  • 1 large egg
  • 1 tbsp olive oil
  • 1/4 cup Parmesan, grated
  • 1/2 tsp salt
  • 1/3 cup chives, finely chopped
  • 1 1/2-2 cups flour
  1. In a large bowl, stir together the ricotta cheese, egg, and olive oil until smooth.
  2. Stir in the Parmesan, salt, and chives.
  3. Stir in the flour a little at a time until a soft dough starts to come together into a ball. Try not to add too much flour otherwise the gnocchi will feel heavy. One and a half cups should be enough to create the dough.
  4. Tear off chunks of the dough and roll into ropes about the thickness of your thumb on a lightly floured surface.
  5. Cut the ropes into 1" long pieces and roll each piece on the back of a fork to create the ridges. Place the finished gnocchi onto a parchment-lined baking tray in a single layer. Refrigerate until ready to cook. 
  6. Once ready to cook, bring a large pot of salted water to a boil. Gently add the gnocchi and stir around. Once they float to the surface they are ready. Spoon them out and serve on a plate lightly drizzled in olive oil. 
Note: The gnocchi can also be frozen in a single layer on the baking sheet then transferred to a freezer bag with a seal. Once ready to cook they do not have to be defrosted, simply cook as you would fresh gnocchi.

Thursday, December 22, 2011

Hanukkah Latkes


Last night was the first night of Hanukkah and no Hanukkah is complete without latkes. These traditional potato pancakes are made using grated potatoes and onions, bound together with some egg and matzo meal or flour, and then fried. Of course there are other variations that can include zucchini or carrot, or even sweet potato instead of regular, but I wanted to stick to the traditional latkes that I know and love.

I have never actually made latkes before, though I have consumed plenty every year, and needed to look up a recipe before I started to prepare them on my own. Most of the recipes were pretty standard with slight differences between them, however the one thing that stood out across the board was the need to wring out all of the moisture from the potatoes. All of the recipes suggested different ways of doing this, but each emphasized the importance of this step. Since it was outlined as being so important, I of course made sure to follow instructions but let me just say...it was hard! No matter how many times I thought I was done, another squeeze would produce more liquid. My eyes were watering from the onions and I was wiping at them with the sleeves of my shirt. When I finally finished I had to go to the bathroom to wash off some of the tears that had rolled down my cheeks.

To be honest, these latkes were not a solitary effort; although I made the batter my mom was the one who actually fried them. While she worked on getting the latkes ready, I made a salad to go along with our meal. Once everything was ready, my brother set the table and everyone gathered for dinner. The only thing missing were glasses for our drinks so I went and grabbed some. Just as I was setting them down I accidentally dropped a glass and it fell right on top of another one. Instantly shards of glass flew across the table and landed on all of the plates and food. However the miracle of Hanukkah blessed my family because at that moment, the only thing missing from the table was the plate of latkes which my mom held in her hands, ready to set it down. Luckily for us, our latkes survived my clumsy accident and we were still able to enjoy them just as planned, albeit with a fresh set of dinnerware and a new salad that I quickly put together. I guess the miracle of Hanukkah extends to anything with oil in it...menorahs and fried food.

Hanukkah Latkes
  • 8 medium sized Russet potatoes (or some other variety if you prefer)
  • 2 large onions
  • 4 eggs, lightly beaten
  • 1/4 cup matzo meal (or flour)
  • Salt and pepper to taste
  • Optional: Handful of chives or green onions, chopped finely
  • Oil (for frying)
  1. Peel the potatoes and onions. Line a large strainer with a cheesecloth and place in the sink. Grate the potatoes and onions using the coarse holes of a box grater, alternating between the two, and place the shreds in the lined strainer. Alternatively, use the shredding disc on the food processor and alternate putting through chunks of potato and onion. 
  2. Gather the ends of the cheesecloth so that all of the shreds are enclosed, then twist and squeeze to wring out as much liquid as possible. Do this in batches so that the load is more manageable and it will make it easier to squeeze out the liquid. Once the mixture is as dry as possible, transfer it to a large bowl and repeat with the remaining shreds.
  3. Add the salt, eggs, matzo meal, salt and pepper, and chives/green onions if using, to the potato-onion mixture and stir well to combine.
  4. Pour enough oil into a frying pan so that it covers the entire bottom and comes about 1-2 cm up the sides. Heat over high heat until the oil gets hot then reduce to medium. Take about 3 tablespoons of the mixture and shape into an oval. Place in the pan and flatten it out slightly so that it forms a small pancake. Repeat until the pan is filled, but the latkes are not touching.
  5. Fry each latke for about 3-5 minutes per side, or until each side is well browned. Transfer to a paper towel-lined plate to absorb some of the oil. Repeat until all of the latkes are cooked. 
Note: The latkes taste best when served immediately, alongside some sour cream or applesauce for dipping. However, they can also be cooled and then stored in an airtight container in the refrigerator or freezer with layers of parchment paper between them to keep from sticking. To reheat, place them in a single layer on a baking tray in the oven at 375 degrees Fahrenheit for about 10-15 minutes, or until they start to sizzle.

Tuesday, December 20, 2011

Chocolate Crinkle Cookies


It's that time of the year again which means that my holiday baking is in full swing! Every year I try to make some festive treats for friends and family and give them out to celebrate the holidays. Personally, I love this time of year because I love the cheerfulness; I love all of the decorations and the nice songs and the overall tone of the holidays. I know that not everyone can be together with their loved ones but I am grateful that so far I have been lucky enough to have my family surround me every year.

This year I included chocolate truffles and my grandmother's berry crumb bars, also known as "rombiki" in my family, as well as these new chocolate cookies. I had seen many versions of this cookie on tastespotting.com under names such as "chocolate crinkle" or "chocolate crackle" or "chocolate snowball" cookies and I really liked the way they looked. My cookies didn't turn out as white because I don't think I rolled them in enough powdered sugar, but the taste was great regardless.

I actually didn't have a chance to save any for our own household but luckily went I went to my grandmother's a couple of nights later she still had some left so she gave one each to my brother and me. My cousin had previously told me that they kind of reminded her of Timbits, a little doughnut hole treat that is popular here in Canada at the coffee chain Tim Horton's. Although not fluffy like a doughnut, the flavor is definitely reminiscent of the frosted chocolate Timbit. Despite the fact that these cookies seem to be popular during the holidays, I think that I will make them again sometime soon so that I can have more than just the one and the rest of the household can try them too.

Chocolate Crinkle Cookies
Note: This recipe makes about three dozen cookies.
  • 6 oz (180 grams) semisweet chocolate
  • 3/4 cup flour
  • 1/3 cup cocoa powder
  • 1 1/2 tsp baking powder
  • 1/4 tsp salt
  • 1/2 cup butter
  • 1 cup brown sugar, packed
  • 2 eggs
  • 2/3 cup powdered sugar
  1. Using a double broiler, melt the chocolate and set aside to cool.
  2. Whisk together the flour, cocoa powder, baking powder, and salt.
  3. In a large bowl, beat the butter and brown sugar on medium speed until light and fluffy.
  4. Beat in the eggs, then the chocolate.
  5. Reduce the speed to low and mix in the flour mixture.
  6. Once the dough comes together,transfer to the refrigerator and chill for at least 30 minutes, or until it becomes firm enough to handle.
  7. Pour the powdered sugar into a shallow bowl. Roll dough into 2" sized balls then roll very generously in the powdered sugar. Make sure you have a thick coating. Note: The dough will start to melt in your hands; use gloves for easier handling.
  8. Place the cookies on a greased or parchment-lined baking tray spaced about 2" apart. Bake at 350 degrees Fahrenheit for 10 minutes, until the tops are cracked and the centers are almost set. Cool for three minutes on the baking tray before transferring to a wire rack to cool completely

Wednesday, December 14, 2011

Banana Pancakes


For me, exam time means baking time. The more I have to study, the more I am inclined to bake. Just last week I finished all of my exams and then took a well-deserved ski trip to Whistler with a friend. However in the week before, while studying for my four exams in four days, I managed to bake goat cheese brownies, blueberry banana muffins, and cranberry-orange cream cheese bars. In fact, as soon as I made the muffins I had the urge to go bake the bars and begged my mom to allow me to do so. The funny thing is that she didn't even argue back, saying to me "I'll spend more time trying to talk you out of it than it will take you to make it". In the end, I paced myself by baking the bars the next day and bringing the brownies over to my cousin's house and the muffins with me to my exam. It seemed to me like the perfect solution because this way there weren't too many baked goods lying around the house and I got to treat my friends and family.

One of the things I made before the muffins and bars were these banana pancakes. Since I've been on somewhat of a pancake streak lately I have found them fun to make on a weekend morning for breakfast, especially considering that my brother is a big fan. I made these pancakes once before during the summer, but that was when my flipping skills were still undeveloped and the pancakes all looked funky. Sure, they tasted good, but nothing I could take a picture of and then blog about. Luckily this time was different; the pancakes tasted just as good as the first time and resembled proper pancakes too.

Banana Pancakes
Makes about 15-18 palm sized pancakes.
  • 1/4 cup (4 tbsp) unsalted butter, melted
  • 1 1/2 cups flour
  • 2 tbsp sugar
  • 2 1/2 tsp baking powder
  • 1/4 tsp salt
  • 1 small ripe banana, mashed
  • 1 cup milk
  • 2 large eggs
  • 1 tsp vanilla extract
  1. Whisk together the flour, sugar, baking powder, and salt and set aside.
  2. In a separate bowl, combine the banana, eggs, and vanilla.
  3. Add the melted butter and banana mixture to the dry ingredients and mix gently just until combined. The batter will be lumpy.
  4. Heat a griddle or large skillet over medium heat. Once heated, reduce the temperature to medium low and pour 1/3 cup of batter onto the cooking surface. Allow the pancake to cook until bubbles start to form on the top surface, about 15-20 seconds, then use a large spatula to gently flip the pancake over. Cook the other side until it is light and golden and fully cooked through. Repeat with remaining batter.
Note: Feel free to add mix-ins to the pancakes such as nuts, chocolate chips, blueberries, etc. You may have to go through a couple of "test" pancakes before you achieve the right temperature on the griddle or skillet. Finished pancakes can be kept warm in the oven at 200 degrees Fahrenheit while the rest are cooking.

Sunday, December 4, 2011

Black and White Chocolate Cake


Sometimes life can be really surprising and one of my favorite things is a pleasant surprise. I have a friend who I met at the beginning of school last year in September and have become quite close with since that time. She, like me, also applied and was accepted into the School of Nursing at UBC and now we continue to study alongside each other as we have been for the past year. However it was only after a whole year of friendship that we accidentally found out that our dads have worked together for the past decade at the same company. In fact, not only is it the same company and department, but they're on the same management team. We were so shocked to find out how connected our families were and never even realized it. Once the news broke out, my family became quite excited and invited my friend's family over for dinner.

The initial discovery was made in September but due to schedule conflicts and complications, the actual dinner took place just last weekend. To celebrate the occasion I decided to bake a cake, as I usually do, but this time I wanted to make something that I've never tried on my own before...a layered cake. Most members of my family love my cheesecakes so I tend to stick to making new variations each time but I have always wanted to try making a layered cake and I saw this as my opportunity.

Making the layers themselves wasn't hard at all. I looked up different recipes and decided to use a chocolate cake recipe from one of my favorite blogs Annie's Eats with a meringue layer in between. In order to make sure the cakes would all turn out the same size I baked the chocolate cake first, cooled and removed it from the pan, then baked the meringue in the same cake pan. So far, so good....right?

The real difficulty came with the frosting. I love my Kitchen Aid, I really do, but I'm still a little bit afraid of it. I can make all sorts of cake and cookie batters in it, as well as doughs, but when it comes to whipping or beating...I am usually beat by the Kitchen Aid. I follow the instructions carefully, increasing the speed at the appropriate times and adding the sugar or whatever ingredient is called for slowly, but still I seem to always fail at achieving what I want.

The problem is I find it difficult to judge how long to keep mixing and since the Kitchen Aid has so much power and speed, even a second too long can be the difference between whipped cream and butter. And that's exactly what happened to me this time. I was whipping the heavy cream and thought it needed just a couple more seconds and then, all of a sudden, I saw it separate. I read online that the situation may be saved by adding some more heavy cream and whisking it by hand, but I had used up all the cream to make the frosting.

Luckily for me, my dad needed to go to the store to buy a few things and he picked up some more heavy cream for me. This time, however, I decided not to risk it and whipped the cream using the hand mixer. I still ended up using the other batch in between the layers of the cake, but I saved the good batch for frosting the outside of the cake.

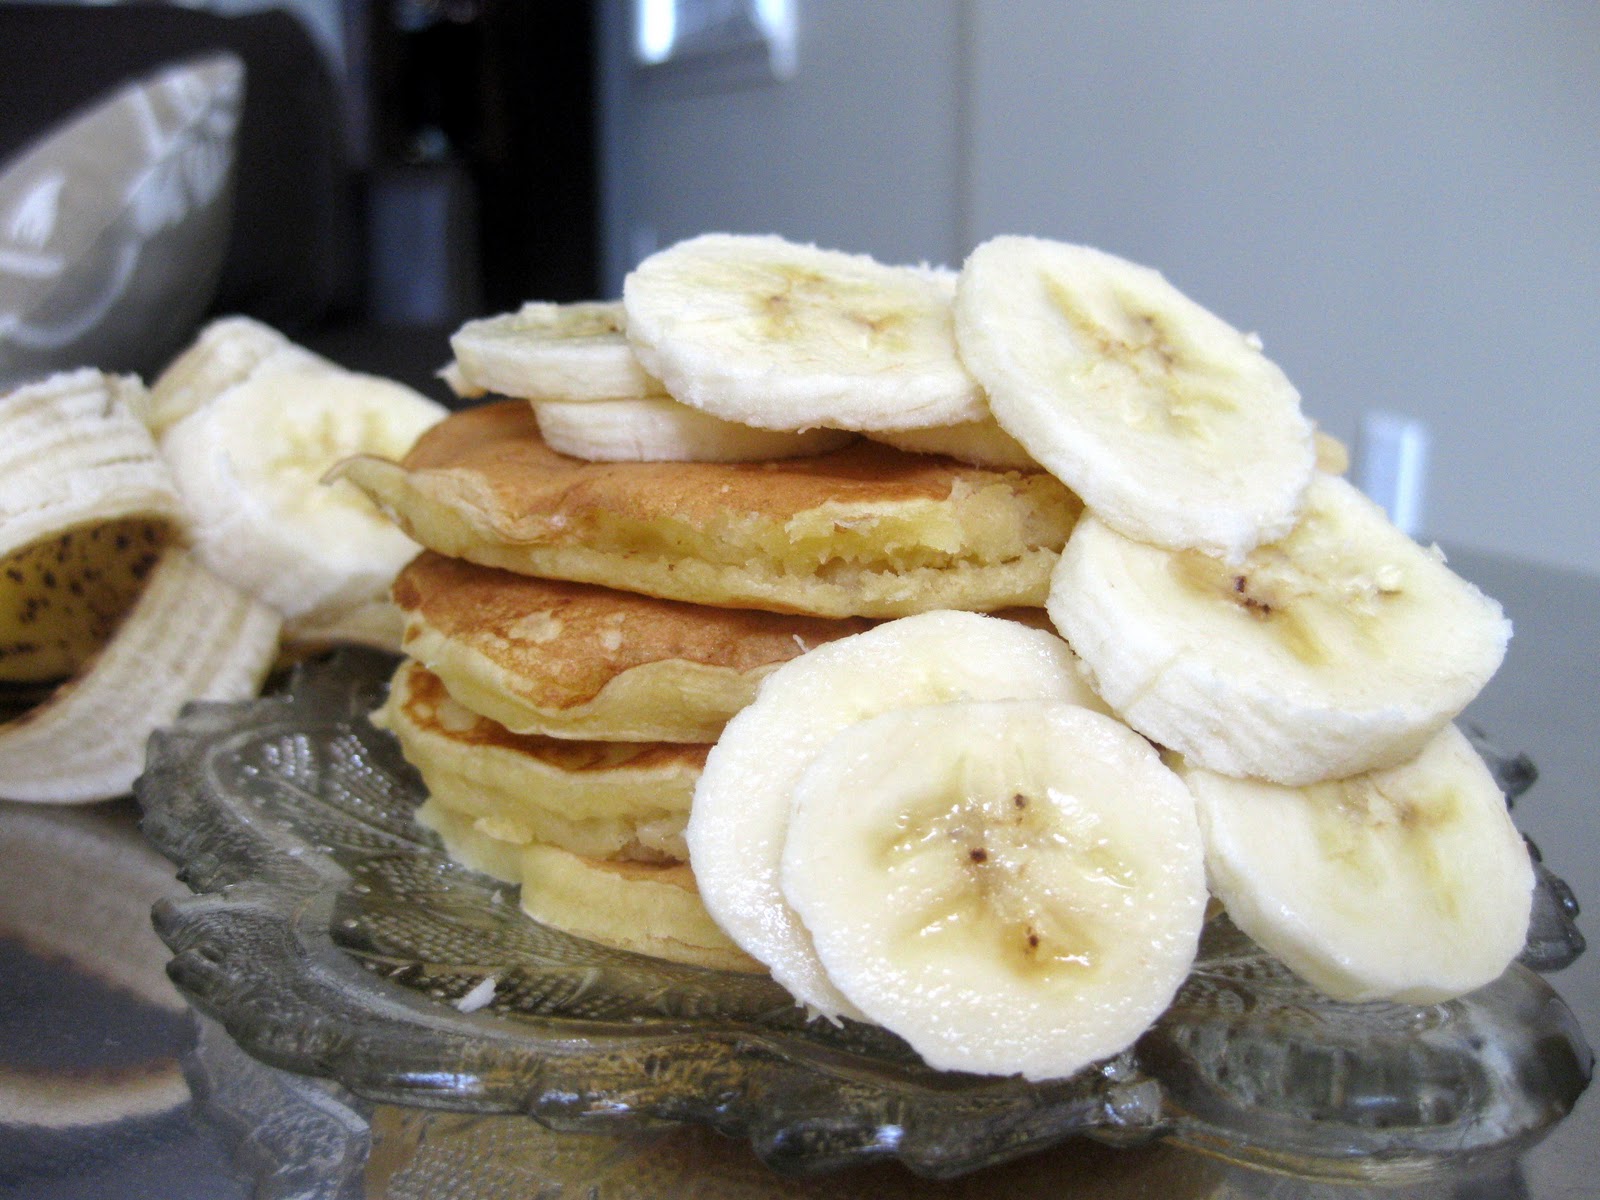
Originally I was going to slice strawberries and put them in between the layers but since blackberries were on sale I bought them instead. The cake tasted good, especially with the meringue layer sandwiched in the middle; it gave the soft cake an unexpected crunch. I tried to take a picture of a slice but no picture seemed to turn out right...they were all a little blurry. However the cake was appreciated by my family and the guests alike and we enjoyed a great evening together.

Black and White Chocolate Cake

For the chocolate layer:
  • 1 cup flour
  • 1/2 cup cocoa powder
  • 3/4 tsp baking soda
  • 1/2 tsp salt
  • 1 cup sugar
  • 1 egg
  • 1/2 cup milk
  • 1/4 cup oil
  • 1 tsp vanilla
  • 1/2 cup boiling water
  1. Stir together the flour, cocoa powder, baking soda, and salt. 
  2. In a separate bowl, mix together the sugar, egg, milk, oil, and vanilla until smooth.
  3. Add in the dry ingredients and mix until just incorporated. Stir in the boiling water (don't worry the batter will be thin).
  4. Pour the batter into a greased and floured 9" cake pan (or line with parchment paper. Bake at 350 degrees Fahrenheit for 30-35 minutes, or until a toothpick inserted into the center comes out clean.
  5. Cool the cake for 10 minutes in the pan before removing and transferring to a rack to cool completely. Once cooled, the cake can be tightly wrapped and stored in the refrigerator for up to a week, or until ready to use. I recommend putting it in the fridge even if using it the same day because it is easier to slice in half when chilled.
For the meringue layer:
  • 4 large egg whites
  • 1 cup sugar
  1. In a large bowl, beat the egg whites on medium-high speed until soft peaks form.
  2. Increase the speed to high and slowly add the sugar. Continue beating until the meringue becomes glossy and stiff peaks form.
  3. Pour the meringue batter into a 9" cake pan lined with parchment paper and smooth the top using a spatula.
  4. Bake at 250 degrees Fahrenheit for an hour, then turn off the oven and leave the cake inside for at least another two hours, though preferably overnight, for it to dry out.
  5. Once ready, carefully remove the meringue from the pan and leave uncovered in a dry environment until ready to use.
For the white chocolate whipped cream:
  • 100 grams white chocolate, finely chopped
  • 1 1/2 cups heavy whipping cream, cold
  1. Bring 1/2 cup of heavy cream to boil then pour over the chopped white chocolate in a small bowl. Gently stir with a spatula until the chocolate melts and the mixture becomes smooth. Set aside to cool to room temperature.
  2. Beat the remaining cup of heavy cream until it holds soft peaks. With the mixer on high speed, add the white chocolate mixture all at once and continue to beat just until it holds firm peaks. 
  3. Transfer the cream to a bowl and press a piece of plastic wrap gently onto the surface. Refrigerate for at least two hours.
For the whipped cream frosting:
  • 1 cup heavy cream, cold
  • 4 tbsp powdered sugar, sifted
  • 1 tsp vanilla
  1. Slowly beat the heavy cream until it starts to thicken. Add the powdered sugar and vanilla and gradually increase the speed. Continue to beat until the cream holds stiff peaks, but careful not to overbeat.
To assemble the cake:
  1. Cut the chocolate cake in half. Place one half, cut side up, onto a large flat plate (at least one inch wider than the cake itself).
  2. Spread a thick layer of the white chocolate whipped cream onto the cake, then layer with freshly sliced berries.
  3. Put the meringue layer on top and gently press down. Repeat the cream and berry topping as before.
  4. Place the second half of the chocolate cake, cut side down, on top and press down gently. Spread the whipped cream frosting evenly over the top and sides of the cake and garnish with fresh fruit.

Wednesday, November 23, 2011

Red Wine Poached Pears with Cranberry Sauce


For my mom's birthday this year we had a small gathering at our house with family and friends. Of course with Russians, a small gathering isn't actually that small and the food is prepared to feed an army, not the twenty or so people who come. I spent the majority of my weekend preparing food for the party, including my zucchini and carrot ribbon salad and sundried tomato wonton cups (using phyllo instead of wonton wrappers for the shells). My mom also asked me to make my white chocolate and raspberry swirl cheesecake, but instead of a swirl I made a design with rings of hearts on top (I have updated the cheesecake post to include the new picture).

Even though I was already baking a cake, I wanted to feature a lighter dessert option for those who wanted it after such a heavy meal. After discussing with my mom we settled on the idea of poached pears. In the past, I have used poached pears to top my french pear tart with almond cream but I have never made the pears themselves into the stars of the dish. This time, I decided to poach the pears in red wine, along with orange juice and some spices, and then use some of the poaching liquid to create a sauce with cranberries to be served with the pears.

I must say...the pears turned out beautifully. They weren't as red as I had hoped they would be, more of a pink hue, but I think that's because I split one bottle of wine between two pots and added a lot of water and juice. However the taste more than made up for the lack of color. The pears were soft, but not mushy, and the tart cranberries paired nicely with the sweetness of the pears. Surprisingly my brother, a cheesecake lover, proclaimed that the pears tasted even better than the cake and was extremely disappointed to discover that they were all eaten by the end of the night. Considering how easy they were to prepare, and their popularity with the crowd, I definitely will be making these again!

Red Wine Poached Pears with Cranberry Sauce
  • 6 pears, peeled with stems still on (I used bosc)
  • 1 bottle fruity red wine
  • 2 cups orange juice
  • 1 orange peel
  • 1 cinnamon stick
  • 1/2 cup honey (a little more if you want it sweeter and depending on the wine you choose)
  • 1 12 oz bag frozen cranberries, unsweetened
  1. Place all the pears in a pot large enough to fit them in a single layer. Make sure not to overcrowd the pears; use two pots if necessary.
  2. Pour the bottle of wine and orange juice into the pot. Pour in water until the pears are submerged in the liquid. They may start to float, just make sure there is enough liquid so that they are completely covered if you press down on them.
  3. Put the orange peel and cinnamon stick in the pot. Stir in the honey as well.
  4. Heat the pot over low heat for 30-40 minutes to allow the pears to simmer slowly. Turn them occasionally so that they develop even color and softness. Once the pears can be easily pierced with a fork, remove them from the poaching liquid and set aside.
  5. Pour out the poaching liquid from the pot but reserve about 2 cups. Add the frozen cranberries, unthawed, to the reserved liquid and simmer the sauce over low heat for about 15-20 minutes, or until the cranberries start to break.
  6. Serve the pears with the warm sauce poured over top.
Note: I saved my poaching liquid so that I could make another batch or cook something else in it...it was so delicious I didn't want to waste it.

Sunday, November 13, 2011

Alfajores Cookies with Dulce de Leche


These cookies have been in my "to bake" list for so long that I almost can't believe I've finally made them. Months ago, at the start of the summer, I made a tart for my cousin's birthday using dulce de leche which is an Argentinean version of caramel. I prepared my own dulce de leche using sweetened condensed milk and after discovering how easy it was, I decided to look up more recipes that involved the delicious caramel spread. When I typed "dulce de leche" into the search box on my favorite website tastespotting.com, there were close to fifty different recipes for Alfajores, a classic Argentinean tea time cookie. I scrolled through many different variations before I finally picked one to make. Yet somehow, the cookies ended up on the back burner and I kind of forgot about them; not intentionally of course but they kept getting pushed back in favor of other recipes.

Fast forward to this weekend, four months later, and I finally baked the Alfajores. Since my cousin is no longer living in Vancouver, I try to make caramel-focused desserts for his visits because I know how much he loves caramel. Once again, I made my own dulce de leche a day in advance and planned to bake the cookies the next evening. Little did I know that my baking pans would be thwarted by the weather; as I was mixing the cookie dough in my Kitchen Aid mixer the power suddenly shut off. We had been having crazy winds all day and the weather had gotten the best of us. It came back on within a minute and I continued making the dough, but then as I finished it shut off again. Seeing as how my oven is electric I had no hopes for baking the cookies that night.

Instead of baking, I spent the evening playing board games with my brother by candlelight. Unfortunately, he beat me in each game we played (I still haven't figured out how that happened) but we had a great time together. Eventually the power came back on, though way too late for me to bake, so I made the cookies the next morning. The dulce de leche was extremely rich so I decided to make the cookies quite small, about 2" in diameter. They tasted lovely both as a little sandwich and with the two halves eaten separately. All in all, these cookies were a long time in the making but definitely worth it in the end.

Alfajores Cookies with Dulce de Leche
  • 1 can sweetened condensed milk
  • 1 cup corn starch
  • 1 1/4 cup flour
  • 1 tsp baking powder
  • 1/2 tsp salt
  • 1/2 cup (4 tbsp) butter, softened
  • 1/4 cup sugar
  • 1/2 cup powdered sugar
  • 1 tsp vanilla 
  • 2 egg yolks
To make the Dulce de Leche:
  1. Pour out the sweetened condensed milk into a shallow pie plate (I used a glass pyrex). Stir in a few flecks of sea salt and cover with aluminum foil. 
  2. Set the pie plate within a larger pan, such as a roasting pan, and add hot water until it reaches halfway up the side of the pie plate. 
  3. Bake at 425 degrees Fahrenheit for 1 1/2-2 hours, adding more water into the roasting pan if necessary as it evaporates. 
  4. Once the dulce de leche has turned a golden brown, caramelized color remove from the oven and whisk until smooth. Pour into a sealable container and store in the refrigerator until ready to use.
To make the Alfajores:
  1. Sift the cornstarch, flour, baking powder, and salt together. Set aside.
  2. Cream the butter, sugars, and vanilla together until light and fluffy. 
  3. Beat in the egg yolks, one at a time, and mix until incorporated.
  4. On low speed, slowly beat in the dry ingredients and mix until a crumbly dough comes together. If the dough is already crumbly but not sticking together, add a tablespoon of water, but don't overmix the dough.
  5. Roll out the dough on a lightly floured surface to about 1/4" thickness. Cut out round cookies and place on a baking sheet lined with parchment paper. Don't worry about spacing the cookies too much as they do not spread.
  6. Depending on the size of the cookies, bake for 10-15 minutes at 350 degrees Fahrenheit. They should be white, not brown, when removed from the oven. My cookies were 2" and baked exactly 10 minutes.
  7. Place on a wire rack to cool. Once cooled, spread the dulce de leche on the flat side of one cookie and sandwich with another. Dust with some powdered sugar over top.

Saturday, November 12, 2011

Chocolate Chip Buttermilk Pancakes


Ever since my success with my lemon ricotta pancakes I have a new found pancake-making confidence and when I woke up yesterday morning I was seriously craving pancakes. My brother had been asking me to make chocolate chip pancakes for a while now so I decided to make regular buttermilk pancakes and add chocolate chips to half of them. I didn't actually have any buttermilk on hand but apparently it's so easy to make your own. Simply measure one tablespoon of vinegar or lemon juice and add enough milk to bring the total volume to one cup and presto....one cup of buttermilk.

The regular version of the pancake tasted great on its own though I'm not going to lie, the chocolate chip tasted even better especially because I used good quality chocolate chips. Growing up in a Russian household, we have things like caviar for breakfast. My dad gave me the idea to spread some of the caviar onto one of the regular pancakes and it was delicious. The saltiness of the caviar combined with the hint of sweetness in the pancake made the perfect bite.

Meanwhile, my family has become quite involved with my blog. Every time I make something new they all ask me whether it will be on the blog. They're also cautious before taking a bite, always asking if I've had a chance to take a picture of the food before they dig in. The picture taking, in particular, is now always on their minds and sometimes they like to come up with ideas on how to best capture my food. For example, my mom came up with the idea to steam the chocolate chips that are sprinkled over the pancakes in the photo, after seeing this technique used on one of our favorite shows Cake Boss on TLC. Then, after my little photoshoot was over and we were right about to eat my mom pointed out that my brother had slathered his pancakes with butter and maple syrup in a very appetizing way, so I took a picture of his plate as well. I love that everyone wants to help me make the blog look as good as possible and I truly enjoy listening to and recreating some of their ideas.

Chocolate Chip Buttermilk Pancakes
Makes about 18-20 palm sized pancakes.
  • 2 cups flour
  • 2 tbsp sugar
  • 2 tsp baking powder
  • 1 tsp baking soda
  • 1/2 tsp salt
  • 2 cups buttermilk (or 2 tbsp vinegar + enough milk to make two cups)
  • 2 large eggs
  • 1/4 cup vegetable oil
  • Chocolate chips (I didn't measure how much I used...just eyeballed it)
  1. Mix the flour, sugar, baking powder, baking soda, and salt together. Set aside.
  2. Mix together the buttermilk (or milk and vinegar), eggs, and oil.
  3. Add dry ingredients to the wet and stir just until combined. It will still be lumpy but don't over mix.
  4. Heat a griddle or large skillet over medium heat. Once heated, reduce the temperature to medium low and pour 1/3 cup of batter onto the cooking surface. Allow the pancake to cook until bubbles start to form on the top surface, about 15-20 seconds, then use a large spatula to gently flip the pancake over. Cook the other side until it is light and golden and fully cooked through. Repeat with remaining batter.
  5. To make the chocolate chip pancakes you can do one of two things: 1) add chocolate chips directly to the batter and mix them in just until incorporated. 2) Pour the batter onto the cooking surface then sprinkle some chocolate chips onto the pancake and resume cooking as you would the regular pancakes. 
Note: You may have to go through a couple of "test" pancakes before you achieve the right temperature on the griddle or skillet. Finished pancakes can be kept warm in the oven at 200 degrees Fahrenheit while the rest are cooking. 

Saturday, November 5, 2011

Chinese Scallion Pancakes


I find it funny that this dish is called "Chinese Scallion Pancakes" considering that these little pieces of bread would hardly be what I consider pancakes. They're not really bread either, more reminiscent of Indian roti or Spanish tortillas. Basically they are composed of a simple dough which is rolled out thin with scallions encompassed in the layers and then lightly fried on both sides.

I must admit that after going to one of my favorite restaurants, a Malaysian eatery, I became enamored with the idea of making my own roti. I found a basic recipe and even watched a YouTube video on how to roll it out, but alas my roti didn't pass the test. It was alright I suppose, but definitely not as good and flaky as in the restaurant and so I gave up and resigned myself to buying pre-made frozen roti and heating them up on the skillet.

Somehow when I saw this recipe it called out to me and made me forget my previous bad experience. I don't know why I thought this time would be different...maybe it was because the name was deceiving or because the pictures made it look so easy, I don't know. Either way it doesn't matter because looking back, I'm glad I decided to give it a go.

I'm not going to lie and pretend that I whipped these "pancakes" up in no time; it was time consuming. Ideally the time and effort spent on continuously rolling and re-rolling the dough should produce a layered, flaky effect. Unfortunately, I couldn't really achieve the desired level of flakiness but I don't think that the taste suffered as a result. Knowing this, I'll probably cut down on the extra rolling next time and do it all in one step.

The real reason why I know I'll make these again is because they tasted great with the dipping sauce. The scallions embedded within the pancake retained their crispiness even when flattened out and it was pronounced because of the gentle frying. The sauce also had the perfect Asian taste to it and you could tell it was specially designed to compliment the scallions in the pancake. Of course if planning to make these, I would definitely recommend eating them right away because they taste best fresh off the hot skillet.

Chinese Scallion Pancakes
Note: These directions reflect my new adaptation of shortened rolling time. In the original recipe, the toasted sesame oil and scallions were applied in two separate steps, with the coiling and rolling performed twice.

For the pancakes:
  • 2 cups flour
  • 1 cup boiling water
  • 2 cups thinly sliced scallions (green parts only)
  • Toasted sesame seed oil
  • Olive oil
For the dipping sauce:
  • 1/3 cup mirin
  • 2 tbsp soy sauce
  • 1/2-1 tsp fresh lime juice
  • 1/4-1/2 tsp red chili flakes (depending on how spicy you want it)
  • 1/2 tsp grated garlic
  • 1/2 tsp fresh grated ginger (or a 1/4 tsp powdered) 
  • 1/2 tsp sugar
  1. Whisk together the dipping sauce ingredients and adjust for any preferences. Set aside. 
  2. Blend together the flour and water, using a food processor or mixer, until a smooth dough forms. Form the dough into a ball and place in a greased bowl covered with a damp towel. Let it sit for about 30 minutes.
  3. Remove the dough from the bowl and knead a few times on a lightly floured surface, then separate it into four separate balls. Keep one out on the counter and cover the remaining three with the towel.
  4. Roll out the first ball of dough into the thinnest, roundest shape possible. Place about a tablespoon of the toasted sesame oil in the center and use a brush to distribute it evenly over the entire surface of the dough, adding more oil if needed. 
  5. Sprinkle a handful of scallions evenly across the entire surface of the dough. 
  6. Roll up the dough tightly so that it forms a long, thin cylinder. Coil the cylinder into a round shape, like a snail shell, and gently tuck the end underneath. 
  7. Carefully flatten the dough and roll it out again into a thin, round pancake. Set it aside and repeat with the remaining three pieces of dough.
  8. Heat some olive oil in a large skillet big enough to fit one pancake over medium-high heat. Working one at a time, place the pancake onto the skillet and fry until golden brown, about 3-4 minutes on each side. 
  9. Use a pizza cutter to cut each pancake into wedges and serve immediately with the dipping sauce and any extra chopped scallions if leftover.

Wednesday, November 2, 2011

Breakfast Burritos


Last Sunday I made these burritos for breakfast and it was a great hit with my family. Similar to a breakfast frittata, these burritos are a great way to use up random leftovers in the fridge and still feel like you have created a complete breakfast. In the past, I've tried applying this concept using pitas because I love how they taste, but I found that the bread became too soggy and the filling would start to fall out. By wrapping everything in a tortilla the filling is held in place and makes the burrito manageable to eat.

The great thing about these burritos is that they take very little time to make since the only things being prepared from scratch are the scrambled eggs. Apart from that, you're free to put anything and everything into the filling. Also, I was able to eat one on the go by wrapping it in aluminum foil and then tearing away at it as I ate, kind of like in the Mexican fast food restaurants.

I highly recommend making these burritos sometime soon, so here are the simple steps:
  1. Gently whisk a little bit of milk into some eggs and add a touch of salt and pepper. Scramble the egg mixture and set aside in a small bowl.
  2. Gather all the filling ingredients you want to use. There are no hard and fast rules but I would recommend a veggie component, such as zucchini, mushrooms, or peppers, a meat component, such as sausage or shredded deli meats, an aromatic, such as onions and garlic, and a spice component, such as red pepper chili flakes. Saute the filling ingredients in some sort of sauce (I used tomato sauce but salsa could also work) and season to taste. 
  3. Remove the tortillas from the packaging and microwave for 30 seconds to one minute, or until they're soft and pliable. Working with one at a time, spoon some filling across the bottom third of the tortilla, leaving room on the sides to fold them in. Top with some scrambled eggs and shredded cheese. I also chose to add some chopped cilantro, but pretty much any herb can be used. For a more Mexican flavor try slicing some avocado and layering them on top of the eggs. Be sure not to put too much filling otherwise it will be difficult to wrap.
  4. To wrap the tortillas bring up the bottom so that it covers the filling completely. Fold each side inward then proceed to roll the bottom of the tortilla up, holding the sides in at the same time.
  5. Place the burritos, seam side down, onto a baking tray with a little space between each one. Carefully spray a little bit of water onto the tops of the burritos (I just wet my hands and flicked water droplets off of them). This will help the tortilla crisp in the oven. 
  6. Using the broiler setting, put the burritos into the oven for 3-5 minutes. This is where it gets tricky because it depends on the intensity of the broiler (I used the "HI" setting) and the position of the rack. Watch carefully for the tortillas to become lightly browned on top. At that point take the tray out of the oven and flip the burritos over so that the soft underside is facing up. Repeat the same process with the water and put back into the oven until the burritos are lightly browned again. Serve alongside some salsa, sour cream or guacamole for dipping.

Monday, October 31, 2011

Caramel Stuffed Apple Spiced Cookies


Last week my friends came over to my house for dinner and afterward we made these cookies. When I first saw the recipe I thought it would be fun to make because it seemed to reflect fall flavors with the apple, cinnamon, caramel combination. I also had an ulterior motive in picking this particular recipe because I knew that my cousin was going to be coming to town and he absolutely loves caramel, therefore I wanted to make something that I could bring to his house when I saw him.

Funny enough my mom, who is not much of a cookie lover, ended up eating the most cookies out of anyone. She said that the texture and flavor reminded her of a type of cookie she used to eat when she was little and asked me to make them again sometime soon, a request I will be sure to follow given her enthusiasm. Overall I would rate the evening and the recipe a success; the cookies ended up being very easy to make and my friends and I had a great time catching up with one another. In fact we got so caught up in our conversation that we forgot to check on the first batch and accidentally left them in a little too long, leading to slightly crispy and burnt bottoms. However the second batch turned out perfect and some people who tried the cookies said that they actually preferred the slightly burnt ones...go figure.

Caramel Stuffed Apple Spiced Cookies
  • 1 cup (8 tbsp) butter, softened
  • 1 cup sugar
  • 1/2 tsp salt
  • 1 box (7.4 oz or 230 g) Spiced Apple Cider drink mix (can be found near the hot chocolate mixes)
  • 2 eggs
  • 1 tsp vanilla
  • 3 cups flour
  • 1 tsp baking soda
  • 1/2 tsp baking powder
  • 1 tsp cinnamon
  • 1 bag  (12 oz or 336 g) caramel soft chews
  1. In a small bowl whisk together the flour, baking soda, baking powder, and cinnamon. 
  2. In a large bowl cream together the butter, sugar, salt, and all 10 packages of apple cider drink mix until light and fluffy.
  3. Beat in the eggs, one at a time, and then mix in the vanilla.
  4. Gradually add the dry ingredients to the mixture until evenly incorporated and a dough forms.
  5. To make it easier to scoop, refrigerate the dough for an hour, though this step can be skipped if you're in a hurry.
  6. Scoop out cookie dough into 2" balls. Flatten the ball slightly in the palm of your hand then press an unwrapped caramel into the center. Seal the dough around it, covering the caramel completely.
  7. Place the cookies on baking sheets lined with parchment paper about 2" apart. Give them plenty of room because they will spread a lot. 
  8. Bake for 12-14 minutes at 350 degrees Fahrenheit or until the cookies are very lightly browned. If using multiple trays, rotate halfway through to ensure even baking. Allow the cookies to cool for 5 minutes on the baking trays before transferring to a wire rack to finish cooling completely.

Friday, October 28, 2011

Carrot Ginger Soup


A while ago as I was doing my nightly browsing of tastespotting.com I decided to search for soup recipes and found this simple sounding carrot soup. It required few ingredients, little effort, and did not require too long to cook in terms of soup. I made a mental note to save the recipe and make the soup at some point but I never quite got around to it. Then, a couple of days ago, I found myself pondering over what to do with extra chicken stock I had left over and suddenly I recalled this recipe and my desire to try it out. As I looked in my fridge I saw that I had all the right ingredients, which isn't hard considering there are only five excluding seasoning and oil, so I set about cooking the soup.

The original recipe calls for using fresh ginger, which unfortunately was the one ingredient I was missing, but I did have ginger powder in my pantry so I decided to use that instead. Personally, I'm not the biggest fan of ginger so I was reluctant to use a lot in the soup. At first I was worried that I didn't properly convert the amount of fresh ginger into powdered because every time I opened the pot lid to stir the soup the smell of ginger was so overwhelming. However once the soup was finished cooking and pureed the ginger became a nice overtone and gave the soup a gentle spice.

When I finished the soup and served it to my brother I said to him "I don't mean to toot my own horn, but damn that's a good soup I just made". He tried the soup and he replied back that it was, indeed, "horn-tootin' good". The next day I brought it with me for lunch and a couple of my friends had a taste, each of them quite enjoying the soup. My mom, also a ginger skeptic, loved the soup as well and when I brought over a friend for dinner she liked it too. The soup was much more delicious and successful than I could have imagined and I don't think it will be long before I make it again.

Carrot Ginger Soup
  • 1 large onion, chopped
  • 4 cloves garlic, diced fine
  • 2 lbs carrots, peeled and roughly chopped
  • 6 cups chicken or vegetable stock
  • 2 tbsp fresh ginger or 2 tsp powdered
  • 1 cup heavy cream or milk
  • Salt and pepper
  • Olive oil
  1. Heat the olive oil in a large pot over high heat then add the chopped onions. Cook until translucent, about 3-5 minutes, stirring occasionally. 
  2. Add the garlic and cook for another minute. 
  3. Add the carrots and ginger and reduce the heat to medium. Cook for about 5-8 minutes or until the carrots start to "sweat".
  4. Pour in the stock and bring the soup to a boil. Reduce the heat to low and simmer, with the pot covered, for about 40 minutes until the carrots become tender.
  5. Transfer the soup to a blender in batches and puree until smooth.
  6. Return the soup to the pot and add the cream or milk. Season with salt and pepper and bring the soup back up to temperature.

Tuesday, October 25, 2011

Chicken Enchiladas


I know a dish is good when my family asks me to make it again immediately after they eat it the first time; this was the case when I made these chicken enchiladas. I found the recipe a while back but hadn't gotten around to making it until just last week. The recipe didn't sound too complicated and I didn't think it would take me long to prepare everything but I was clearly mistaken. Not only did I cut myself in the process, but I also managed to get a little bit of jalapeno pepper under my fingernail and was left with a burning sensation in my thumb for many hours.

I was quite frustrated with both myself and the recipe because it required so much effort and time, something I hadn't anticipated. I know there are things that I cook or bake which can be time consuming, but usually I am aware of that fact going in and therefore I mentally prepare myself for the time and effort required to produce the dish. However this time I was convinced that this recipe would be a breeze and so, I was caught off guard when it came time to making the enchiladas. I was completely ready to write off the enchiladas as a fail but then I saw my family's enthusiastic response and I became determined to recreate the recipe in an easier way. I kept the ingredients the same but tweaked a couple of steps, like using pre-cooked chicken instead of cooking the chicken from scratch, and put the new version to the test this past weekend.

I'm happy to report that my tweaking was a success! I managed to keep the same great flavor that my family had originally fallen in love with but shortened the preparation time by half an hour. The dish came together exactly how I wanted and everyone was left satisfied. The best part about these enchiladas is that they taste good fresh from the oven but they also reheat well. The first time I made them I didn't eat it right away. The next day, everyone in my family took one or two with them for lunch and by the time I came home from school to try it there was only one enchilada left. I was so glad to see how my family enjoyed it, both last time and this time, and I know I will be making it again sometime in the near future.

Chicken Enchiladas
  • 3-4 cooked skinless chicken breasts (depending on the size; I used 4 medium sized)
  • 1 large onion, chopped
  • 3 cloves garlic, minced
  • 1/4-1/2 tsp red chili flakes (depending on how spicy you want it)
  • 2 tbsp chili powder
  • 1 tbsp cumin
  • 1 tbsp sugar
  • 1 28 oz (392 mL) can crushed tomatoes
  • 2 cups shredded Mexican blend cheese
  • 1/2 cup (about 1/2 bunch) cilantro, chopped
  • 12 fajita-size flour tortillas
  • Salsa (any variety will work; just enough to cover the top)
  • Olive oil
  • Salt and pepper
  1. In a large saucepan heat the oil on high heat until hot then add the onions and cook until translucent, about 3-5 minutes. Stir in the garlic and cook for another 30 seconds.
  2. Add the crushed tomatoes, chili flakes, chili powder, cumin, and sugar and stir to combine. Bring the mixture to a boil then reduce the heat to low and allow it to simmer and thicken for about 20 minutes.
  3. Meanwhile, shred the chicken into a bowl and combine with the cilantro and one cup of the shredded cheese.
  4. Once the sauce has slightly thickened, pour it through a strainer. Make sure to press down onto the onion mixture to extract as much of the liquid as possible. Reserve the liquid and add the onion mixture to the chicken. Mix well to combine.
  5. Microwave the tortillas for 30-60 seconds so that they are soft and pliable. Working with one tortilla at a time, spread about 1/3 cup of the chicken mixture in a line evenly along the bottom third of the tortilla. Tightly roll the tortilla and lay, seam-side down, in a greased 9" x 13" pan.
  6. Repeat with the remaining tortillas and lay each one so that it is touching its neighbors. Pour the liquid sauce and salsa evenly over the enchiladas and top with the remaining cup of shredded cheese.
  7. Cover with aluminum foil and bake at 400 degrees Fahrenheit for 20 minutes. Uncover and bake for 5 more minutes or until the cheese browns a little. Remove from the oven and let stand for about 10 minutes before serving.
Note: The enchiladas can be reheated the next day either in the oven or the microwave, either way is good though the oven will keep the edges a little crispier.

Sunday, October 23, 2011

Carrot Zucchini Squares


About a month ago my friend made these carrot zucchini squares and brought one to class for me to sample. I have used zucchini only once before in baking when I made my chocolate zucchini bread and, though it tasted great, my family typically aren't fans of those types of desserts. However when I tried the carrot zucchini square made by my friend it tasted so delicious I immediately asked her for the recipe and convinced myself that at some point an occasion would arise where I could bake them.

Finally my opportunity came when my mom pointed out that we had a lot of zucchini in our fridge and they were going to go bad soon if we didn't use them up. For breakfast my mom made what we call "zucchini aladushki", which are like little fritters, but we still had plenty of zucchini left. I talked my mom into letting me make these carrot zucchini squares so that we wouldn't be letting food go to waste.

My brother was quite skeptical when he saw me prepping all of the ingredients because it contained so many things he doesn't like in his desserts--dried fruit, zucchini, ginger. However seeing as how this was a dessert, he obviously couldn't resist tasting one and he was shocked to find that he really liked it. In fact he told me that I had "beat him" by baking something that sounded so unappealing to him but in the end tasting amazing. 

The truth of the matter is that what makes these carrot zucchini squares so delicious is the combination of the moist cake with the crunch of the walnuts and the sweetness of the cream cheese frosting. Even my mom loved the squares, particularly noting the texture added by the walnuts and the slight lemony flavor of the frosting.

Later that evening, my aunt and uncle came over to our house to join us for an impromptu dinner. My uncle was delighted when he saw the carrot zucchini squares because apparently carrot cake is one of his favorite desserts. I never knew this about him and was pleased to discover that at least one person in my family appreciates more "savory baking". In fact at the end of the night I packed a container full to send home with him and he gave me one of the biggest smiles.

Carrot Zucchini Squares
Note: This recipe says it makes 36 squares but I cut mine into 24 nicely sized portions.
  • 1 1/2 cups flour
  • 1 tsp baking powder
  • 1/4 tsp baking soda
  • 1/2 tsp ginger
  • 2 eggs, lightly beaten
  • 1 1/2 cups shredded carrot (about 3 medium sized)
  • 1 cup shredded zucchini (about 1 medium sized)
  • 3/4 cup brown sugar, tightly packed
  • 1/2 cup raisins (I also added 1/2 cup craisins)
  • 1/2 cup walnuts, roughly chopped
  • 1/2 cup oil
  • 1/4 cup honey
  • 1 tsp vanilla
For the cream cheese frosting
  • 1 8 oz block cream cheese
  • 1 cup powdered sugar
  • 1 lemon, zested
  1. In a large bowl combine the flour, baking powder, baking soda, and ginger.
  2. In a separate bowl combine the eggs, shredded carrot and zucchini, brown sugar, raisins, craisins (if using them), walnuts, oil, honey, and vanilla.
  3. Add the carrot and zucchini mixture to the four mixture and stir until just combined.
  4. Pour the mixture into an ungreased 9" x 13" pan and spread out evenly. Bake for about 25 minutes at 350 degrees Fahrenheit, or until an inserted toothpick comes out clean.
  5. While the mixture is baking, beat together the cream cheese, powdered sugar, and lemon zest on medium speed until fluffy. 
  6. Cool the cake in the pan before spreading the prepared frosting and cutting into individual squares.


Saturday, October 15, 2011

Lemon Ricotta Pancakes


I am so excited to finally be posting a pancake recipe! I must admit that this is not the first time I have made these pancakes, but this is definitely the first that these, or any other pancakes I have made, turned out correctly. The thing is...I'm awful at making pancakes! I have tried several times, mostly over this past summer, and each time I was left with a disappointing mess. Even though the pancakes tasted good I could never quite figure out the technique behind the flipping and therefore my pancakes looked horrible...misshapen and uneven, sometimes burnt or pieced together. Today my flipping issues were finally put behind me and I made a giant stack of beautifully perfect pancakes.

The first time I made these pancakes they tasted delicious so I really wanted to try my hand at them again and after making moussaka earlier in the week I had extra ricotta cheese leftover. In fact, I had exactly the right amount called for in the recipe. I was awakened early this morning by a phone call and couldn't get back to sleep so I decided I would make the pancakes for breakfast for the entire family. I don't know why this time in particular I finally got the flipping technique down, and why it has eluded me in the past. It took me a while to get the pan to exactly the right temperature and time my flips so that I had a beautiful golden color every time.

Once I got my "flipping groove" on I dared myself to pour out two at a time. Previously, I had been working at a slow and steady pace, pouring one pancake at a time in the center of the pan and giving myself plenty of room to flip it over. However I decided that since I was doing such a good job with the one pancake I should at least attempt two. Luckily for me, my flipping skills withstood the little challenge and I continued to make the rest two at a time. At first it took me a little bit off guard as I had to figure out how to best flip one without messing up the other, but once I got the spacing down I was on a roll. Even though I was actually only using one hand to flip, somehow I found it reassuring to hold a spatula in each hand...it gave me a sense of balance. Every time I plated another pancake I let out a little squeal of joy; good thing everyone was still asleep and no one was watching me.

As far as the taste goes, I already knew that the pancakes would be well received by my family because they quite enjoyed them last time. The lemon flavor is really strong because the recipe calls for both the zest and juice of a lemon. Also, the pancakes are extremely light because the eggs are separated and the whites are beaten with sugar before being folded into the rest of the batter. This gives the pancakes a sense of airiness which offsets any graininess that one might think would come from the use of ricotta. I'm so happy that my pancakes finally turned out the way I imagined them to be. Hopefully my newly acquired flipping skills are here to stay and I will be able to post more pancake recipes soon!

Lemon Ricotta Pancakes
Note: This recipe makes about 24 palm-sized pancakes.
  • 1 cup ricotta cheese
  • 1 cup milk
  • 3 large eggs, separated
  • 1 lemon, zested and juiced
  • 1 1/4 cup flour
  • 3 tbsp corn starch
  • 1 tbsp baking powder
  • 1/4 tsp salt
  • 1/4 cup sugar
  1. In a large bowl, combine the ricotta, milk, egg yolks, lemon zest and juice and whisk together.
  2. Add the flour, corn starch, baking powder, and salt and whisk just until the dry ingredients are incorporated.
  3. In a separate bowl, beat the egg whites on medium-low speed until foamy. Increase the speed to medium-high and gradually add the sugar. Continue to beat until soft peaks form.
  4. Fold one third of the egg whites into the lemon ricotta mixture until completely incorporated. Gently fold or whisk in the rest of the egg whites until no more white streaks are present.
  5. Heat a griddle or large skillet over medium heat. Once heated, reduce the temperature to medium low and pour 1/3 cup of batter onto the cooking surface. Allow the pancake to cook until bubbles start to form on the top surface, about 15-20 seconds, then use a large spatula to gently flip the pancake over. Cook the other side until it is light and golden and fully cooked through. Repeat with remaining batter.
Note: You may have to go through a couple of "test" pancakes before you achieve the right temperature on the griddle or skillet. Finished pancakes can be kept warm in the oven at 200 degrees Fahrenheit while the rest are cooking.

Wednesday, October 12, 2011

Apple Pie


Last week I went out for dinner with my oldest childhood friend. Even though we only live two blocks from each other, our busy schedules keep us from seeing each other on a regular basis and we had a great time catching up over some lovely tapas and sangria. For the past month my friend has been living by herself as her parents went to go visit family in Israel. In honor of their return she told me that she wanted to bake something and I volunteered to help. I asked her to pick something to bake and I would research the recipe and send her a list of ingredients to buy. She agreed to the plan and a couple of days later informed me that she wanted to bake apple pie.

I was actually quite excited at her choice because I have never made apple pie before and always wanted to try my hand at this classic baked good. Although I have made galettes in the past, which are basically just a free form rustic pie, I have always wanted to make a traditional pie with a lattice top. Now that I have done it I can honestly say that it's really not that hard to accomplish and it definitely gives the pie a beautiful appearance which everyone admires.

As it happens, this past weekend was a holiday weekend in Canada with everyone receiving Monday off for Thanksgiving. Because my friend was alone my mother invited her to come celebrate Thanksgiving with our family on Sunday. We didn't exactly have a traditional meal with turkey and all of the fix-ins, but we still spent a wonderful afternoon together and that's what really counts. After the meal my friend and I partook in some fall shopping before coming back to the house to bake the pie. It was so much fun to have such an eager student in the kitchen; she carefully watched me each step of the way and listened to my explanations of why I did things a certain way. Generally I would start on something, like making the dough or preparing the filling, and then she would take over.

At the end of the night she took the pie home and the next day she served it to her parents when they arrived. She told me that they loved the pie and I know she was proud of making it for them. It was great for me to see how much she enjoyed herself in the kitchen and that I could teach her about something I love so much.

Apple Pie

For the dough:
Note: This is enough to make one 9" crust. To make the top layer double-up the ingredients.
  • 1 1/4 cups flour
  • 1 tbsp sugar
  • 1/4 tsp salt
  • 1/2 cup (8 tbsp) cold unsalted butter, cut into pieces
  • 3-4 tbsp ice cold water
  1. Combine the flour, sugar, and salt and pulse a couple of times in a food processor. Add the chunks of butter into the processor and pulse until the butter pieces are roughly the size of walnuts. If you don't have a food processor use a pastry cutter or fork and knife to cut the butter into the flour.
  2. Transfer the dough mixture into a bowl and moisten with the water, starting with just a couple of tablespoons at first. Work the mixture until it forms a dough, adding water by the tablespoon only as needed if it feels dry.
  3. Form the dough into a small disk and wrap in plastic wrap. Refrigerate for at least 30 minutes or up to 24 hours before rolling it out.
For the filling:
  • 5-6 large Granny Smith apples (or any other variety), peeled, cored and sliced
  • 1/3 cup sugar
  • 3 tbsp brown sugar
  • 1 tbsp flour
  • 1/2 tsp cinnamon
  • 1 tbsp lemon juice
  • 2 tbsp cold unsalted butter, cut into small chunks
  • 1 egg yolk
To assemble:


  1. Roll out half of the dough (equivalent to one crust) into approximately a 12" round. Transfer to a 9" pie plate and cover with plastic wrap and refrigerate for 30 minutes.
  2. Meanwhile, in a large bowl, combine the apple slices, sugars, flour, cinnamon, and lemon juice. Mix well and set aside.
  3. Once the dough has chilled, pour the apple mixture with its accumulated juices into the bottom pie crust and spread the filling evenly. 
  4. Dot the surface of the apples with the small chunks of cold butter.
  5. Roll out the remaining dough and use a pizza cutter to cut into long strips of equal width. If you want more of a lattice look make the strips thinner. If you want less work, make them thicker.
  6. Lay several strips of dough parallel to each other over the filling. Fold back every other strip to the middle of the pie then lay another strip next to the folded ones, perpendicular to the rest.
  7. Unfold the strips so that they lay over the newly placed perpendicular one. Next, fold back the previously unfolded strips (now underneath the new strip) and lay another perpendicular strip on either side. 
  8. Repeat the process until the lattice is finished. Trim off the excess and crimp the edges. If you have extra dough, you can cut out little shapes and stick them on the sides of the pie.
  9. Add a little water to the egg yolk and brush the egg wash all along the surface and edges of the pie. Bake at 400 degrees Fahrenheit for 50-60 minutes or until the crust is golden brown and the juices are bubbling. If the crust starts to brown too quickly, cover with aluminum foil and continue baking.
  10. Allow the pie to cool for at least 30 minutes before slicing and serving. It pairs well served warm with a scoop of vanilla ice cream on the side.

Monday, October 10, 2011

Baked Chicken Parmesan


Almost a year ago I presented my mom with a birthday gift for the two of us to take a cooking class together. Due to various circumstances, we didn't have a chance to book and attend a class until this past week. We went to the Italian Cooking Class hosted at Meinhardt foods here in Vancouver. The class was so much fun and I had a great time with my mom.

When I told my aunt about our upcoming class she questioned my need and desire to go to such classes, citing my vast skills and noting that my cooking/baking repertoire was already so full. What, she asked me, could I possibly gain from the class when I'm so good at recreating recipes that I come across on my own. I explained to her that although I gather most of my recipes online and try out various new techniques it's nice to be able to see something being done in front of you rather than reading steps or looking at pictures. The interactive element helps to establish the technique and also allows you to ask questions along the way. This cooking class was no different; although the recipes we prepared were quite simple and I could have prepared them on my own, I learned a new way to dice onions and tomatoes quickly and efficiently. Things like that, and the actual fun of attending the class with other food enthusiasts, makes me seek out these experiences and treasure them.

The Chicken Parmesan we made during the class tasted great and the instructor let me take home the extra breading mixture that was left over. My family celebrated Canadian Thanksgiving this weekend by having a nice big lunch together, though not with the traditional turkey. Instead, I prepared my Thai Curry Mussels and Mussels in White Wine and Tomato Broth along with this chicken. It was very well received and tasted just as good as the one we made during the cooking class.

Baked Chicken Parmesan
Note: We didn't actually measure out how much breading we used and the specific amount of herbs but these are the amounts I suspect should be enough.
  • 6-8 boneless, skinless chicken thighs (can also use chicken breasts sliced in half)
  • 2 cups Panko bread crumbs
  • 2-3 tbsp each thyme, parsley, basil (you can pretty much use any herbs you have on hand)
  • 1 lemon, zested
  • 2-3 eggs, lightly beaten
  • 1 1/2 cups Parmesan cheese
  • Salt and pepper
  • Olive oil
  1. Wash and pat down all of the chicken thighs and set aside.
  2. In one bowl, mix together the bread crumbs, herbs, lemon zest, a little salt and pepper, and half of the Parmesan cheese.
  3. In a separate bowl lightly beat the eggs and set next to the first bowl.
  4. Prepare a large baking tray with parchment paper and pour a generous amount of olive oil onto it.
  5. One at a time, dredge the chicken thigh first in the egg mixture and then into the breadcrumb topping, making sure to fully coat both sides. Coat both sides of the chicken with the olive oil from the tray (spread it around a little) and repeat with the remaining pieces. Arrange the pieces evenly on the tray so that they are not touching.
  6. Top the chicken thighs with the remaining Parmesan cheese and put in the oven to bake for 10 minutes at 400 degrees Fahrenheit.
  7. Reduce the temperature to 375 degrees (350 if the thighs are quite thick or using chicken breast) and bake for an additional 25-30 minutes, or until there is no more pink on the inside when sliced through.
  8. Serve the chicken with some fresh lemon wedges or marinara sauce. 
Note: Any extra breading can be sealed in a ziploc back and frozen for up to two months...just make sure to label it and use it only for chicken. Also, the chicken can be reheated the next day in the oven at a high temperature (400 degrees Fahrenheit) for about five minutes.

Friday, September 30, 2011

Rosh Hashanah Apple Cake


It's that time of year again...Shana Tova, or Happy New Year. Last year I made a traditional challah to celebrate the Jewish new year with my family but this year I wanted to do something different. I still wanted to bake something with apples because it is customary to eat apples on Rosh Hashanah and I found a highly rated recipe for an apple cake on allrecipes.com. It was especially appealing to me because it had so many positive reviews and a lot of people commented on how the cake tasted better with age, meaning I could make it a day ahead and serve it the next day knowing it would taste great.

The recipe was quite easy to follow but it was challenging to know how long to bake the cake for because so many of the reviews gave differing opinions. Some commented that the time called for in the recipe was too short, others claimed it was too long and their cake burnt. I think part of the problem was the fact that the cake bakes in a bundt pan and it's very hard to judge when the inside has truly baked through. I used a long wooden kebab skewer as I would a toothpick and that allowed me to poke down all the way through to the bottom of the cake. In the end I actually ended up baking the cake for exactly the time listed in the recipe, though I was watching it like a hawk for the last fifteen minutes making sure I didn't burn it. In fact, for the last ten minutes I covered it in aluminum foil because I could see the top was already done but the skewer was coming out with batter stuck to it every time I tested the cake.

Interestingly enough, I actually wasn't home when my family ate the cake because I had my first clinical shift at the hospital. I had taken some pictures of the cake before I left, but I really wanted to have some pictures of the sliced cake as well and I left that task to my mother. She was quite nervous that she wouldn't be able to capture the cake in a good way that I would like but I assured her that I trusted her photography and food styling skills. Besides, I'm definitely no expert when it comes to food photography and the only reason why I have gotten better at it is because I have a lot more practice now. Although I like to have a good picture, ultimately the food itself and the taste is most important to me; therefore I try my hardest to take a nice shot but in the end I make do with what I have and edit the pictures to look as good as I can given my photographic and editing abilities. I am proud to say that my mother took many wonderful pictures and the one featured above was one that she took.

My family enjoyed the cake and left me some to try when I got home. It had a very strong apple flavor, which is to be expected considering I used four whole apples in the cake, but it was a little too sweet for my taste. I used McIntosh apples because that's what we had on hand but I think that in the future I would prefer to use Grannysmith because I like they way they taste when they're baked better than other types of apples. I noticed that the next day the cake became softer, especially around the bottom where the majority of the apple chunks were concentrated. I'm not sure which texture I liked better but overall I think it was a successful cake. I particularly loved how regal it looked coming out of the bundt pan and I'm going to try and use the bundt pan more often in the future.

Rosh Hashanah Apple Cake
Note: Baking time may vary. Personally, I found 70 minutes to be just right, with the last 10 minutes spent covered, but other reviewers have claimed the time too long or to short. I would start to check on it every 5 minutes around the 45 minute mark in order to make sure it doesn't burn but does get baked through.
  • 3 cups flour
  • 1/2 tsp salt
  • 2 1/2 tsp baking powder
  • 2 cups sugar
  • 1 cup oil (can substitute apple sauce like I did)
  • 4 eggs, lightly beaten
  • 1/4 cup orange juice
  • 1 tsp vanilla
  • 4 apples, peeled, cored, and cut into chunks
  • 2 tsp cinnamon
  • Another picture taken by my mother.
  • 5 tsp sugar
  1. Combine the apple chunks with the cinnamon and sugar and mix well until all of the apples are evenly coated. Set aside.
  2. In a large bowl combine the flour, salt, baking powder, and sugar.
  3. Mix in the oil (or applesauce if using), eggs, orange juice, and vanilla. The batter will be quite thick.
  4. Butter and flour a 10" tube or bundt pan. Alternatively, spray with non-stick cooking spray.
  5. Alternate pouring in the batter and topping with apple chunks. You should have three layers of batter and two layers of apples, starting with the batter. Pour the juice from the apple mixture on top of the last layer of batter and lightly spread around.
  6. Bake at 350 degrees Fahrenheit for 70 minutes. To test the doneness of the cake, poke with a long skewer or use a butter knife to reach the deepest parts. Bake until the skewer or knife comes out clean. 
  7. Allow the cake to cool completely in the pan. To remove, shake the pan back and forth until the cake starts to loosen in the pan then carefully invert it onto a plate. Top with some powdered sugar if desired.

Monday, September 26, 2011

Cookies and Cream Cookies


Last Friday it was my friend's birthday so I decided to bake her some cookies and bring them with me to school. I set out on Thursday evening to bake these cookies and cream cookies which my brother had been asking me to make for quite some time. The cookies are kind of like chocolate chip cookies, except instead of using chocolate chips there are Oreo bits mixed in. Since we don't normally have Oreo cookies at my house I made the special effort to go to the store and buy some, pleasantly surprised to find they were on sale.

Of course no good deed goes unpunished, or at least in my case without some hiccups. As I was preparing the cookies I happened to be on hold with our cable TV provider due to some problems we were having with our receiver. I left the phone on speaker and carried on about my business, occasionally pausing to listen closely and see if the "on hold music" had stopped without my noticing. I had already been on hold for an hour and a half by the time I put the cookies in the oven. As with most cookies, these ones do not take a long time to bake and I had to rotate the trays halfway through. And that's when it happened...I opened the oven door only to have the handle fall off on one side. At the same time I could tell that I had finally been taken off hold as the phone started eliciting a person's voice saying "Hello, hello?". Frantically I started to yell at the phone while still holding the oven door, trying to make sure that the customer service agent didn't hang up on me and that the oven handle didn't fall off entirely. Acting fast I yelled at my brother to fetch my mom so that she could take over with the oven and I could attend to the phone.

In the end, my mother fixed the oven door and I managed to schedule and appointment for a service technician to come next week and check out our receiver. Somehow, despite the craziness, I still managed to bake the cookies and didn't have to start the process over with a new batch. I'm not going to lie...the cookies weren't the best I've ever made. The taste of the Oreos was quite prominent but other than that they were just regular cookies. However the conditions under which they were prepared were quite amusing and entertaining. I think that a year ago, maybe even a few months ago, I would have found the situation completely frustrating but now I can recognize how hilarious the situation was and just smile and laugh as I recount the story.

Cookies and Cream Cookies
Makes about 30 cookies.
  • 1/2 cup (8 tbsp) butter, room temperature
  • 6 tbsp sugar
  • 6 tbsp brown sugar
  • 1 large egg
  • 1 tsp vanilla
  • 1 1/4 cup flour
  • 1/2 tsp baking soda
  • 1/4 tsp salt
  • 12 Oreos, broken into small pieces
  1. Cream together the butter and sugars until light and fluffy using a mixer on medium speed.
  2. Beat in the egg and vanilla and mix until incorporated.
  3. In a separate bowl, whisk together the flour, baking soda, and salt.
  4. Reduce the mixer speed to low and gradually add the dry ingredients to the wet until just combined.
  5. Gently fold in the Oreo pieces. Shape the dough into small balls, about 1-2" in diameter and place on a ungreased baking tray spaced 1-2" apart.
  6. Bake at 350 degrees Fahrenheit for 8-10 minutes until the edges just start to brown. If using multiple baking trays, rotate halfway through to ensure even baking. Let cool for a couple of minutes on the tray before transferring to a cooling rack to cool completely.