Showing posts with label soup. Show all posts

Thursday, May 21, 2015

Curried Cauliflower Soup


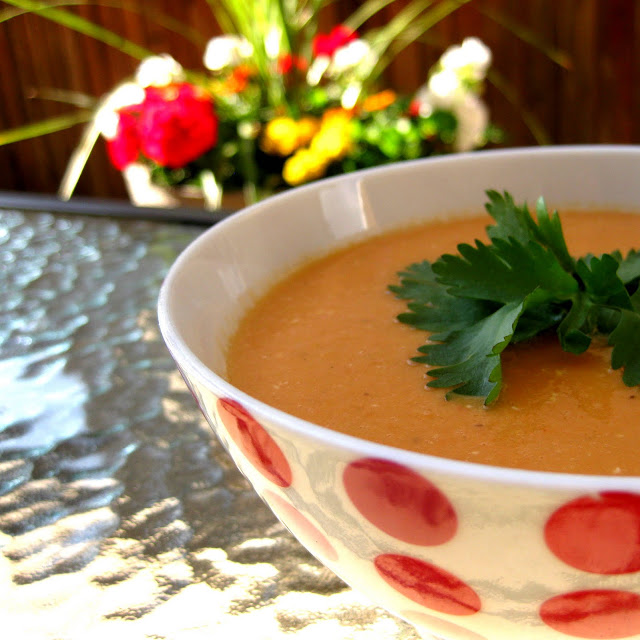
Over a month ago I made this delicious curried cauliflower soup, mostly because I had some leftover coconut milk I wanted to use up. The soup was very popular with my family but I never blogged about it because at the time I didn't think it was anything special so I never bothered to take a picture of it. However when my mom recently came back from her vacation she asked me to make it again and this time I decided it was worth writing about.

Even though I have made a similar roasted cauliflower soup in the past, this one turned out better. I think that one of the reasons why my family enjoyed this soup was because it was smooth but still had chunks in it. That is because after roasting the cauliflower, I set aside a quarter of it to add to the soup later. When I finished making the soup, I pureed it using my hand immersion blender, then added back the pieces. Personally I prefer chunky soups over completely creamy ones because I like to have something to bite into and chew. This met my expectations while still delivering an overall creamy texture thanks to the coconut milk.

Curried Cauliflower Soup
  • 1 head cauliflower, florets cut into bite size pieces
  • 1 large onion, diced
  • 3-4 cloves garlic, finely chopped
  • 1 tsp cumin
  • 1 tsp coriander
  • 1 tsp turmeric
  • 1 tbsp red curry paste
  • 6 cups chicken or vegetable stock
  • 1 can coconut milk
  • 1 lemon, juiced
  • Olive oil
  • Salt and pepper
  1. Toss the cauliflower pieces with some olive oil, salt and pepper, and the cumin, coriander, and turmeric. Arrange in a flat layer on a baking tray and roast in the oven for about 20 minutes at 400 degrees Fahrenheit. Stir about halfway through to ensure even baking and keep in the oven until the cauliflower starts to soften and becomes golden. 
  2. While the cauliflower is roasting, saute the chopped onion in a large pot over medium heat with some olive oil until the pieces start to become translucent, about 3-5 minutes. Add the chopped garlic and continue to saute for about 30 seconds, or until fragrant.
  3. Mix in the tablespoon of red curry paste then add ¾ of the roasted cauliflower pieces. 
  4. Pour the stock into the pot and bring to a boil. Once boiling, reduce the heat to low and simmer the soup, covered, for 30 minutes or until the cauliflower starts to easily break down. Stir occasionally.
  5. Add the coconut milk and stir through. Puree the soup using a hand blender or transfer in batches to a blender and return to the pot. 
  6. Add the remaining cauliflower pieces to the soup and season to taste with the lemon juice, salt, and pepper. 

Thursday, February 28, 2013

Malaysian Laksa


A couple of weeks ago I attempted to make laksa, a popular Malaysian soup, after watching an episode of Jamie Oliver's 15 minute meals. Despite the delicious flavor, the soup took me longer than 15 minutes to make and did not actually turn out as soup but rather more like a shrimp and noodle dish.

After that experience, I was determined to make laksa and decided to look up some recipes. I soon realized that most of the recipes involved making a spice paste that was combined with a broth, typically seafood though it could be substituted for chicken or vegetable, and then preparing the rest of the ingredients separately. In the end it kind of became a "build your own adventure" type of soup with the garnishes served alongside the spiced broth.

I wasn't able to find the shrimp paste typically used as part of the spice paste so I combined elements from various recipes to create my own spice blend. I have to admit that I'm quite proud of the paste and resulting broth that I made. It was milder than what I usually make but this also made it more light and gentle tasting. Served alongside some chili garlic sauce it was perfect because each person could make it as spicy as they wanted.

In the past, I have had difficulties with the rice noodles absorbing too much liquid and the result no longer resembles a soup. This time I followed the packaged instructions and cooked the noodles separately. The only problem was that I found that the rice noodles did not absorb much of the flavor of the broth when it was simply ladled over top, rather than cooked in it. After consulting with my mom we collectively decided to add the noodles in their entirety to the broth and let it sit over night. As we suspected, the noodles ended up absorbing the liquid but at the same time became much more flavorful and delicious. Once again the laksa stopped being a soup but I was okay with that because it tasted good and that's what matters the most.

Malaysian Laksa
Note: These directions reflect the original way I made the soup. If desired, the noodles can be cooked directly in the broth but the result will most likely not be soup-like in consistency.
  • 2 cloves garlic
  • 1 thumb-sized piece of ginger
  • 1 tsp turmeric
  • 2-3 green onions
  • 1 tsp peanut butter
  • 1 tbsp chopped lemon grass
  • 1 tbsp fish or oyster sauce
  • 1 tbsp sesame oil
  • 1 tbsp chili garlic sauce
  • 4 dried Kaffir lime leaves
  • ½ bunch cilantro
  • 6 cups stock (seafood, chicken, or vegetable)
  • 1 400 mL can coconut milk
  • 300 g dried vermicelli rice noodles
  • Juice of 1 lime
  • Salt
  • Optional add-ins/garnishes: shrimp, chicken, bean sprouts, cilantro, lime wedges, chili garlic sauce
  1. In the bowl of a food processor combine the garlic, ginger, turmeric, onions, peanut butter, lemon grass, fish sauce, sesame oil, chili garlic sauce, kaffir lime leaves, and cilantro. Blend until completely pureed and a paste forms.
  2. In a large pot heat the stock. Once boiling, add the paste to the pot and mix well.
  3. Add the coconut milk to the pot and then the lime juice. Adjust seasoning if necessary with salt and more lime juice or fish sauce.
  4. Meanwhile, prepare the rice noodles by allowing them to soak for 8-10 minutes in hot water. Drain the water and set the noodles aside.
  5. To assemble the soup place a handful of noodles into a small bowl and top with desired add-ins and garnishes. Ladle soup broth over top and enjoy.

Saturday, January 12, 2013

Creamy Roasted Cauliflower and Leek Soup

 
I haven't made any new soups for a long time and I suddenly got the urge to do so last week. Winter time tends to make people crave warm and comforting flavors and I thought to tap into one of my favorite techniques, roasting vegetables, and incorporate it in a soup. I knew that cauliflower would taste soft and sweet after a simple roast in the oven and I thought it would pair well with leeks.

Originally my plan had been to season the soup with oregano and thyme but then my dad convinced me to use cumin, coriander, chili powder, and turmeric. I wish I had stuck to my first instincts because, although delicious, the delicate flavor of the cauliflower was lost to the overpowering spices. Ironically enough, he didn't actually try the soup because by the time he got around to it the rest of the family had eaten it up.

Interestingly, the soup inspired a conversation amongst my family members about creamy vs. chunky soups. My mom, though a lover of many of my pureed soups such as roasted tomato and pepper and red lentil tomato and coconut, prefers chunkier soups. She claims she likes to have pieces that she can see and combine on her soup for the perfect bite. My aunt, on the other hand, said she adores creamy soups and was intrigued by my latest creation. Personally, I think that I too like my soups on the chunky side but occasionally I enjoy eating a perfectly smooth soup as well. Next time I will try making the soup based on my initial plan with the oregano and thyme and leave it chunky. Still, I can't deny I enjoyed this soup as well and will probably repeat it sometime in the future.

Roasted Cauliflower and Leek Soup
  • 2 leeks (white parts only), chopped
  • 1 carrot, chopped
  • 2 stalks celery, chopped
  • 1 head cauliflower, florets cut into bite size pieces
  • 3-4 cloves garlic
  • 1½ tsp cumin
  • 1½ tsp coriander
  • 1 tsp chili powder
  • 1 tsp turmeric
  • Optional: ¼-½ tsp chili pepper flakes
  • 6 cups chicken or vegetable stock
  • ½ cup sour cream
  • 1 lemon, juiced
  • Olive oil
  • Salt and pepper
  1. Toss the cauliflower pieces and garlic cloves with some olive oil and salt and pepper. Arrange in a flat layer on a baking tray and roast in the oven for about 20 minutes at 400 degrees Fahrenheit. Stir about halfway through to ensure even baking and keep in the oven until the cauliflower starts to soften and becomes golden. 
  2. While the cauliflower is roast9ng, saute the leeks in a large pot over medium heat with some olive oil until they start to become translucent, about 3-5 minutes.
  3. Add the chopped carrot and celery to the pot and continue to saute until the vegetables soften, another 3-5 minutes.
  4. Add the cumin, coriander, chili powder, turmeric, and chili pepper flakes (if using) to the pot and mix through. 
  5. Once the cauliflower and garlic has finished roasting add it to the pot and mix to incorporate.
  6. Pour the stock into the pot and bring to a boil. Once boiling, reduce the heat to low and simmer the soup, covered, for 10 minutes or until the cauliflower starts to easily break down. Stir occasionally.
  7. Stir in the sour cream then using a hand blender or by transferring the soup in batches, puree the soup and return to the pot. Season to taste with the lemon juice, salt, and pepper.

Wednesday, August 22, 2012

Roasted Corn and Tomato Soup


This week I am back in the kitchen full swing and it feels great! Even before I went on vacation I had a stack of recipes lined up to try and in my last two weeks off of school I intend to make as many as I can. Although some of them have been sitting around for a while others, such as the one for this soup, I came across more recently but decided to try out first.

The reason why I wanted to make this soup was because corn is very much in season right now and I haven't made soup for a long time. The recipe also looked super simple and I was able to whip up the soup in slightly over half an hour. Once again I used my hand blender, given to me as a birthday gift from my parents, and I loved how it transformed both the soup and the cook time into magic. Interestingly enough, because the corn pieces were so small, it actually made the soup kind of chunky because not all of the corn was caught in the blade. I think this actually added a nice textural component to the soup rather than it being a puree.

To separate the corn from the husks I used a cool trick that my brother showed me on the internet. The idea is to place the corn into the center of a bundt pan, where the hole is, and then cut away at the sides. The pan acts as a bowl and collects the kernels as they fall. Of course if you don't own a bundt pan the same effect can be achieved by placing a small bowl upside down inside of a large bowl and resting the corn on top of the surface of the smaller bowl.

The soup itself tasted quite sweet, obviously a result of the corn being sweet. The flavor of the corn was definitely prominent and I enjoyed it, as did my mom and brother. A couple of days prior I had actually tried a recipe for something called "baked cous cous poppers". The "poppers" didn't turn out as well as I would have liked; they were slightly bland. However my mom and I came up with the idea to put them in the soup and they acted as little meatballs, only made of cous cous instead. It was great because the soup added flavor to the poppers while the poppers added texture to the soup...a win-win combination.

Roasted Corn and Tomato Soup
  • 4 cups corn (about 6 cobs)
  • 8 roma tomatoes, halved and insides hulled out
  • 4 bell peppers, halved and de-seeded
  • 6 cloves garlic
  • 1 large onion, chopped
  • 6 cups (2 L) chicken or vegetable stock
  • 1 tsp smoked paprika
  • 1 tsp chili powder
  • Salt and pepper to taste
  • Olive oil
  • Lemon
  • Optional: red chili flakes
  1. Lightly drizzle the corn, tomatoes, peppers, and garlic with olive oil and sprinkle with some salt. Toss to coat evenly the spread in a flat and even layer across a large baking pan covered with aluminum foil or parchment paper.
  2. Bake at 400 degrees Fahrenheit for about 20 minutes or until the tomatoes become wrinkled. Remove from the oven and peel away the skins from the tomatoes. 
  3. Meanwhile, in a large pot saute the onion over medium heat for 3-4 minutes, or until it becomes translucent.
  4. Once the vegetables have roasted, add them and all their juices to the pot. Add the smoked paprika, chili powder, and red chili flakes (if using) and mix well to incorporate.
  5. Add the stock to the pot and bring to a boil. Once boiling, reduce the heat to low and allow the soup to simmer for 15 minutes.
  6. Use an immersion blender or transfer the soup in batches to a stand blender to puree until smooth (though chunks may remain). Season with salt and pepper and some lemon juice if desired.

Monday, January 9, 2012

Moroccan Chickpea Stew


Back in December, my friend and I took a trip to Whistler to commemorate the end of our first term of nursing school. Thanks to an amazing deal I found using a coupon website, livingsocial.com, we were able stay in a wonderful resort with an outdoor pool and hot tub and complimentary DVD rentals. I had a great time skiing with my friend during the day and then walking around the village in the evening.

On our last day we had already checked out of the resort and walked around while waiting for our bus back to Vancouver. For lunch, we stopped by a small cafe at the base of the mountains and each ordered a soup and sandwich. I particularly enjoyed the Moroccan lentil soup that I ordered and decided to recreate it once I got home. Due to other things going on, I wasn't able to make the soup until this past weekend, but I definitely think the results were worth the wait.

Originally I had researched recipes for Moroccan soups and came across one from Emril Lagasse for Harira, a traditional Moroccan chickpea stew with chicken and lentils. I read through both the recipe and the reviews and decided to give it a try, but in my own way. I decided to omit the chicken and rice called for in the original recipe because I felt it would make the stew to heavy and I wanted something vegetarian. I also added a few more vegetables of my own choosing to the stew and used canned chickpeas instead of dried in order to speed up the cooking time. Basically, the recipe provided a good base and showed me which spices to use, but the rest I took creative liberties with.

In the end, I was quite pleased with how the stew turned out. It definitely had a Moroccan/Lebanese taste to it which I figured out comes from the turmeric. I had always found this taste so appealing in Mediterranean cuisine but I never knew its source; now, though, I think I will try to use it in more of my dishes. My mother also recognized the scent and taste when she tried the stew and she said that she enjoyed it as well. Overall the stew was a success; I made something yummy and I discovered a new spice to play around with.

Moroccan Chickpea Stew
  • 1 large onion, chopped
  • 2-3 stalks celery, chopped
  • 2-3 carrots, chopped
  • 1 28 oz can crushed tomatoes
  • 1 19 oz can chickpeas, rinsed and drained
  • 2 cups green lentils, rinsed and drained
  • 6 cups (2 L) chicken or vegetable stock
  • 2 tsp ground ginger
  • 2 tsp ground turmeric
  • 1 tsp ground cinnamon
  • 1 lemon, juiced
  • 1/2 cup (about 1/2 bunch) cilantro, chopped
  • Salt and pepper
  • Olive oil
  • Optional: 1/4-1/2 tsp red chili flakes
  1. In a large pot, saute the onion 3-4 minutes over medium heat until the onion starts to become translucent. 
  2. Add the chopped celery and carrots and saute for another 5-7 minutes, or until they become soft.
  3. Stir in the ginger, turmeric, and cinnamon to the vegetables and continue to cook for another minute.
  4. Add the tomatoes and their juices, as well as the chili flakes if using, and mix well to incorporate everything.
  5. Add the lentils and chicken stock and mix to incorporate. Bring the stew to a boil then cover and reduce the heat to a simmer.
  6. Continue to cook, stirring occasionally, for 45 minutes. At this point, mix in the chickpeas and test the lentils for softness. If still crunchy, replace the lid and continue to cook for another 15 minutes, or until they soften.
  7. Once the lentils are cooked, add the lemon juice and chopped cilantro. Season with salt and pepper to taste.

Friday, October 28, 2011

Carrot Ginger Soup


A while ago as I was doing my nightly browsing of tastespotting.com I decided to search for soup recipes and found this simple sounding carrot soup. It required few ingredients, little effort, and did not require too long to cook in terms of soup. I made a mental note to save the recipe and make the soup at some point but I never quite got around to it. Then, a couple of days ago, I found myself pondering over what to do with extra chicken stock I had left over and suddenly I recalled this recipe and my desire to try it out. As I looked in my fridge I saw that I had all the right ingredients, which isn't hard considering there are only five excluding seasoning and oil, so I set about cooking the soup.

The original recipe calls for using fresh ginger, which unfortunately was the one ingredient I was missing, but I did have ginger powder in my pantry so I decided to use that instead. Personally, I'm not the biggest fan of ginger so I was reluctant to use a lot in the soup. At first I was worried that I didn't properly convert the amount of fresh ginger into powdered because every time I opened the pot lid to stir the soup the smell of ginger was so overwhelming. However once the soup was finished cooking and pureed the ginger became a nice overtone and gave the soup a gentle spice.

When I finished the soup and served it to my brother I said to him "I don't mean to toot my own horn, but damn that's a good soup I just made". He tried the soup and he replied back that it was, indeed, "horn-tootin' good". The next day I brought it with me for lunch and a couple of my friends had a taste, each of them quite enjoying the soup. My mom, also a ginger skeptic, loved the soup as well and when I brought over a friend for dinner she liked it too. The soup was much more delicious and successful than I could have imagined and I don't think it will be long before I make it again.

Carrot Ginger Soup
  • 1 large onion, chopped
  • 4 cloves garlic, diced fine
  • 2 lbs carrots, peeled and roughly chopped
  • 6 cups chicken or vegetable stock
  • 2 tbsp fresh ginger or 2 tsp powdered
  • 1 cup heavy cream or milk
  • Salt and pepper
  • Olive oil
  1. Heat the olive oil in a large pot over high heat then add the chopped onions. Cook until translucent, about 3-5 minutes, stirring occasionally. 
  2. Add the garlic and cook for another minute. 
  3. Add the carrots and ginger and reduce the heat to medium. Cook for about 5-8 minutes or until the carrots start to "sweat".
  4. Pour in the stock and bring the soup to a boil. Reduce the heat to low and simmer, with the pot covered, for about 40 minutes until the carrots become tender.
  5. Transfer the soup to a blender in batches and puree until smooth.
  6. Return the soup to the pot and add the cream or milk. Season with salt and pepper and bring the soup back up to temperature.

Friday, August 19, 2011

Gazpacho Shooters


I've always enjoyed the idea of a gazpacho because really it's like salad in the form of a soup. Although a traditional gazpacho is thickened with white bread, I personally have never made it that way and I feel it adds unnecessary calories without flavor. Seeing as we recently had a lot of tomatoes in our kitchen and my brother just had his wisdom teeth removed, I thought to make this soup for him.

In the past I have made this soup using chicken stock and then refrigerating it however this time I decided to make a completely "raw" version because my brother is trying to more of a raw food diet these days. What this means is that he tries to eat with the majority of his diet consisting of uncooked, unprocessed, and mostly organic foods. So rather than cook some chicken stock and use it as the base of my soup, I blanched a lot of tomatoes, peeled their skins, and then blended them up. The rest of the ingredients I pulsed a few times in the food processor, just until they were very small pieces but still a little chunky, and then added to my tomato juice. I seasoned the soup and then let the flavors meld together for a couple of hours in the fridge.

I have to say that personally I really enjoyed this new version of gazpacho that I made. In general I love the pure taste of tomatoes and because it made up the base of the soup I thought it was heavenly. I also realized that this soup would make a cute little appetizer for a summer barbeque if served in a shot glass. It has a nice acidic note which comes from the red wine vinegar, as well as a little bit of a zesty punch from the red onion and garlic. Best of all, the seasonings and mix-ins can be adjusted to anyone's taste. As for my brother, he loved the flavor but I ended up having to blend his soup even more to give it a puree consistency because it was too difficult for him to eat the small chunks so soon after his surgery.

Gazpacho Shooters
  • 10 large tomatoes
  • 1 red bell pepper
  • 1 medium-sized English cucumber
  • 1/4-1/2 red onion 
  • 2-3 cloves garlic
  • 1/4 cup red wine vinegar
  • Salt and pepper to taste
  • Optional: red chili flakes
  1. Score an X on the bottom of each tomato and set aside. 
  2. Bring a large pot of water to boil. Once boiling, lower each tomato into the water so that it is completely submerged and keep it there for about 30 seconds, or until the skin on the bottom starts to curl up.
  3. Remove the tomatoes from the water and set aside to cool for 1-2 minutes before gently peeling the skins off. Quarter the tomatoes and puree, including the pulp, until it becomes homogenous and a juice consistency.
  4. Meanwhile, roughly chop the remaining vegetables and then put into the food processor. Pulse a few times until the vegetables are all roughly the same size and small pieces, but still chunky.
  5. Add the chopped vegetables to the tomato juice and then add the red wine vinegar and chili flakes, if using. Season with some salt and pepper and then cover and let sit in the refrigerator for at least an hour. Don't add too much because it will further develop flavor while it is in the fridge.
  6. Prior to serving, taste to see if any further vinegar or salt and pepper is needed.

Thursday, July 7, 2011

Red Lentil, Tomato, and Coconut Soup


I find it amazing how easily the weather can change on a dime. Just this morning I looked out the window and could see the clouds scattered all over the sky, bringing intermittent showers all day. However at about 4 o'clock the clouds disappeared and the sun came out in full force. Then in the evening the clouds returned and the rain came with them. Luckily we were having dinner during the brief sunny period and I managed to snap a nice photo of the soup that I made.

The inspiration for the soup came from my family's new found love of coconut milk, especially my mom. After my success with the Thai Tom Kah Gai Soup I wanted to try using the coconut milk again in another soup. Once again, tastespotting.com was my starting point and I browsed through many coconutty recipes before settling on one using red lentils. Although I didn't actually follow the recipe and used my own spices I liked the idea of using red lentils because they're quick and easy to cook.

When I tasted the soup I enjoyed it but I couldn't easily detect the coconut flavor over that of the lentils. The coconut milk added a certain creaminess but to me it just tasted like a yummy lentil soup. My mom, however, said that she could definitely taste the coconut and it added what she refers to as "Thai style" to the soup. I guess her palette is more refined than my own and she can detect subtleties in flavor. Even though I couldn't taste the coconut I still loved the soup and the rest of the family seemed to appreciate it as well.

Red Lentil, Tomato, and Coconut Soup
  • 1 medium onion, chopped
  • 2-3 cloves garlic, minced
  • 1 tsp ground cumin
  • 1 tsp ground coriander
  • 1 28 oz can crushed tomatoes
  • 1 12 oz (400 mL) can coconut milk
  • 6 cups (2 L) chicken or vegetable stock
  • 2 cups red lentils, rinsed and drained
  • 1 lemon
  • Olive oil
  • Salt and pepper to taste
  • Optional: 1/4-1/2 tsp red chili flakes
  1. In a large pot, saute the onion and garlic for 3-4 minutes over medium heat until the onion starts to become translucent.
  2. Add the ground cumin, coriander, and chili flakes, if using, and stir through.
  3. Add the tomatoes with their juices, coconut milk, stock, and lentils and bring the soup to a boil.
  4. Once boiling, reduce the heat to a simmer and cook for about 25-30 minutes until the lentils are soft and mushy. Keep the pot partially covered and stir the soup occasionally.
  5. Using a blender, puree the soup in batches then return to the pot. Add some lemon juice and season with salt and pepper to your liking.

Thursday, June 23, 2011

Tom Kah Gai


After my previous success with the thai curry mussels, I decided to challenge myself and recreate one of my favorite Thai soups: Tom Kah Gai, also known as chicken and coconut soup. The subtle flavors of lemongrass and ginger complement the coconut and red curry paste. I always love to order the soup whenever I go to Thai restaurants and I was encouraged by my family to try making it at home.

Traditionally, the soup actually calls for galanga instead of ginger and kaffir lime leaves however, despite living in an extremely Asian influenced city, I had difficulty finding all of the ingredients so I substituted fresh ginger root and lime zest instead. I don't think my soup suffered because of it and I definitely did not have the energy to go searching the city for two ingredients.

The actual preparation of the soup was not at all difficult and the whole thing was ready within half an hour. Personally, I found the hardest part to be properly cleaning and preparing the unfamiliar ingredients before tossing them into the soup. Luckily I was wise enough to ask the shop clerks how to handle the lemongrass and ginger and was very grateful to them for their explanations, including how big to cut the pieces.

Once I made the soup the whole family was eager to try it and I was curious to see if they thought it actually tasted like the real thing. The verdict: total success! Apart from my little brother, for whom the soup was too spicy, everyone had seconds and the soup was completely consumed down to the very last drop. Funny enough, my older brother did not see one of the Thai bird chiles floating around in the broth and he ate it whole, seeds and everything. My mom claimed she could see the steam coming out of his ears as we sat there and watched him turn bright red and start sweating. Fortunately he ate some watermelon and that seemed to help cool off the heat and he was able to resume eating the soup. At the end of the night, I was quite pleased with myself not only for making the soup but also for having the confidence to venture into unknown territory. Who knows what else I can do now...I guess only time will tell.

Tom Kah Gai
  • 1 stalk lemongrass
  • 1 medium onion, chopped finely
  • 2 cloves garlic, minced
  • 2 tbsp vegetable or olive oil
  • 1 tbsp Thai red curry paste
  • 6 slices fresh ginger, cut 1/4" thick
  • 6 Thai bird chiles
  • 2 limes, juiced + zest of one lime
  • 4 cups chicken stock
  • 1 400 mL can coconut milk
  • 2 skinless chicken breasts, cut into chunks
  • 2 cups oyster mushrooms, stems removed and caps quartered
  • 2 tbsp fish sauce
  1. Prepare the lemongrass by peeling the outermost layer and cutting the stalk into 2" long pieces. Whack the pieces with the flat side of the knife to crush them slightly.
  2. Peel the ginger and cut into disks about 1/4" thick. For a hotter tasting soup, cut up the Thai bird chiles, otherwise simply cut a slit down the side of each one.
  3. Heat the oil in a large pot over medium-high heat until hot then add the chopped onions. Saute until the onions are translucent, about 2-3 minutes, then add in the garlic and saute for one more minute.
  4. Add the lemongrass, curry paste, ginger, lime zest, and Thai bird chiles and continue to cook over medium heat for another 2-3 minutes.
  5. Add the chicken stock and bring the broth to a boil then reduce the heat to low and continue to simmer for 15 minutes.
  6. Add the coconut milk, chicken pieces, and mushroom caps and continue to cook for another five minutes or until the chicken is just cooked through.
  7. Add the lime juice and fish sauce and stir through. You might find that after tasting the soup it could use a little bit more lime juice or fish sauce, it depends on your own preferences.
  8. Garnish with some chopped cilantro and green onions.

Wednesday, May 18, 2011

Chicken Tortilla Soup


This past week has been especially difficult for my family and me as we suffered the loss of my grandfather. I know I speak for my family when I write that we truly appreciate all of the heartfelt support and compassion from everyone around us as go through this time. Despite this sadness, I know my grandpa would have wanted us to continue to enjoy our lives and live them to the fullest. Personally, these sentiments encourage me because I saw how much my grandfather liked and appreciated my food and upheld my passion for cooking and baking.

I had been wanting to make chicken tortilla soup for months but for several reasons I hadn't been able to find the time. Finally I researched some recipes and gauged a basic understanding of the ingredients I needed. Unfortunately, most of the recipes called for specialty Mexican ingredients and I had no idea where to get them. Instead I went to the Mexican aisle of my local grocery store and stared at all of the items until I found something I thought to be suitable, canned chipotle peppers.

Once I started to make the soup, I decided to combine the canned peppers with a can of plum tomatoes in the food processor and then add it as part of the liquid component of the soup. Although the peppers were spicy, I thought that the large can of plum tomatoes would "outweigh" the spiciness of the peppers....I was wrong, really, really wrong. I tried a little bit and my mouth was on fire. Apparently I had inadvertently created a spicy salsa rather than a nice, tomato based sauce. Luckily I had another can of tomatoes and added those to the soup with a couple of spoonfuls of my salsa mixture.

In the end, I was extremely pleased with the result. My soup actually tasted like an authentic Mexican-style soup and everyone in the family loved it. I served it alongside some avocado slices, corn tortilla chips, and sour cream. I also served the salsa which allowed each person the option of making their portion a little spicier if they wanted. My brother especially liked the salsa and saved the rest in a container now sitting in our fridge.

Chicken Tortilla Soup
Note: I left the chipotle peppers out of this recipe because of the spice factor. Instead, I think one or two small diced jalapeno peppers would provide enough spice and authentic Mexican flavor without going overboard.
  • 1 large onion, chopped
  • 4-5 garlic cloves, finely chopped
  • 2 bell peppers, chopped (I used one green and one yellow)
  • 1-2 jalapeno peppers, finely chopped
  • 1 28 oz. can plum or diced tomatoes
  • 1 12 oz. can corn kernels
  • 2 tsp cumin
  • 2 tsp chili powder
  • 3 cooked chicken breasts, shredded
  • Corn tortilla chips
  • 6 cups (2 L) chicken stock
  • Olive oil
  • Salt and pepper to taste
  1. In a large pot, heat some olive oil over high heat then add the onion, garlic, and bell peppers. Reduce the heat to medium and saute the vegetables for 5-7 minutes or until they become soft.
  2. Stir in the cumin and chili powder to the vegetables and continue to cook for another minute.
  3. Add the chicken stock and tomatoes, with all their juices, along with the diced jalapeno peppers and mix thoroughly. Bring the mixture to a boil then reduce the heat and continue to simmer for 15 minutes.
  4. Add the shredded chicken and a handful of tortilla chips and stir well to incorporate. Continue to simmer for 15-20 minutes. stirring occasionally to help breakdown the tortilla chips. 
  5. In the last 5 minutes, add the canned corn kernels to the soup and season with salt and pepper. Serve alongside garnishes such as avocado, cilantro, sour cream, and tortilla chips.

Wednesday, April 13, 2011

Beef Chili


A couple of years ago, before I developed my passion for cooking and baking, I had an idea that I wanted to make chili. I don't quite remember what had inspired this...a sudden craving I guess...but my mom agreed to make chili if I provided her with a recipe. Obviously back then I did not browse food blogs on a regular basis so I simply typed "chili" into Google and clicked on the first recipe that popped up and sounded relatively easy. We made the chili later that week and it was a hit; better yet my cravings were satisfied and I got to spend some quality time in the kitchen with my mom.

Since then my mom has made her own adjustments to that basic recipe from years ago and I love her chili even more. A week ago my mom asked me to prepare the chili for dinner since I had the time and we had all the ingredients. The funny thing is that I honestly felt a little unsure and scared. Although I had prepared the original chili with my mom it had been a long time ago and she had since made even more delicious versions. I was a little intimidated because I loved her chili so much and was afraid mine wouldn't stand up.

I set forth on cooking the chili and was pleased when the family gobbled it up, just like they would my mom's. She said that she had no doubts I could create a chili that would probably be even better than hers. I assured her that could never be the case because her chili had her heart in it...I swear you could taste the love in every spoonful.

Although I used ground beef and red kidney beans for my chili, I've discovered that this recipe is quite versatile and lends itself to plenty of add-ins or substitutions. For example, the original recipe I got from the internet years ago called for ground turkey and white beans. Also, my mom tends to add vegetables such as eggplant or zucchini if we have it on hand. The recipe below is really just the bare bones; it can be used as a starting point for more robust chilis or it can be made as is in basic form. Either way, it makes for a nice and comforting soup that can warm you up on a cold day.

Beef Chili
  • 2 lbs. ground beef (can use leaner meat instead)
  • 1 large onion, chopped
  • 2 28 oz. cans diced tomatoes (I used plum tomatoes and squished them by hand)
  • 2 14 oz. cans red kidney beans (can use white instead)
  • 1 cup water
  • 2 tbsp olive oil
  • 3 tbsp chili powder
  • 2 tbsp ground cumin
  • Salt and Pepper to taste
  • Optional: 1 cup diced eggplant or zucchini 
  1. In a large pot, heat the oil on medium-high until hot. Add the ground beef and cook for 6-8 minutes or until no pink is visible.
  2. Add the onion and continue to cook for another 3-4 minutes. Stir in the chili powder and cumin and then cook for an additional minute.
  3. Drain and rinse the beans and add to the pot. Also add the tomatoes and their juices, water, and any other additions you choose.
  4. Heat to boiling on high then reduce heat to medium and continue to cook uncovered for 10 minutes, stirring occasionally. Season with salt and pepper.
Note: You may find at the end that you want a little more flavor; in that case add about one more teaspoon of cumin and chili powder.

Saturday, February 19, 2011

Farmer's Market Soup


I'm calling this farmer's market soup...really it's just a soup with a bunch of vegetables and barley. Although I may not have gone to a farmer's market to get all of my ingredients, more like the local grocery store, this is the type of soup I imagine one could make out of all the fresh seasonal ingredients currently available.

I especially enjoyed the barley in the soup because it gave the soup a lovely texture and something to really chew on. I admit I may have gone a little spice crazy...I liberally sprinkled red chili pepper flakes and may have added too much...but I actually liked the extra kick. For those who just want a hearty soup without the spice skip the flakes and you're good to go.

Unfortunately, due to the fact that I was using random ingredients from the fridge and pantry I don't exactly remember the proportions for everything but by now I've made enough soups that I've figured out the basic recipe. Each soup has five to six steps, depending on whether you leave the soup chunky or want it to be smooth in the end.
  1. Saute the onions and shallots (whichever you're using) for 3-5 minutes until translucent. Add the chopped/minced garlic and continue to saute until everything becomes fragrant, about 1 more minute.
  2. Add all of the hard chopped vegetables. This includes carrots, celery, pepper....things that are crunchy. Saute for about 5 minutes and mix it all around.
  3. Add all of the soft vegetables. This includes mushrooms, zucchini, tomatoes, and eggplant. At this point, also add any spices including the salt and pepper. Depending on the type of flavor you want this can include a variety of seasonings but generally I like to pair thyme with oregano and dill or cumin with coriander. If you want an extra kick, add some red chili pepper flakes (just don't go crazy like I did). Mix everything well and saute until you see the second set of vegetables start to brown and soften.
  4. Add your grain of choice. In this farmer's market soup, I used barley but you can also use lentils, split peas, or various other soup-type grains. Cover the ingredients with stock. This can be chicken stock, beef stock, vegetable stock or even water. Generally, most of my recipes call for at least 2 L of stock (6 cups). You may have to add additional liquid if it starts to boil off, but make sure the liquid always covers the rest of the ingredients.
  5. Cover the pot with a lid and reduce the heat to a gentle simmer. Depending on which grain you're using, the soup will have to simmer for anywhere from 30 minutes to an hour. Usually the package will have proper cooking instructions. For example, red lentils are soft and take only half an hour. Green lentils and harder and take 45 minutes to an hour. Barley also takes about 40 minutes. If you want to add some potatoes (as I did in this farmer's market soup) cut them up into chunks and add about 10-15 minutes before you expect the grains to finish cooking.
  6. For a smooth soup, transfer to a blender and puree in batches. Afterward, return the soup to the pot to heat it through and add any additional salt and pepper.
There you have it...a basic guide to making a simple soup any day of the week.

Monday, January 31, 2011

Red Lentil Soup


It's official...my family has gone lentil crazy. My parents went to the health food store last weekend and bought what seemed to me like a year's supply of lentils. Afterward, they followed their successful purchase with a trip to IKEA to buy storage containers for our now gigantic collection. I may be exaggerating the amount of lentils currently in our house...but not by much. In truth, I'm happy that they bought all of those lentils because I really enjoy the taste and it is a very healthy legume packed with lots of protein.

My first attempt at cooking the lentils came in the form of red lentil soup. Red lentils are quite soft and therefore become mushy when cooked; this makes them ideal for soups. Unfortunately, their mushy quality tends to result in a thick stew more often than a liquid soup. However I was determined to make my soup "soupy". I think that I achieved my goal pretty well; the soup was definitely chunky, but not too thick and stew like. It still had a lot of liquid in the end and that made me happy.

The soup was so well received by my family that it caught me off guard. I have only recently started making soups and some of my recipes require tweaking. This time, however, everyone ate the entire soup up as soon as I made it. It makes me proud to know that my soup skills are improving.

Red Lentil Soup
  • 2 cups red lentils, rinsed and drained
  • 1 large onion, finely chopped
  • 2-3 carrots, finely chopped
  • 2-3 ribs of celery, finely chopped
  • 2-3 garlic cloves, finely chopped
  • 1 tsp paprika
  • 1 tsp cumin
  • 2 tbsp tomato paste
  • 2 L (6 cups) chicken or vegetable stock
  • 1 lemon, juiced
  • Olive oil
  • Salt and pepper to taste
  • Optional: 1/4-1/2 tsp red chili flakes
  1. In a large pot, saute the diced carrots, onion, garlic, and celery for 3-4 minutes over medium heat until the onion starts to become translucent.
  2. Add the paprika, cumin, and chili flakes if using and cook over low heat for 6-8 minutes.
  3. Stir in the tomato paste and cook for an additional minute.
  4. Add the lentils and stock and bring to a boil.
  5. Reduce the heat to a simmer and cook for about 25-30 minutes until the lentils are soft and mushy. Keep the pot partially covered and stir the soup occasionally.
  6. If you like a smoother consistency, puree the soup in batches using a blender and then return to the pot. I prefer the chunky soup so I left mine as is.
  7. Add lemon juice and season with salt and pepper to your liking.
  8. Serve the soup with crumbled feta or a dollop of sour cream/yogurt as well as some fresh chopped herbs, such as dill or cilantro.

Saturday, January 29, 2011

Butternut Squash Soup


There is a certain danger of typing in an ingredient into the search box of tastespotting.com or foodgawker.com--there are so many delicious sounding recipes it's hard to decide what to make. Last week my dad brought home some butternut squash, already precut and ready to be prepared. At first I couldn't decide whether to roast it or make a soup out of it, but ultimately I chose the later. I figured that in the cold of winter, a nice warm soup is always filling and enjoyable.

When I told my family of my intentions, my grandfather was particularly skeptical. He claimed that he has never liked the taste of butternut squash and was doubtful that I could change his mind. I responded by telling him that he was free to try the soup, but I would not be offended if he didn't like it. Well, not only did he try the soup...he was the first to finish his bowl and was asking for seconds. It made me so proud to have taken an ingredient he didn't like and transform it into a delicious creation. In fact, he has already asked me to make the soup again sometime in the near future.

Butternut Squash Soup
  • 2 lbs butternut squash, peeled and cut into 2" chunks
  • 3 tbsp butter
  • 1/2 large onion, chopped
  • 2 large shallots, chopped
  • 2 tsp dried oregano
  • 1 tsp dried thyme
  • 6 cups chicken stock (can be substituted for vegetable stock)
  • Salt and pepper
  1. In a large pot, heat the butter over medium heat then add the chopped onion and shallots. Cook for 6-8 minutes until translucent.
  2. Add the chopped pieces of butternut squash, oregano, and thyme. Stir all of the ingredients together so that they are evenly coated with the spices.
  3. Pour in all of the stock and bring to a boil. Reduce the heat to a simmer, cover, and cook for about 20-30 minutes, or until the butternut squash is soft and can be easily pierced through with a fork.
  4. Working in batches, puree the soup in a blender until creamy then return to the pot. Bring the soup back up to a boil and season with salt and pepper.
  5. To serve, garnish the soup with a dollop of sour cream or plain yogurt and some sliced green onion.

Saturday, November 20, 2010

Roasted Tomato and Pepper Soup


I have never made soup before...until now. The other day I was watching food network and I saw a recipe for a simple roasted tomato soup. As I watched the host prepare the soup I thought to myself "hey, this isn't so hard...I can do this". It turned out the host was right; the soup was easy to make and the only difficulty was waiting for it to cool down a little before putting it in the blender. Best of all, it had a great tomato and pepper flavor and you could really feel the effects of the roasting prior to making the soup.

Roasted Tomato and Pepper Soup

  • 8 Roma tomatoes, sliced in half with insides scooped out
  • 4 bell peppers, sliced in half
  • 8 garlic cloves
  • 1 medium onion, peeled and quartered
  • 6 cups vegetable or chicken stock (I actually used Clamato juice to give it even more of a tomato flavor)
  • 1 can tomato paste
  • Olive oil
  • Balsamic vinegar
  • Salt and pepper to taste
  • Optional: Chili pepper flakes
  • Optional: Basil or cilantro for garnish
  1. Arrange the tomatoes and peppers on a shallow roasting pan, skin side up. Add the garlic cloves and onion to the pan as well.
  2. Sprinkle some salt and pepper then lightly drizzle some olive oil and balsamic vinegar over the pan ingredients.
  3. Roast at 400 degrees Fahrenheit for 40-50 minutes. Take the pan out once the skins are slightly charred.
  4. In a soup pot, warm about 2 tbsp olive oil over medium heat and then mix in the tomato paste.
  5. Add the roasted ingredients to the pot, including all the juices left on the pan, and stir well to combine.
  6. Add the vegetable or chicken stock and then reduce heat to low and allow the soup to simmer for 20 minutes. Optional: you can add some chili flakes to soup to give it a little kick...just don't go overboard otherwise it will overpower the actual flavor of the soup.
  7. Transfer the soup to a blender and puree. *It is important that you let the soup cool slightly before blending it and do not fill the blender more than halfway.* The best way to do this is to blend 1/3 of the soup at at time and allowing each batch to cool in the blender for 5 minutes before proceeding. Pulse it a couple of times first, then continue to puree. 
  8. Pour blended soup back into soup pot and reheat. Garnish with some cilantro or basil.