Showing posts with label breakfast. Show all posts

Sunday, November 16, 2014

Butternut Squash, Kale and Sausage Hash


There's nothing like digging through your fridge, throwing a bunch of random ingredients into the pan, cooking them up together and then calling it a "hash". Just like the word entails, a hash is really just a modge-podge of many different ingredients and a great way to use up random things you may have lying around. More importantly, it's a great way to make an easy carefree breakfast that can also be reheated later for lunch or dinner.

I first made this hash about a month ago but I have to admit it was a planned dish and not just random leftovers. I had seen a recipe that for something similar that combined butternut squash and sausage. Although the butternut squash and kale are both ingredients typically found in my fridge, the sausage was not and I had to specifically go to the store to buy it.

What I liked about this particular hash is that the mild spice of the sausage balanced the sweetness of the butternut squash, a flavor that can sometimes be too strong and overwhelming. Combined with the fresh tomatoes and bitter kale, the dish had the perfect balance. It was great on its own and also the next day when I made it even more "breakfasty" by reheating it and cracking two eggs over top then lightly frying just until the egg whites cooked through and the yolks were still runny.

Butternut Squash, Kale and Sausage Hash
Note: I didn't measure everything precisely so these are just estimates as to the quantities I used as far as the spices go.
  • 2 lbs butternut squash, peeled and cubed
  • 5 small mild Italian sausage (or other type if preferred)
  • 1 small onion, chopped
  • 2-3 cloves garlic, minced
  • 1 red bell pepper, chopped
  • 2 large tomatoes, roughly chopped
  • 2 cups baby kale, rinsed and drained
  • 1 twig rosemary, finely chopped
  • 3 tsp dried basil
  • 3 tsp dried thyme
  • 3 tsp dried oregano
  • Olive oil
  • Salt and pepper
  1. In a large bowl, combine the cut pieces of butternut squash, the chopped rosemary, 1 teaspoon each of the dried basil, thyme, and oregano. Drizzle with a little bit of olive oil and add some salt and pepper. Stir well to evenly coat the butternut squash with the herbs.
  2. Lay out the pieces of butternut squash in a single layer of a large baking tray. Bake for 20 minutes at 400 degrees Fahrenheit. Once the butternut squash is tender enough to poke through with a fork, remove from the oven and set aside.
  3. Meanwhile, while the squash is baking, prepare the sausage by removing from the casing and frying over medium-high heat until completely cooked through and no pink remains. Drain the sausage from the pan and set aside.
  4. Heat some olive oil over medium heat and saute the chopped onions for 3-5 minutes, or until they start to become translucent.
  5. Add the chopped garlic and continue to cook for another minute until the garlic becomes fragrant.
  6. Add the chopped pepper and tomatoes and cook for another 3-5 minutes or until it begins to soften. Mix in the remaining 2 teaspoons of dried basil, thyme, and oregano and stir to combine.
  7. Add the cooked sausage back into the pan as well as the pieces of butternut squash and kale. Season to taste with salt and pepper.
  8. Briefly cover the pan with a lid to allow the kale to gently wilt. Remove from the heat and serve warm.

Friday, September 5, 2014

Lemon Blueberry Pancakes


Last month was the first time in the history of this blog that I did not have a single post. Part of the reason was because I traveled with my brother to Europe for two weeks to celebrate his graduation from high school. When we returned it was his birthday shortly after and I made many dishes including a roasted beet quinoa salad, stuffed mushrooms, and chocolate creme brulee for dessert. I did make one new thing: grape leaves stuffed with dried figs, goat cheese, and walnuts. Even though it was actually very well received I felt it was too simple to dedicate an entire post to.

However last weekend was Labor Day and for some odd reason I woke up very early on Monday morning in the mood for pancakes. Recently my mother had purchased a 10 lb box of blueberries because she knows that I love them and the season is coming to an end. I decided to use the blueberries in the pancakes and also make a blueberry compote topping.

The pancakes were very simple and also quite fluffy because of all the baking powder. I was quite pleased that it made a small batch perfect for two people to enjoy for breakfast. When my brother woke up he happily ate the pancakes along with me. Overall it was a nice relaxing morning and my pancake craving was fulfilled.

Lemon Blueberry Pancakes
Makes about 13 palm-sized pancakes
  • 1½ cups flour
  • 1 tbsp baking powder
  • 2 tbsp sugar
  • 1 lemon, juiced and zested
  • ½ tsp salt
  • 1 large egg
  • 2 tbsp oil
  • 1 cup milk
  • 1⅓ cups fresh blueberries (can use frozen as well)
For the blueberry compote:
  • 1 cup fresh or frozen blueberries
  • ¼ cup water
  • 2 tbsp sugar
  1. In a medium-sized bowl, whisk together the flour, baking powder, lemon zest, sugar, and salt.
  2. Add the egg, oil, milk, and lemon juice. Mix well until a batter forms. If it is too thick, add some extra milk, one tablespoon at a time.
  3. Gently fold in the blueberries, being careful not to break them.
  4. Heat a griddle or large skillet over medium heat. Once heated, reduce the temperature to medium low and pour cup of batter onto the cooking surface. Allow the pancake to cook until bubbles start to form on the top surface, about 20-25 seconds, then use a large spatula to gently flip the pancake over. Cook the other side until it is light and golden and fully cooked through. Repeat with remaining batter.
  5. Meanwhile, combine the ingredients for the blueberry compote in a small saucepan and bring to a boil. Once the cranberries start to pop, reduce the heat to a simmer and keep heating while making the pancakes. Stir occasionally until compote thickens, then remove from heat. 
Note: You may have to go through a couple of "test" pancakes before you achieve the right temperature on the griddle or skillet. Finished pancakes can be kept warm in the oven at 200 degrees Fahrenheit while the rest are cooking.

Monday, February 24, 2014

Baked Eggs with Spaghetti Squash


I was grocery shopping the other day and for some reason I was suddenly struck with a longing to buy spaghetti squash and make it. Ever since I prepared spaghetti squash a few months ago I have been meaning to repeat the experience but hadn't gotten around to doing so.

This time, rather than put the squash mixture back into the scraped shells, I decided to go with more of a breakfast theme. I scooped the prepared veggie and squash mixture into little ramekins and then cracked an egg over top. Then I put the ramekins into the oven and used the broiler to cook the egg just until the whites set and the yolk still jiggled. I made one for each family member and then just served the remaining squash mixture in the skillet for those who wanted extra. I was pleased with the outcome and it was nice to have something different for breakfast for a change.

Baked Eggs with Spaghetti Squash
Note: I prepared the spaghetti squash the same way I did last time. The recipe can be found here and should be followed all the way until stuffing the shells with the squash mixture.
  • Prepared spaghetti squash
  • Eggs
  • Salt and pepper
  1. Distribute the spaghetti squash and vegetables amongst the ramekins, filling each about ¾ full.
  2. Carefully crack an egg into each ramekin, making sure not the break the yolk.
  3. Place the ramekins onto a tray and into the oven under the broiler. Cook the eggs just until the whites are set but the yolks are still soft and runny. Keep a close watch as the eggs will cook quickly.
  4. Remove the ramekins from the oven and serve. Sprinkle a little salt and pepper on top if desired.

Friday, November 29, 2013

Hummingbird Cake


While my parents were away last week, my aunt and uncle invited my brother and me over for dinner one night. As usual, I volunteered to make something for dessert. We happened to have some overly-ripe bananas lying around and I wanted to use them. However I didn't want to just make a banana loaf, not that it isn't yummy, but I wanted to try something different. When I went to my favorite tastespotting.com and typed in "banana" into the search box I scrolled through quite a few recipes for different variations of banana loaf before I came across one for "hummingbird cake".

The recipe appealed to me because it was simple, easy, and had a twist using crushed pineapple and chopped pecans. Also, the idea of baking it in a bundt pan made for a nice presentation. Of course the cream cheese icing on top also scored points in my book.

The cake turned out moist and delicious and everyone enjoyed it after dinner. According to my aunt, who later phoned my mom, my uncle really loved it and has been taking it to work with him as well. Although I liked how it looked coming out of the bundt pan, I think I may use a regular 9" x 13" pan next time because it took a long time to bake all the way through and that resulted in the outside being a little too crusty for my liking. Despite that fact, I was still satisfied and based on their comments it seemed everyone else was too.

Hummingbird Cake

For the cake:
  • 1½ cups pecans, chopped
  • 3 cups flour
  • 2 cups sugar
  • 1 tsp baking soda
  • 1 tsp cinnamon
  • ½ tsp salt
  • 3 eggs, beaten
  • 1¾ cups mashed banana (approximately 3-4 large bananas)
  • 1 cup crushed pineapple with juice
  • ¾ cups canola oil
  • 1½ tsp vanilla extract
For the cream cheese icing:
  • 4 oz (½ cup) cream cheese, softened
  • 2 cups powdered sugar
  • 1 tsp vanilla
  • 1-2 tbsp milk
  1. In the oven or on the stove, gently heat the pecans for 5-8 minutes or until lightly toasted. Cool and set aside.
  2. In a large bowl, sift together the flour, sugar, baking soda, cinnamon, and salt. 
  3. Add the eggs, mashed banana, pineapple, oil, and vanilla. Stir just until all of the ingredients are combined. (The batter will be lumpy)
  4. Gently stir in one cup of the chopped pecans.
  5. Grease a large bundt pan with butter or non-stick spray and pour the batter into the pan.
  6. Bake at 350 degrees Fahrenheit for 60-80 minutes, or until a knife poked all the way to the bottom comes out clean. (Mine took the full 80 minutes) If the top starts to brown too quickly cover the pan with aluminum foil.
  7. Remove the pan from the oven and set aside for 10 minutes before carefully loosening the cake and flipping it over. Allow the cake to finish cooling for about an hour on a wire rack.
  8. Meanwhile, blend the ingredients for the icing. Add more milk if desiring a more liquidy consistency. 
  9. Once the cake has cooled, pour the icing over top and sprinkle the remaining chopped pecans. 

Sunday, May 5, 2013

Mocha Granola


Yes that's right...it's another granola recipe. You would think that by now I would have stopped posting such recipes because really they're all quite the same. The concept is simple: mix some oats with desired nuts, add some sort of binding sweetner, bake in the oven (mixing often), and then mix in any dried fruit at the end. Easy, right?

Well the truth of the matter is that there are actually many flavor combinations out there, some on the healthier side and others more like a dessert. This particular granola is more of a dessert granola due to the mini chocolate chips that get mixed in the end. It also uses quite a bit of coffee so I wouldn't recommend it as a late night snack, though it's a great pick-me-up in the morning. Of course the chocolate chips can be omitted all together...but then again, who would want to do that?

Mocha Granola
  • 3 cups old-fashioned oats
  • ¼ cup ground flax seed
  • ½ cup sliced almonds
  • ½ cup sunflower seeds
  • ¼ tsp salt
  • 3 tbsp dry instant coffee granules
  • 3 tbsp hot water
  • 1 tsp vanilla extract
  • ½ cup canola oil
  • ½ cup honey
  • ½ cup mini chocolate chips 
  1. Dissolve the instant coffee granules in the hot water. Add in the vanilla and set aside.
  2. In a large bowl, combine the oats, ground flax seed, almonds, sunflower seeds, and salt. 
  3. Add the oil to the dissolved coffee mixture and combine with the oats. Mix well.
  4. Add the honey to the oats and stir until everything is evenly coated.
  5. Spread the oats in an even layer onto a large baking sheet lined with parchment paper. Bake for 30-45 minutes at 300 degrees Fahrenheit, stirring every 10-15 minutes, until the oats are golden.
  6. Allow the granola to cool completely before mixing in the mini chocolate chips and breaking into clumps. Store in an airtight container. 

Tuesday, April 16, 2013

Apple Cinnamon Pancakes


I woke up on Saturday morning with a big craving to make pancakes, something I haven't done for a while. I had bookmarked a recipe for apple cinnamon pancakes a few months ago and decided that this weekend would be a good time to finally try it out. The recipe was pretty straightforward and I substituted using sour cream instead of Greek yogurt because that's what I had on hand.

My brother was delighted to discover that I had made pancakes for breakfast and eagerly helped me out with his taste-testing skills. Although nice and fluffy, as all good pancakes should be, I have to admit the apple flavor was not as pronounced as I had hoped it would be. The chunks of grated apple were pleasant but I think I might add more in the future, in addition to some applesauce in order to really make the apple flavor come through.

Apple Cinnamon Pancakes
Note: Makes about 10 slightly larger than palm-sized pancakes. Also, this recipe features changes that should create more of an apple flavor, but have not actually been tested. For the original recipe click here.
  • 1 large egg
  • ½ cup Greek yogurt or sour cream
  • ½ cup milk
  • ½ cup applesauce
  • 1 cup flour
  • ½ tsp baking powder
  • ¼ tsp salt
  • ½ tsp cinnamon
  • ¼ tsp vanilla extract
  • 2 large apples, peeled and roughly grated
  1. Sift together the flour, baking powder, salt, and cinnamon and set aside.
  2. In a separate bowl combine the egg, Greek yogurt or sour cream, milk, applesauce, and vanilla extract.
  3. Add the dry ingredients to the wet ones and mix until just barely incorporated.
  4. Add the grated apples and mix to incorporate into the batter. Don't worry if the batter is lumpy but if it is too thick add a little bit of milk to thin it out.
  5. Heat a griddle or large skillet over medium heat. Once heated, reduce the temperature to medium low and pour cup of batter onto the cooking surface. Allow the pancake to cook until bubbles start to form on the top surface, about 20-25 seconds, then use a large spatula to gently flip the pancake over. Cook the other side until it is light and golden and fully cooked through. Repeat with remaining batter.
Note: You may have to go through a couple of "test" pancakes before you achieve the right temperature on the griddle or skillet. Finished pancakes can be kept warm in the oven at 200 degrees Fahrenheit while the rest are cooking. 

Wednesday, January 16, 2013

Cheese and Chive Biscuits


Out in the food blogging community there is something called the Daring Bakers Challenge. Every single month a prominent food blogger proposes some sort of food item that everyone has to make. Generally it involves some sort of interesting technique or is considered a complicated item...hence the "challenge". Most times there are some sort of rules as well, such as how and what type of variations can be made. Each challenge lasts for the duration of the month and then starts all over again in the next month with a new featured food item.

I have never actually participated in the Daring Bakers Challenge nor do I know how the hosts get chosen, let alone if there are any winners. However when I browse tastespotting.com I can always tell when a new challenge has started because all of a sudden there will be many recipes all featuring the same type of food, just with different styles and variations.

As it happens, when I was looking for a good recipe for scones and biscuits to make for my family high tea I found out that it was the theme of the Daring Bakers Challenge exactly a year ago in January 2012. I decided to use the recipe provided by the host of the challenge and in the process I learned the difference between scones and biscuits. It turns out that what we call "scones" in North America are actually called "rock cakes" in England and Australia, and that which we call "biscuits" here are called "scones" over there. It's all trivial information but interesting when talking to someone from a different part of the world and finding out about these slight nuances.

For the high tea I wanted to stick with traditional flavors so I decided to make the biscuits using Gruyere cheese and chopped chives. According to the host he bookmarked over 288 recipes and tried 16 different batches before coming up with the best technique and recipe. In the end he had very simple instructions with plenty of pictures, which I appreciated. Since the techniques were not that hard or time consuming I decided not to skip any steps and follow all of his specific instructions.

It was nice to see the rationale explained behind each specific technique, such as triple sifting the dry ingredients in order to allow plenty of air to become incorporated into the mixture as well as evenly distributing the rising agents. Supposedly this gives the scones maximal lightness, though I can't honestly say whether my scones achieved this. They were extremely light and fluffy and very layered, thanks to the kneading technique also outlined in the recipe, but since I only made one batch I didn't have anything else to compare them to in order. I'll just have to trust that triple sifting the ingredients led to a better biscuit than if I had simply mixed the ingredients together.

In terms of taste the biscuits turned out deliciously and were especially enjoyed by my mother and brother. I was especially pleased that my mom liked the biscuits because she often complains that biscuits sold in stores are too hard, though I think her complaints are aimed more toward scones rather than biscuits. She said she loved the flaky layers and softness of the biscuits. Personally I enjoyed the subtly of the Gruyere cheese but my brother asked that next time I use a stronger cheese, such as cheddar, for a more intense and cheesier flavor. The great thing about the recipe is that it provides a base and can then be modified to individual preference.

Cheese and Chive Biscuits
Note: This recipe makes about 16 palm-sized biscuits.
  • 2 cups flour
  • 4 tsp baking powder
  • 1 tsp baking soda
  • 1 tsp ground mustard seeds (dry mustard powder)
  • ½ tsp salt
  • 1 cup freshly grated cheese (any variety)
  • 4 tbsp chives, finely chopped
  • 4 tbsp cold unsalted butter, cut into pieces
  • 1 cup cold milk
  1. Triple sift the flour, baking powder, baking soda, dried mustard, and salt together into a large bowl.
  2. Add the grated cheese and chopped chives and mix in with the dry ingredients.
  3. Rub the butter pieces into the dry ingredients until the mixture resembles large, beach-sized sands pieces and the butter is well coated with the flour.
  4. Add the milk to the mixture and mix until it just starts to form a wet and sticky dough. Turn the dough out onto a lightly floured surface and gently shape it into a ball.
  5. To achieve a layered effect, gently knead and press down on the dough to form a large rectangle. Fold it into thirds on itself then turn 90° and repeat the process 3-4 times.
  6. On the last turn pat the dough down so that it is ¾"-1" thick. Use a well-floured 2"-3" biscuit cutter (depending on how big you want them) to cut out the biscuits. Sprinkle with a little bit of cracked pepper and place on a parchment or wax paper lined baking tray 2" apart.
  7. Bake for 8-10 minutes at 475 degrees Fahrenheit. Take the biscuits out of the oven as soon as the tops turn golden and immediately remove from the tray and place on a plate or cooling rack to prevent the bottoms from burning.

Monday, January 14, 2013

Cranberry and Orange Scones


This past Saturday I hosted a high tea for all of the female members of my family. One of the many items I prepared were these cranberry and orange scones. If you have ever had the pleasure of attending high tea you would know that the food selection almost always includes some sort of sweet and fruity scone served alongside jam and cream.

I decided to go to my favorite food blog Annie's Eats and use her recipe for cranberry scones, but pair it with orange rather than lemon because I had only recently baked some cranberry lemon squares over the holidays. The nice thing about the recipe was that the scones could be made in advance and then baked once the time came, ensuring they were hot and fresh from the oven when serving them.

Everyone seemed to enjoy the scones, especially my aunt and grandmother. They were perfectly tender and crumbly and the sprinkled sugar on top added a nice crust. I truly felt that I properly represented this traditional high tea goodie and was impressed with how it turned out so well.

Cranberry and Orange Scones
Note: This recipe makes 15-20 palm-sized scones.
  • 2½ cups flour
  • ½ cup + 3 tbsp sugar
  • 1 tbsp baking powder
  • ½ tsp salt
  • 1 orange, zested
  • 6 tbsp cold unsalted butter, cut into pieces
  • 1¼ cups fresh or frozen cranberries, coarsely chopped
  • 1 large egg + 1 egg yolk
  • 1 cup heavy cream
  1. In the bowl of a food processor (or a large bowl) combine the flour, half cup of sugar, baking powder, salt, and orange zest. Pulse a few times to briefly blend together.
  2. Add the pieces of butter and continue to pulse until the mixture becomes mealy and the butter pieces become the size of large peas. If you don't have a food processor use a fork or or your hands.
  3. In a separate bowl combine the chopped cranberries with the three tablespoons of sugar and mix to ensure the cranberries are evenly coated. Stir the cranberries into the flour and butter mixture.
  4. Combine the whole egg, egg yolk, and cream and whisk to blend in a small bowl.
  5. Add the liquid mixture to the dry ingredients and stir gently with a spatula or wooden spoon until the dough starts to come together.
  6. Turn the dough out onto a lightly floured surface and gently knead it just so that it stays together. Be careful not to overwork the dough.
  7. Shape the dough into a round disk and gently pat it down so that it is about ½"-1" thick, depending on how thick you want the scones to turn out. Use a well floured biscuit cutter to punch out small 2"-3" rounds (also dependent on how big you want them). 
  8. Gather the scraps and gently mold together and repeat the process with the remaining dough. Alternatively the dough can simply be patted down and then cut regularly into triangular wedges or squares.
  9. The shaped scones can be refrigerated, frozen, or baked right away. If freezing, flash freeze them on a baking tray directly in the freezer then put into freezer-safe bags and store. If refrigerating, arrange on a baking tray and cover with plastic wrap. 
  10. Once ready to bake, brush the tops with the leftover egg white and sprinkle them lightly with some additional sugar. Place them about 2"-3" apart on a baking sheet lined with parchment or wax paper and bake for 15-20 minutes at 400 degrees Fahrenheit, or until they are a touch golden. (If baking from the freezer they may require an extra 3-5 minutes.)

Tuesday, October 30, 2012

Peanut Butter and Quinoa Granola


Yes I know...another granola recipe. You're probably thinking to yourself: "How can she have yet another granola recipe...didn't she already figure it out?" The truth is yes...for the most part I figured out two different base recipes that I alter with different mix-ins to create various flavors. However this granola is not like the others because it also uses quinoa, a new favorite ingredient of mine. The quinoa isn't cooked before being added to the oats, rather it gets baked right into the granola itself.

Personally I think that this is my new favorite granola. Granted I may say that about the next one I make but for now this is it. Being the texture snob that I am, I love how the quinoa provided an extra crunch to the granola. Also, the base recipe had a good ratio of wet to dry ingredients making for a crunchy granola to start with that was full of peanut flavor. Of course that could easily be changed to some other type of nut with the appropriate substitution. That being said I would still recommend using a nut butter of some sort, such as almond or cashew, because without it there will not be enough wet binder for the granola to stick together in clumps.

As for the mix-ins, I'm not a coconut lover myself but I know that coconut flakes are a common and popular granola addition. Other things include various dried fruits, banana chips, or chocolate chips. Ultimately, I highly recommend trying this granola because it's probably unlike any you have tasted before with the great addition of quinoa.

Peanut Butter and Quinoa Granola
  • 2 cups large-flake (old-fashioned) rolled oats
  • ¾ cup quinoa, rinsed
  • ¾ cup lightly salted roasted peanuts, coarsely chopped
  • ½ tsp fine sea salt
  • ½ tsp ground cinnamon
  • ¼ cup natural cane sugar or packed light brown sugar
  • ¼ cup honey
  • ½ cup unsweetened natural peanut butter
  • cup vegetable oil
  • 1 tsp vanilla extract
  • cup dried cranberries
  1. In a large bowl, combine the oats, quinoa, peanuts, salt and cinnamon.  
  2. In a small saucepan, combine the sugar and honey. Bring to a simmer over medium heat, stirring constantly. Turn off heat and stir in peanut butter, oil, and vanilla until blended.
  3. Pour the peanut butter mixture over the oats and stir until evenly coated. Spread the mixture in a single layer on a large rimmed baking sheet lined with parchment paper.
  4. Bake for 30-45 minutes (time will vary based on size of baking sheet) at 325 degrees Fahrenheit or until the granola becomes golden brown. Stir every 10-15 minutes to ensure even baking.
  5. Remove from the oven and allow the granola to cool completely on the tray before mixing in the dried cranberries and transferring to an airtight container.

Sunday, July 22, 2012

Guest Post: Puffy Omelet


I am doing something totally new...I am featuring a guest post on my blog. This idea has actually come up a few times in conversation since I first started the blog two years ago. However due to one reason or another it never came to fruition until now. My brother surprised the family this morning by making his famous "puffy omelet" for breakfast. I won't go into detail describing it since his post does so quite well, however I will say that it was a great feeling to wake up and have such a lovely breakfast awaiting me downstairs. I am extremely proud of my brother for both the omelet and his post that he wrote to accompany it. I can honestly say I did not have to change the content whatsoever and only minor editing (in the form of name removal) had to be done. So without further ado...I give the stage over to my brother.


Hi. You may have heard of me in previous posts referenced as “my brother”, reviewing food (almost always something along the lines of “nom nom nom”). I am one of my sister’s most avid fans; I help her decide on which food pictures to use, and I like to refer to myself as the Chief Taste Tester here at the Food for Thought blog. Whenever she makes something, I’m always the one to ask, “Is it food bloggable?” And sometimes, I make requests that end up here on the blog, like the potato skins (which turned out very well to no one’s surprise). My sister’s passion for cooking has arguably benefited me more than her, which is just fine for me! And seeing her rule over our kitchen, along with all the cooking shows we watch, sometimes I want to get in on the action and take a turn as the “Masterchef”! 

I take a foods class at my high school during the year, and I like to keep some of my favorite recipes from the class. Last year, we made a beautiful puffy omelet and I loved it. That same weekend, I made the omelet for my family for breakfast, and I don’t know what it was about the omelet, but it became an instant classic. I made the puffy omelet every so often, and it built up its reputation in our family. Sometimes, relatives would visit just to try this “famous” breakfast dish. I had always talked about making a guest post on the Food for Thought blog, but never got around to doing it. This weekend, I surprised my family once again with the puffy omelet for breakfast, and it turned out really well, so I couldn’t pass up the chance to finally make an appearance on the blog!

The omelet itself is pretty simple. You separate 4-6 eggs, beat both the whites and yolks until foamy, combine them, cook the bottom in a pan, and then finish the omelet in the oven. The filling can be whatever you like, but the traditional “Denver filling” includes sautéed onions, bell peppers and some deli meat. I hope to make more guest posts in the future and I hope you enjoy this puffy omelet recipe.

Puffy Omelet
Note: Suggested fillings included sauteed onions and bell peppers along with sausage or deli meat.
  • 4-6 large eggs
  • 50 mL water
  • Pinch of cream of tarter (can substitute with a bit of lemon juice)
  • Salt and Pepper to taste
  • 1/2 shredded cheese 
  1. Separate the yolks and whites of the eggs into two bowls. Add the water to the yolks, and season them to taste. 
  2. For the whites, add a pinch of cream of tartar, or a few drops of lemon juice. (This is to help stabilize the egg whites, and believe me it does make a difference in the finished product.
  3. Beat the whites to the stiff peak stage. Separately, beat the yolks for 1-2 minutes until they are foamy. Then, gently fold the yolks into the whites. 
  4. Spread the egg mixture into a large (oven safe) pan, and on a medium-low heat, cook until the bottom of the omelet is set. This should take around 3-4 minutes. 
  5. Once the bottom has cooked, put the pan into an oven at 350 degrees Fahrenheit. Bake for about 4-5 minutes until the top is spongy and springs back when touched. 
  6. After the omelet is cooked, take it out, and turn off the oven. Make a crease just a bit off center through the whole omelet. Place the filling onto the smaller half of the omelet.
  7. Using a large spatula, lift the larger half of the omelet, and fold it over the smaller half. (This takes a bit of practice so as not to tear the omelet.) 
  8. Pour the shredded cheese on top of the omelet, and put the omelet back into the turned off oven just to melt the cheese. 
  9. After the cheese is melted, take the omelet out, and voila! Your very own puffy omelet! Enjoy! 

Saturday, June 30, 2012

Strawberry Oat Muffins


I hate wasting food! It is one of my biggest pet peeves. Therefore there often comes a time when I look into the fridge and I see various items that are about to expire and I feel obligated to use them up in some way. Usually that involves making some sort of omelet or frittata because it's easy to throw virtually any ingredient in them and have it turn out. However this time I needed to use up strawberries and Greek yogurt...not exactly omelet ingredients. So I decided I would bake them into muffins and see how it turned out.

Wouldn't you know it the muffins actually turned out great! I'm quite proud of them because they tasted good and I realized later that they were pretty healthy too. The muffins were almost completely sugar and fat free. I managed this by substituting unsweetened applesauce for butter and relying only on the natural sugars contained in the strawberries and the yogurt itself. I also substituted half the flour with oats. As a result the muffins turned out quite dense and not sweet at all, but the missing sweetness was actually nice. It made the muffin feel more substantial and less like a dessert, fitting of a breakfast snack. The only unfortunate part was that the muffins stuck completely to the paper liners and it was very difficult to peel the paper off. Next time I think I will make sure to grease the muffin tin well and just bake them straight in the tin without the use of any liners.

Strawberry Oat Muffins
Note: These muffins could be made using other fruit instead such as blueberries or raspberries. I used strawberries because that's what I had on hand.
  • 1 1/4 cup flour
  • 1 1/4 cup old-fashioned oats 
  • 1 tsp baking powder
  • 1/2 tsp baking soda
  • 1/4 tsp salt
  • 1/2 tsp cinnamon
  • 1 cup applesauce
  • 1 cup Greek yogurt (I used nonfat strawberry flavored but regular works too)
  • 1 egg
  • 2 tbsp oil
  • 3/4 cup strawberries, cut into pieces
  1. In a large bowl sift together the flour, oats, baking powder, baking soda, salt, and cinnamon.
  2. In a separate bowl combine the applesauce, Greek yogurt, egg, and oil. 
  3. Add the wet ingredients to the dry and mix just until the dry ingredients are incorporated. The batter will be fairly thick.
  4. Gently fold in half of the strawberries.
  5. Distribute the batter evenly in a well-greased 12 cup muffin tin. Top the muffins with the remaining strawberry pieces.
  6. Bake for 18-20 minutes at 375 degrees Fahrenheit or until a toothpick inserted into the muffins comes out clean. Cool for five minutes in the pan before transferring to a wire rack to finish cooling.

Monday, May 28, 2012

Eggs in Potato Nests


A month ago my cousin emailed my aunt and me this recipe for cute little potato nests baked in a muffin tin and then filled with eggs. I don't know how he came across the recipe considering that most of his internet browsing has to do with sports or politics but I guess I will be left to wonder. When he sent the email my aunt and I thought it would be fun for me to sleepover at their house one evening and then have the little nests for breakfast the next morning. Last Saturday my parents left for a vacation and so my brother and I spent the evening at my aunt and uncle's house and enjoyed brunch all together the following morning.

The idea of baking eggs in an edible shell was not new to me...in fact I have tried it once before a long time ago. In my previous attempt the recipe called for thinly slicing the potatoes and then layering them in the muffin tin to create a little cup. Unfortunately the little cups did not hold up when it came time to scooping them out of the muffin tin. This recipe called for grating a mix of regular and sweet potatoes and pressing the mixture along the bottom and sides of the muffin tin. Even though the potato nests did come out of the muffin cups, there was still some left in each well despite having sprayed the pan with Pam.

Ultimately, although a fun idea, I think that I will stick to making stuffed breakfast tomatoes in the future if I'm looking for an edible vessel for the eggs. The tomatoes are less fussy and involve fewer steps and I like the extra juice and flavor they provide to the egg. Because these potato nests didn't have that additional flavor component I suggested to my aunt that we make a vegetable hash that could be spooned on top or to the side of the eggs.

In addition to making the eggs, we also made lemon ricotta pancakes and paired it with a cranberry compote. My aunt also baked some puff pastry and topped it with shredded cheese and my uncle cut up some fresh strawberries. It was quite the breakfast spread and we had to extend the table to fit it all. Everyone really loved the entire breakfast and it was great to spend the night with my cousins, something I haven't done in a very long time.

Eggs in Potato Nests
  • 1 large russet potato, peeled
  • 1 large sweet potato, peeled
  • 1/2 tsp salt
  • 1/2 onion or 1 shallot, minced
  • 3-4 cloves garlic, minced
  • 12 eggs
  • 1/4-1/2 cup shredded cheese
  • Salt and pepper
  1. Grate the potatoes and mix together. Sprinkle with the salt and set aside for 10 minutes. Gather the potatoes in a bundle of paper towels and wring dry to remove excess liquid.
  2. Add the onion and garlic to the potato mixture and season lightly with some salt and pepper. Add about 2-3 tablespoons of the potato mixture to each cup of a well-greased muffin tin. Press the mixture firmly along the bottom and sides to create the nests.
  3. Bake the nests for 13-15 minutes at 400 degrees Fahrenheit, or until they have become a little crispy and can hold their shape.
  4. Remove the pan from the oven and sprinkle some shredded cheese into each cup. Crack an egg into each cup as well and then season again with a little salt and pepper.
  5. Return to the oven at a reduced temperature of 350 degrees Fahrenheit and bake for another 10-15 minutes, or until the whites have set. Keep a close eye on them otherwise the yolks will harden if kept in the oven too long.
  6. Allow the eggs to cool for a few minutes in the tray before gently spooning the nests out of the pan.

Sunday, February 19, 2012

Fruit, Yogurt, and Granola Parfaits


Lately I've been really into granola. I start off pretty much every day with some fruity yogurt mixed with granola and some eggs, be it hard boiled, scrambled, or an omelet if I have the time. Since my family regularly shops at Costco, and they frequently stock the same items, I usually end up alternating between the same two varieties of granola. One day I decided that I wanted to try and make my own granola but somehow this idea got postponed for a really long time, partially due to the fact that I was too lazy to go and buy old-fashioned rolled oats.

After finally going to the grocery store and picking up a bag of oats I no longer had any excuses and set upon making the granola. There are so many different "recipes" although after looking through them I realized a recipe is not really needed. Basically you just need to mix the oats with some sort of binder, be it honey or peanut butter or maple syrup, and add in any mix-ins, such as coconut flakes, sunflower seeds, nuts, etc. After it's done baking you can add in any dried fruits as well. The only annoying part is that while its baking, the granola needs to be stirred periodically which means that you can't just stick it in the oven and pull it out once a timer goes off.

I still ended up following a recipe I found on my favorite blog Annie's Eats for a healthy omega-3 granola. Of course I didn't have all of the ingredients so I kind of took some liberties with it. Since the recipe called for sunflower seeds and canola oil, but I didn't have it, I substituted pumpkin seeds and sunflower oil. In the end the sunflower taste was a little too strong for my liking, making it a very savory granola, but my whole family loved it, especially my brothers. Both said that the savory taste was great and different compared to the usual granola from the store. Next time I think I will try sticking to a neutral oil and see if that lets the sweetness of the honey come through more.

As for the parfaits, I've been making those quite frequently for my family as they continue to request them over and over. The concept is very simple: I layer fruits with Greek yogurt and then sprinkle granola on top. I know that some people put a layer of granola in the middle as well but unless the parfait is eaten right away the granola gets soggy and I can't stand that. I usually make six or seven of these parfaits (leaving out the granola) and leave them, covered, in the fridge. Then once someone wants to eat it, for breakfast or dessert, they take one out and put the granola topping on themselves. Everyone in my family loves them because they're a sweet little treat but also healthy.

Fruit, Yogurt, and Granola Parfaits

For the parfaits:
Note: These are all rough measurements in order to make 6-7 parfaits in 4 oz. ramekins.
  • 3-4 cups fresh or frozen fruit (thawed if frozen)
  • 1 large container (650-750 mL) Greek yogurt (I used honey flavored but plain or vanilla works too)
  • Granola
To assemble: Put a layer of fruit in the bottom of each ramekin so that it is completely covered. Spoon enough yogurt over top to cover the surface of the fruit. Repeat the layering process with the fruit and yogurt then top with granola. Optional: Put a layer of granola on top of first yogurt layer before repeating fruit layer.

For the Omega-3 Granola:
  • 1/3 cup slivered almonds
  • 1/3 cup walnuts, roughly chopped 
  • 3 cups old-fashioned rolled oats
  • 3 tablespoons canola oil
  • 1/4 cup sunflower seeds
  • 2 tablespoons sesame seeds
  • 1/2 cup honey
  • 2 tablespoons ground flaxseeds
  • 1/4 teaspoon salt
  • 1/2 cup raisins (I used 1/4 cup raisins, 1/4 cups dried cranberries)
  1. Toast the almonds and walnuts in a large skillet over medium heat, stirring often, until fragrant and beginning to darken, about 3 minutes.
  2. Stir in the oats and oil and continue to toast, stirring often, until the oats begin to turn golden, about 2 minutes.
  3. Stir in the sunflower and sesame seeds and continue to toast until the mixture turns golden, about 2 minutes.
  4. Transfer the mixture to a large bowl and stir in the honey, flaxseeds, and salt until evenly combined.
  5. Spread the granola over a large rimmed baking sheet lined with parchment paper and bake at 325 degrees Fahrenheit, stirring every 3 minutes, for 15 minutes until the granola is a light golden brown.
  6. Stir in the raisins (or whatever other variety of dried fruit) and use a spatula to gently push the granola to one side and press into a slab about 1/2" thick.
  7. Allow the granola to cool to room temperature, about 30 minutes, then use your hands to gently break it into small clusters. 
Note: The granola can be stored in an airtight container at room temperature for up to one week.

Sunday, February 5, 2012

Orange Pancakes with Cranberry Compote


I woke up this morning with a major pancake craving and, being me, I obviously wanted to try a new recipe. Lately I have been very much into making things with cranberries, such as my red wine poached pears with cranberry sauce (made several times now by request from my mom and brother) and other baked goods. I particularly enjoy the combination of sweet orange with tart cranberry and when I found a pancake recipe utilizing this perfect pairing I jumped on the chance to make it.

The pancakes turned out extremely airy and light with a gentle undertone of citrus. They were good, but the cranberry compote definitely put the pancakes over the edge. I started on the compote at the same time as the pancakes, which gave the cranberries plenty of time to pop open and release their juices. It was actually quite fun to listen to the little popping noises and watch the process. As I continued to make the pancakes, I left the compote to simmer and reduce, making it really thick and syrup-like. The end result spread nicely over the pancakes and provided a great contrasting tart flavor.

The reaction from my family also made breakfast quite entertaining. My mom complained that I can't make such delicious pancakes for breakfast because pancakes are not diet-friendly. Of course that didn't stop her from eating one "just to try". My brother decided to try every possible permutation of eating the pancakes with butter, maple syrup, the cranberry compote, and fresh orange slices. In the end, after 10 pancakes, he determined that the best tasting ones were those topped with either the cranberry compote alone or fresh orange slices, but not in combination. I was happy he found his "ultimate pancake" and quite amused in the process, having fulfilled my own cravings as well.

Orange Pancakes with Cranberry Compote
Makes about 25 palm-sized pancakes
  • 2 cups flour
  • 2 tsp baking powder
  • 1 tsp baking soda
  • 1/2 tsp salt
  • 3 tbsp sugar
  • 2 eggs, lightly beaten
  • 2 cups yogurt
  • 4 tbsp unsalted butter, melted and slightly cooled
  • 1/2 cup orange juice
  • Zest of one orange
For the Cranberry Compote:
  • 1 cup fresh or frozen cranberries
  • 1/4 cup orange juice
  • 2 tbsp sugar
  1. Whisk together the flour, sugar, baking powder and soda, and salt and set aside.
  2. In a separate bowl, combine the eggs, yogurt, butter, orange juice and zest.
  3. Add the wet ingredients to the dry and mix gently just until combined. The batter will be lumpy. If needed, thin out the batter with a little orange juice and milk.
  4. Heat a griddle or large skillet over medium heat. Once heated, reduce the temperature to medium low and pour 1/3 cup of batter onto the cooking surface. Allow the pancake to cook until bubbles start to form on the top surface, about 20-25 seconds, then use a large spatula to gently flip the pancake over. Cook the other side until it is light and golden and fully cooked through. Repeat with remaining batter.
  5. Meanwhile, combine the ingredients for the cranberry compote in a small saucepan and bring to a boil. Once the cranberries start to pop, reduce the heat to a simmer and keep heating while making the pancakes. Stir occasionally until compote thickens, then remove from heat. Feel free to add some extra sugar if compote is too tart.
Note: You may have to go through a couple of "test" pancakes before you achieve the right temperature on the griddle or skillet. Finished pancakes can be kept warm in the oven at 200 degrees Fahrenheit while the rest are cooking. 

Sunday, January 22, 2012

Quinoa Cakes with Poached Eggs


Yesterday for breakfast I decided to make these quinoa cakes which I had seen about a month ago on one of my favorite websites Annie's Eats. Previously, I had only made quinoa in a salad type capacity so I thought it would be fun to try something new with it. Also, seeing as how it's considered a super grain I would like to incorporate it more into my diet.

I have never actually made patties before, such as hamburgers, so I found it a little difficult to shape the patties and keep them from falling apart. The original directions in the recipe were to fry the quinoa cakes until golden on both sides. After attempting to fry one and having it fall apart on me I decided to go in a different direction. Instead, I shaped all of the patties and then baked them on trays lined with parchment paper and a little non-stick cooking spray (just in case). The result turned out crispy and I felt even better knowing that the recipe was made healthier by avoiding the frying.

I have to admit that the quinoa cakes tasted quite plain on their own. Even though they included shallots, chives, cilantro, and Parmesan cheese there was not much seasoning other than salt and pepper. The poached egg on top was nice because the egg yolk, once broken, seeped into the quinoa cake and gave it more flavor. I also enjoyed the cakes the next day with a sunny side up egg rather than a poached egg but the effect was just the same.

I think that next time I will add some more seasoning to the quinoa mixture itself, such as cumin or red pepper flakes, so that the cakes stand up on their own a little more in terms of flavor. Still, it was nice to have something different for a change and I also appreciated being able to eat the poached egg with something other than toast.

Quinoa Cakes with Poached Eggs
Makes about 10 palm-sized cakes
  • 2 cups cooked quinoa (for directions on how to cook click here)
  • 3 eggs, slightly beaten
  • 1/3 cup (about 2-3 stalks) fresh chives, finely chopped
  • 1/3 cup (about 1/8 of a bunch) fresh cilantro, finely chopped
  • 2 large shallots, finely chopped
  • 3 cloves garlic, minced
  • 1/2 cup bread crumbs (I used Panko)
  • 1/3 cup grated Parmesan cheese
  • Salt and pepper to taste
  • Eggs and vinegar (for poaching)
  1. In a large bowl combine the quinoa, chopped herbs and onions, garlic, Parmesan cheese, and beaten eggs. 
  2. Mix in the bread crumbs and stir gently to incorporate.
  3. Line a baking tray with parchment paper and spray with non-stick cooking spray or brush with a little bit of olive oil. 
  4. Take large handfuls of the quinoa mixture and form into patties roughly the size of your palm. Place on the baking tray and repeat with the remainder of the mixture.
  5. Bake the cakes at 400 degrees Fahrenheit for 10-15 minutes or until they are slightly golden brown. 
  6. Meanwhile, to poach the eggs bring a small pot of water to a simmering boil. Add a splash of vinegar and a little bit of salt. Prepare the egg by cracking it into a small ramekin or bowl.
  7. Once the water reaches a gentle simmer (not boiling) use a spoon or spatula to create a whirlpool in the middle then carefully slide the egg from the bowl into the center of the whirlpool.
  8. If the egg sticks to the bottom of the pot, wait about 30 seconds then gently nudge it free using a spatula or slotted spoon.
  9. The egg will be ready after 2-3 minutes, as soon as you see the egg white is completely solid and white. Carefully use a slotted spoon to lift the egg from the water and drain any excess liquid before placing on top of the quinoa cake.
Note: The poached eggs have to be made one at a time (otherwise it will be too crowded in the pot and the yolks will probably break when trying to remove them). If that seems like too much work another suggestion is to make the eggs sunny side up on a large surface big enough to accommodate more than one at a time. Also, the quinoa cakes should be eaten immediately after being topped with the egg otherwise the egg yolk won't have the same effect when broken into.

Wednesday, December 14, 2011

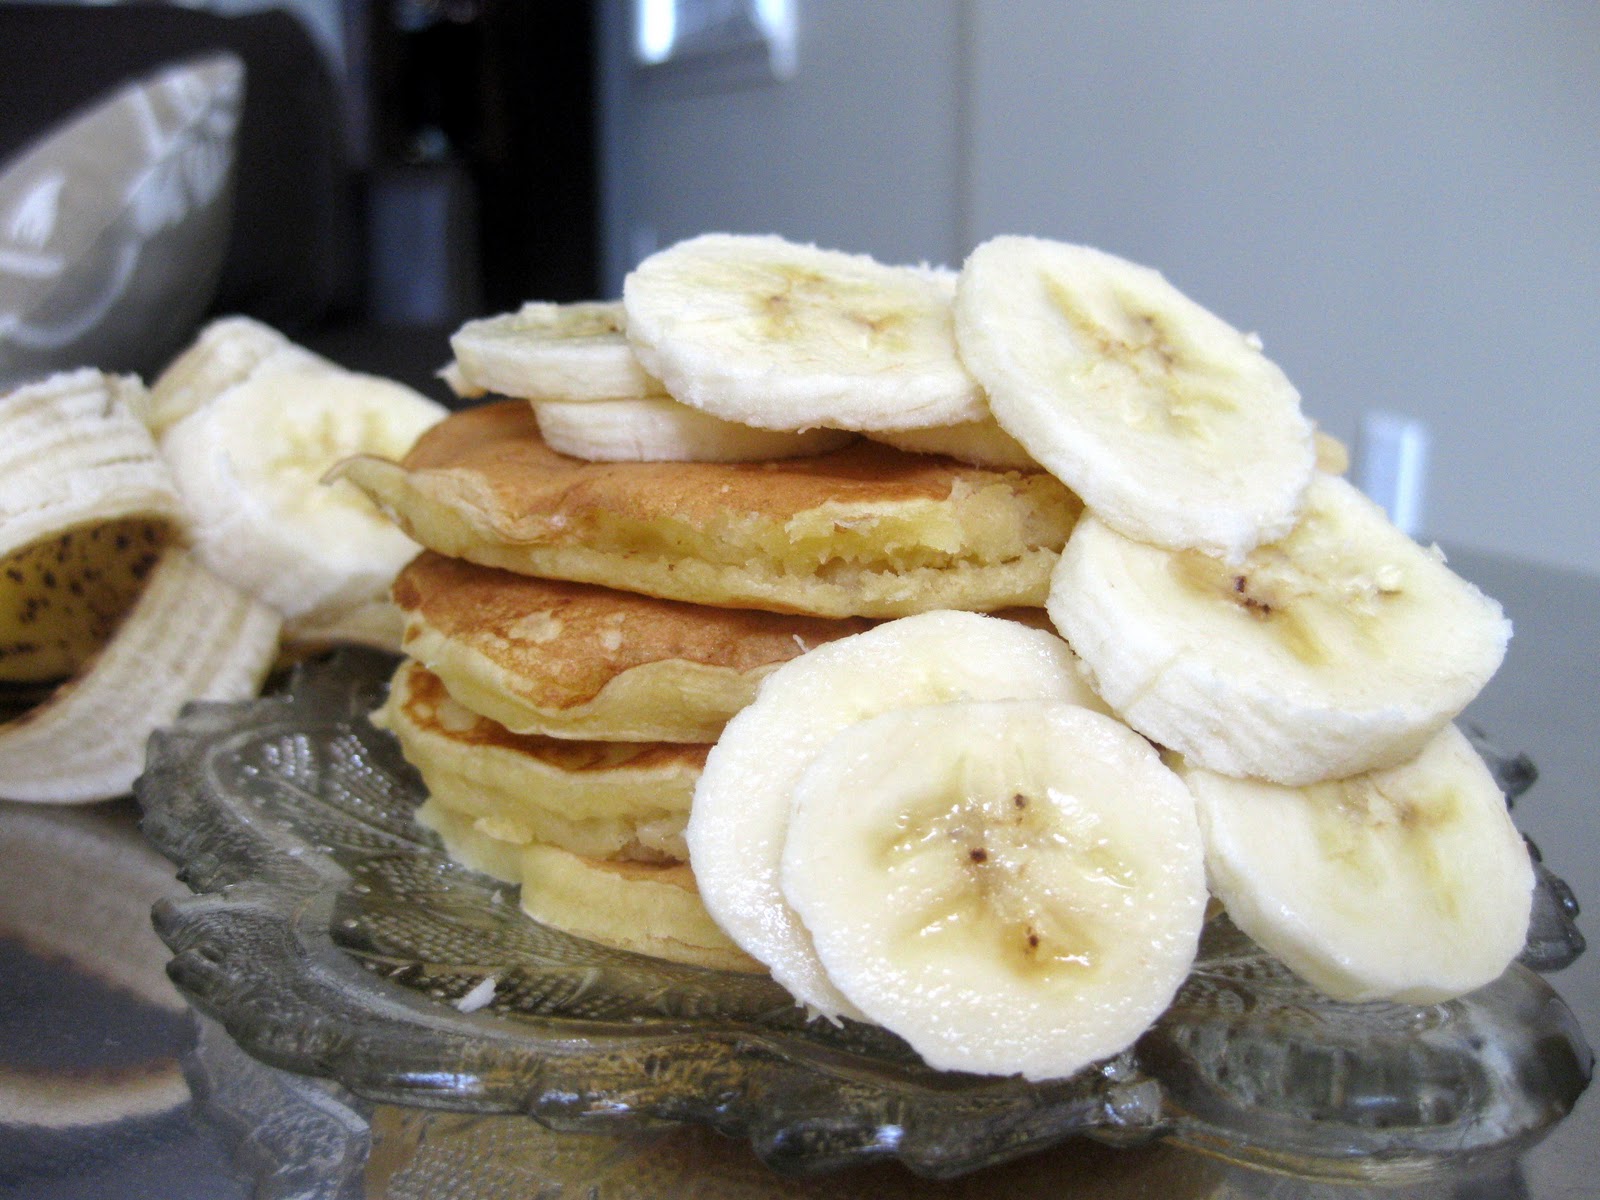
Banana Pancakes


For me, exam time means baking time. The more I have to study, the more I am inclined to bake. Just last week I finished all of my exams and then took a well-deserved ski trip to Whistler with a friend. However in the week before, while studying for my four exams in four days, I managed to bake goat cheese brownies, blueberry banana muffins, and cranberry-orange cream cheese bars. In fact, as soon as I made the muffins I had the urge to go bake the bars and begged my mom to allow me to do so. The funny thing is that she didn't even argue back, saying to me "I'll spend more time trying to talk you out of it than it will take you to make it". In the end, I paced myself by baking the bars the next day and bringing the brownies over to my cousin's house and the muffins with me to my exam. It seemed to me like the perfect solution because this way there weren't too many baked goods lying around the house and I got to treat my friends and family.

One of the things I made before the muffins and bars were these banana pancakes. Since I've been on somewhat of a pancake streak lately I have found them fun to make on a weekend morning for breakfast, especially considering that my brother is a big fan. I made these pancakes once before during the summer, but that was when my flipping skills were still undeveloped and the pancakes all looked funky. Sure, they tasted good, but nothing I could take a picture of and then blog about. Luckily this time was different; the pancakes tasted just as good as the first time and resembled proper pancakes too.

Banana Pancakes
Makes about 15-18 palm sized pancakes.
  • 1/4 cup (4 tbsp) unsalted butter, melted
  • 1 1/2 cups flour
  • 2 tbsp sugar
  • 2 1/2 tsp baking powder
  • 1/4 tsp salt
  • 1 small ripe banana, mashed
  • 1 cup milk
  • 2 large eggs
  • 1 tsp vanilla extract
  1. Whisk together the flour, sugar, baking powder, and salt and set aside.
  2. In a separate bowl, combine the banana, eggs, and vanilla.
  3. Add the melted butter and banana mixture to the dry ingredients and mix gently just until combined. The batter will be lumpy.
  4. Heat a griddle or large skillet over medium heat. Once heated, reduce the temperature to medium low and pour 1/3 cup of batter onto the cooking surface. Allow the pancake to cook until bubbles start to form on the top surface, about 15-20 seconds, then use a large spatula to gently flip the pancake over. Cook the other side until it is light and golden and fully cooked through. Repeat with remaining batter.
Note: Feel free to add mix-ins to the pancakes such as nuts, chocolate chips, blueberries, etc. You may have to go through a couple of "test" pancakes before you achieve the right temperature on the griddle or skillet. Finished pancakes can be kept warm in the oven at 200 degrees Fahrenheit while the rest are cooking.

Saturday, November 12, 2011

Chocolate Chip Buttermilk Pancakes


Ever since my success with my lemon ricotta pancakes I have a new found pancake-making confidence and when I woke up yesterday morning I was seriously craving pancakes. My brother had been asking me to make chocolate chip pancakes for a while now so I decided to make regular buttermilk pancakes and add chocolate chips to half of them. I didn't actually have any buttermilk on hand but apparently it's so easy to make your own. Simply measure one tablespoon of vinegar or lemon juice and add enough milk to bring the total volume to one cup and presto....one cup of buttermilk.

The regular version of the pancake tasted great on its own though I'm not going to lie, the chocolate chip tasted even better especially because I used good quality chocolate chips. Growing up in a Russian household, we have things like caviar for breakfast. My dad gave me the idea to spread some of the caviar onto one of the regular pancakes and it was delicious. The saltiness of the caviar combined with the hint of sweetness in the pancake made the perfect bite.

Meanwhile, my family has become quite involved with my blog. Every time I make something new they all ask me whether it will be on the blog. They're also cautious before taking a bite, always asking if I've had a chance to take a picture of the food before they dig in. The picture taking, in particular, is now always on their minds and sometimes they like to come up with ideas on how to best capture my food. For example, my mom came up with the idea to steam the chocolate chips that are sprinkled over the pancakes in the photo, after seeing this technique used on one of our favorite shows Cake Boss on TLC. Then, after my little photoshoot was over and we were right about to eat my mom pointed out that my brother had slathered his pancakes with butter and maple syrup in a very appetizing way, so I took a picture of his plate as well. I love that everyone wants to help me make the blog look as good as possible and I truly enjoy listening to and recreating some of their ideas.

Chocolate Chip Buttermilk Pancakes
Makes about 18-20 palm sized pancakes.
  • 2 cups flour
  • 2 tbsp sugar
  • 2 tsp baking powder
  • 1 tsp baking soda
  • 1/2 tsp salt
  • 2 cups buttermilk (or 2 tbsp vinegar + enough milk to make two cups)
  • 2 large eggs
  • 1/4 cup vegetable oil
  • Chocolate chips (I didn't measure how much I used...just eyeballed it)
  1. Mix the flour, sugar, baking powder, baking soda, and salt together. Set aside.
  2. Mix together the buttermilk (or milk and vinegar), eggs, and oil.
  3. Add dry ingredients to the wet and stir just until combined. It will still be lumpy but don't over mix.
  4. Heat a griddle or large skillet over medium heat. Once heated, reduce the temperature to medium low and pour 1/3 cup of batter onto the cooking surface. Allow the pancake to cook until bubbles start to form on the top surface, about 15-20 seconds, then use a large spatula to gently flip the pancake over. Cook the other side until it is light and golden and fully cooked through. Repeat with remaining batter.
  5. To make the chocolate chip pancakes you can do one of two things: 1) add chocolate chips directly to the batter and mix them in just until incorporated. 2) Pour the batter onto the cooking surface then sprinkle some chocolate chips onto the pancake and resume cooking as you would the regular pancakes. 
Note: You may have to go through a couple of "test" pancakes before you achieve the right temperature on the griddle or skillet. Finished pancakes can be kept warm in the oven at 200 degrees Fahrenheit while the rest are cooking. 

Wednesday, November 2, 2011

Breakfast Burritos


Last Sunday I made these burritos for breakfast and it was a great hit with my family. Similar to a breakfast frittata, these burritos are a great way to use up random leftovers in the fridge and still feel like you have created a complete breakfast. In the past, I've tried applying this concept using pitas because I love how they taste, but I found that the bread became too soggy and the filling would start to fall out. By wrapping everything in a tortilla the filling is held in place and makes the burrito manageable to eat.

The great thing about these burritos is that they take very little time to make since the only things being prepared from scratch are the scrambled eggs. Apart from that, you're free to put anything and everything into the filling. Also, I was able to eat one on the go by wrapping it in aluminum foil and then tearing away at it as I ate, kind of like in the Mexican fast food restaurants.

I highly recommend making these burritos sometime soon, so here are the simple steps:
  1. Gently whisk a little bit of milk into some eggs and add a touch of salt and pepper. Scramble the egg mixture and set aside in a small bowl.
  2. Gather all the filling ingredients you want to use. There are no hard and fast rules but I would recommend a veggie component, such as zucchini, mushrooms, or peppers, a meat component, such as sausage or shredded deli meats, an aromatic, such as onions and garlic, and a spice component, such as red pepper chili flakes. Saute the filling ingredients in some sort of sauce (I used tomato sauce but salsa could also work) and season to taste. 
  3. Remove the tortillas from the packaging and microwave for 30 seconds to one minute, or until they're soft and pliable. Working with one at a time, spoon some filling across the bottom third of the tortilla, leaving room on the sides to fold them in. Top with some scrambled eggs and shredded cheese. I also chose to add some chopped cilantro, but pretty much any herb can be used. For a more Mexican flavor try slicing some avocado and layering them on top of the eggs. Be sure not to put too much filling otherwise it will be difficult to wrap.
  4. To wrap the tortillas bring up the bottom so that it covers the filling completely. Fold each side inward then proceed to roll the bottom of the tortilla up, holding the sides in at the same time.
  5. Place the burritos, seam side down, onto a baking tray with a little space between each one. Carefully spray a little bit of water onto the tops of the burritos (I just wet my hands and flicked water droplets off of them). This will help the tortilla crisp in the oven. 
  6. Using the broiler setting, put the burritos into the oven for 3-5 minutes. This is where it gets tricky because it depends on the intensity of the broiler (I used the "HI" setting) and the position of the rack. Watch carefully for the tortillas to become lightly browned on top. At that point take the tray out of the oven and flip the burritos over so that the soft underside is facing up. Repeat the same process with the water and put back into the oven until the burritos are lightly browned again. Serve alongside some salsa, sour cream or guacamole for dipping.

Saturday, October 15, 2011

Lemon Ricotta Pancakes


I am so excited to finally be posting a pancake recipe! I must admit that this is not the first time I have made these pancakes, but this is definitely the first that these, or any other pancakes I have made, turned out correctly. The thing is...I'm awful at making pancakes! I have tried several times, mostly over this past summer, and each time I was left with a disappointing mess. Even though the pancakes tasted good I could never quite figure out the technique behind the flipping and therefore my pancakes looked horrible...misshapen and uneven, sometimes burnt or pieced together. Today my flipping issues were finally put behind me and I made a giant stack of beautifully perfect pancakes.

The first time I made these pancakes they tasted delicious so I really wanted to try my hand at them again and after making moussaka earlier in the week I had extra ricotta cheese leftover. In fact, I had exactly the right amount called for in the recipe. I was awakened early this morning by a phone call and couldn't get back to sleep so I decided I would make the pancakes for breakfast for the entire family. I don't know why this time in particular I finally got the flipping technique down, and why it has eluded me in the past. It took me a while to get the pan to exactly the right temperature and time my flips so that I had a beautiful golden color every time.

Once I got my "flipping groove" on I dared myself to pour out two at a time. Previously, I had been working at a slow and steady pace, pouring one pancake at a time in the center of the pan and giving myself plenty of room to flip it over. However I decided that since I was doing such a good job with the one pancake I should at least attempt two. Luckily for me, my flipping skills withstood the little challenge and I continued to make the rest two at a time. At first it took me a little bit off guard as I had to figure out how to best flip one without messing up the other, but once I got the spacing down I was on a roll. Even though I was actually only using one hand to flip, somehow I found it reassuring to hold a spatula in each hand...it gave me a sense of balance. Every time I plated another pancake I let out a little squeal of joy; good thing everyone was still asleep and no one was watching me.

As far as the taste goes, I already knew that the pancakes would be well received by my family because they quite enjoyed them last time. The lemon flavor is really strong because the recipe calls for both the zest and juice of a lemon. Also, the pancakes are extremely light because the eggs are separated and the whites are beaten with sugar before being folded into the rest of the batter. This gives the pancakes a sense of airiness which offsets any graininess that one might think would come from the use of ricotta. I'm so happy that my pancakes finally turned out the way I imagined them to be. Hopefully my newly acquired flipping skills are here to stay and I will be able to post more pancake recipes soon!

Lemon Ricotta Pancakes
Note: This recipe makes about 24 palm-sized pancakes.
  • 1 cup ricotta cheese
  • 1 cup milk
  • 3 large eggs, separated
  • 1 lemon, zested and juiced
  • 1 1/4 cup flour
  • 3 tbsp corn starch
  • 1 tbsp baking powder
  • 1/4 tsp salt
  • 1/4 cup sugar
  1. In a large bowl, combine the ricotta, milk, egg yolks, lemon zest and juice and whisk together.
  2. Add the flour, corn starch, baking powder, and salt and whisk just until the dry ingredients are incorporated.
  3. In a separate bowl, beat the egg whites on medium-low speed until foamy. Increase the speed to medium-high and gradually add the sugar. Continue to beat until soft peaks form.
  4. Fold one third of the egg whites into the lemon ricotta mixture until completely incorporated. Gently fold or whisk in the rest of the egg whites until no more white streaks are present.
  5. Heat a griddle or large skillet over medium heat. Once heated, reduce the temperature to medium low and pour 1/3 cup of batter onto the cooking surface. Allow the pancake to cook until bubbles start to form on the top surface, about 15-20 seconds, then use a large spatula to gently flip the pancake over. Cook the other side until it is light and golden and fully cooked through. Repeat with remaining batter.
Note: You may have to go through a couple of "test" pancakes before you achieve the right temperature on the griddle or skillet. Finished pancakes can be kept warm in the oven at 200 degrees Fahrenheit while the rest are cooking.

Wednesday, April 27, 2011

Stuffed Breakfast Tomatoes


The idea of stuffing a fruit or a vegetable has always been very appealing to me. Whether my orzo stuffed peppers or my stuffed zuchini with vegetable rice and cheese, I think that the concept is fun and allows for a lot of creativity. So of course when I came across a recipe for tomatoes filled with eggs I jumped on the chance to try it out.

The first time I made this for breakfast I had chosen tomatoes that were too small which was a big mistake. When I had originally cracked the egg into the tomato it had fit perfectly, but I forgot to account for the fact that the egg would expand during the baking process. My lovely stuffed tomato turned into an overflowing mess and a large portion of the egg ended up on the baking tray instead of inside the tomato.

This time, I used hot house tomatoes which were very big and wide. When I cracked the egg into the tomato there was about a centimeter of space between the surface of the egg and the top edges of the tomato. This was the perfect amount because it accommodated the egg once it baked and allowed it to puff out a little on top without overflowing.

Once I used the properly sized tomato, the only difficulty remaining was to make sure I didn't overbake the egg. Unfortunately, I was not as successful in that department. Due to the fact that I plated the tomatoes and took pictures of them for five minutes, they became a little cold so I decided to put them back in the oven to warm them up a little. Obviously I kept them in too long because instead of having a runny egg yolk when I cut into it, I was left with one hard boiled and one soft boiled egg. Still, I'm crazy about eggs and I enjoyed the delicious combination of the eggs, cheese, parsley, and tomato. There are of course variations that can be made, such as using dill instead of parsley or even some green onions. I saw one version online that had a little minced garlic inside the tomato. I wanted to keep my breakfast nice and simple, so I stuck to the basics, but maybe next time I'll try it a different way.

Stuffed Breakfast Tomatoes
  • 2 hot house tomatoes
  • 2 medium sized eggs
  • Fresh parsley, chopped
  • Parmesan cheese
  • Salt and Pepper
  1. Cut the tops off the tomatoes and then carefully hollow them out. Leave the walls of the tomato as intact as possible.
  2. Sprinkle some salt and pepper along the bottom and walls of the tomatoes.
  3. Add some Parmesan cheese and chopped parsley and use your fingers to evenly rub the mixture all along the inside of the tomatoes.
  4. Carefully crack one egg into each tomato.
  5. Bake at 350 degrees Fahrenheit for 25-30 minutes, or until the egg whites are set. During the last five minutes, sprinkle a little bit of Parmesan and parsley on top and then return to the oven. Don't keep them in the oven too long otherwise the eggs will overbake.