Showing posts with label dough. Show all posts

Wednesday, November 12, 2014

Plum Pie


When my parents returned from their trip to Europe, my mother had a sudden craving to make plum pie after seeing it in a bakery window in Baden-Baden. Plum season was just about ending but we bought some nice, juicy plums and I scoured online until I found a good recipe. The pie turned out great and we ate it all up within two days.

Apparently one pie was not enough to satisfy my mother's cravings. Recently, I myself traveled to Europe and when I returned my mom asked me if I wanted to make the pie again. Technically, it was mostly her as I was still kind of tired and jet-lagged and only helped by rolling out the dough. This time the pie turned out even better than the first time. As it came out of the even, golden brown and looking absolutely beautiful, it was almost like torture waiting for it to cool so that we could slice into it.

Once again we devoured the pie quickly and started thinking of more pies we could make. I questioned my mother about her comment a few months prior when my brother asked for a pie for his birthday and she said "we're not pie people". However my mother clarified that although pie is delicious, what she meant by that was that pie is wonderful and homey but not good enough for a birthday celebration. Regardless, I think this plum pie proved that we are in fact "pie people" and now I look forward to the next pie we decide to bake.

Plum Pie

For the dough:
Note: This recipe is enough to make two 9" crusts.
  • 2¼ cups flour
  • 1 tbsp sugar
  • 1 tsp salt
  • ¾ cup unsalted butter, chilled and cut into chunks
  • ⅔ cup cold water
  1. Whisk together the flour, salt, and sugar in a large bowl.
  2. Rub the butter pieces into the mixture until coarse and approximately pea-sized.
  3. Stir in the water using a fork. You may not have to use all of the water but just enough until the dough forms. 
  4. Split the dough evenly and form each half into a ball. Wrap in plastic and refrigerate for at least 30-60 minutes before using.
For the filling:
  • 2 lbs fresh plums, cut into chunks
  • 1 cup sugar 
  • ¼ cup cornstarch
  • ¼ tsp salt
  • 1 tsp vanilla
To assemble:
  1. Mix the pieces of plum with the remaining ingredients and stir well to evenly coat. Set aside.
  2. Roll out one ball of dough into a large circle, about 10"-11" so that there is an overhang around the edge of the pie plate. 
  3. Carefully transfer the rolled out dough onto a lightly floured and greased 9" pie plate, making sure the dough comes up evenly around the sides.
  4. Fill the pie crust with the plum mixture. Roll out the second ball of dough and lay on top of the filling.
  5. Crimp or pinch the dough edges to seal the filling completely.
  6. Brush the top of the pie with some milk and sprinkle generously with sugar.
  7. Cut about 5-7 slits on the top of the dough using a sharp knife. This will help steam to escape and is absolutely necessary.
  8. Bake for 65-75 minutes at 375 degrees Fahrenheit, until the crust is golden brown and the filling starts to bubble through the vents on top of the pie.
  9. Cool pie completely before slicing to ensure that the filling thickens and sets.
Note: The first time we made the pie we had difficulty cutting it as it had stuck to the glass dish. The second time we lined the dish with parchment paper and had no troubles whatsoever. 

Sunday, September 14, 2014

Pecan Tarts


After making blueberry pie last week I had some leftover pie dough and decided to make these little pecan tarts using my little 4" tart pans. I actually bought the pans a long time ago but have only ever used them once before to make french pear tarts with almond cream, which were actually quite delicious.

The beauty of these tarts was that they were super easy to assemble, given that I already had the dough made. The filling came together quickly and then it was just a matter of pouring it over the layer of pecans sitting over top the dough in the pans. Due to the golden corn syrup, the filling had a taste very reminiscent of caramel, something my cousin really appreciated. I only had enough dough to make three tarts, but the filling supposedly could be divided into five or six as it puffs up while baking anyway.

Pecan Tarts:
Note: Since I used leftover pie dough, I don't have proportions for the dough recipe. However I do have a pre-existing dough recipe which I know would be enough for one 9" tart or 5-6 mini 4" tarts. It can be found here.

For the filling:
  • 1½ tbsp unsalted butter 
  • cup packed dark brown sugar
  • ¼ cup plus 1 tsp golden syrup 
  • tsp fine salt
  • ½ tsp vanilla extract
  • 1 egg, lightly beaten 
  • 1 tsp all-purpose flour 
  • ⅔ cup whole pecans
  1. Combine the butter, brown sugar, golden syrup and salt in a small saucepan and bring to a boil. 
  2. Remove from heat and let cool to room temperature. 
  3. Whisk in the vanilla, egg and flour until smooth. 
  4. On a lightly floured work surface, roll dough out to " thickness and cut out as many 5-6" circles as you can. Re-roll scrap pastry and cut out another circle so that you have five in total. Fit each round into the 4" tart pans with removable bottoms. 
  5. Prick pastry shells several times with a fork and scatter pecans evenly in a single layer over the base of each one. 
  6. Pour the filling over to cover the nuts, dividing it evenly. Place tart pans on a baking tray and bake on the bottom rack of the oven at 375 degrees Fahrenheit until the filling has puffed and the pastry is nicely browned, 25-30 minutes. Transfer to a wire rack and let cool slightly before serving.

Saturday, September 13, 2014

Blueberry Pie

 
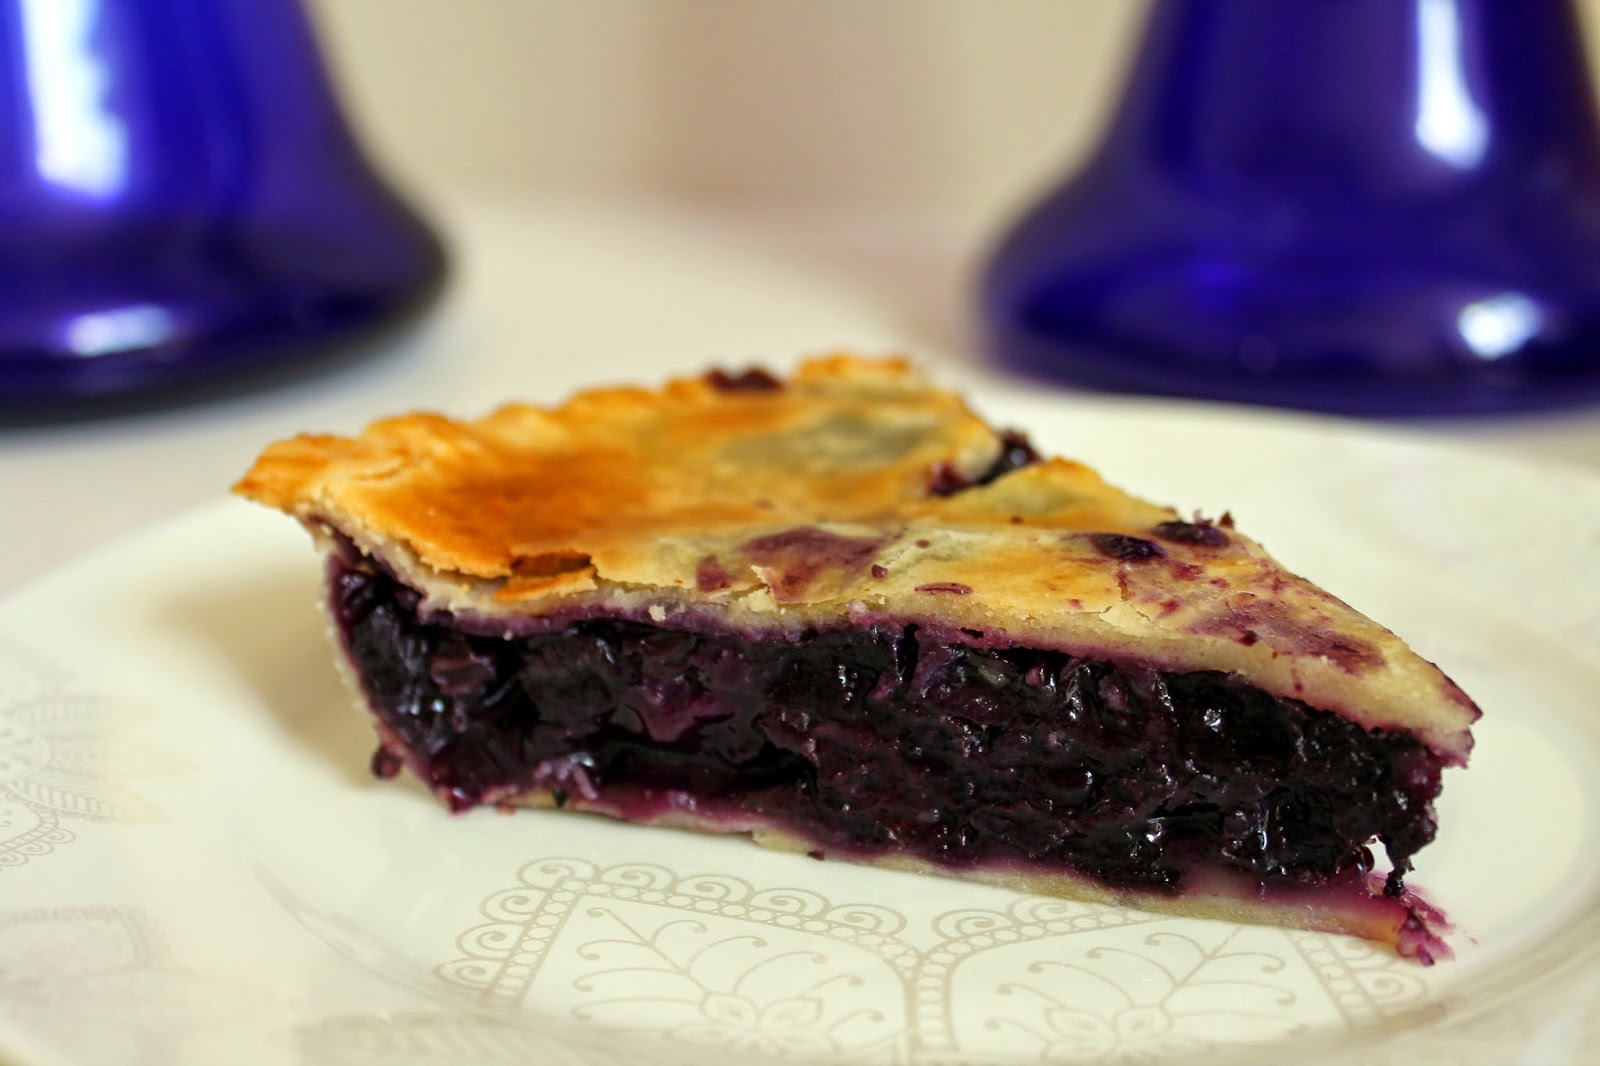
A few weeks ago we were celebrating my brother's birthday and he asked me to bake a pie. My mom said that she didn't think pie was good enough for a birthday so we agreed upon a cake instead. As a compromise, I promised him that I would make him a pie sometime in the near future. In that same week, my mom also bought a 10 lb box of blueberries, knowing they are my favorite berry and that the season was ending. As much as I love blueberries, it is difficult to eat 10 lbs on my own so I was looking for some recipe that would use up a significant amount. That's when I got the idea to make a blueberry pie, therefore fulfilling my brother's request and serving my blueberry purpose.

I've only baked a pie once before, almost two years ago when my friend asked me to help her make an apple pie. Unfortunately, since she took it home with her I never had the chance to taste it. This time I definitely made sure I had a nice big slice when I invited my cousins and grandparents over for dinner one evening. The pie was delicious and I enjoyed a slice for breakfast the next morning as well.

Blueberry Pie

For the dough:
Note: This is enough to make one 9" crust. To make the top layer double-up the ingredients.

  • 1¼ cups flour
  • 1 tbsp sugar
  • ¼ tsp salt
  • ½ cup (8 tbsp) cold unsalted butter, cut into pieces
  • 3-4 tbsp ice cold water
  1. Combine the flour, sugar, and salt and pulse a couple of times in a food processor. Add the chunks of butter into the processor and pulse until the butter pieces are roughly the size of walnuts. If you don't have a food processor use a pastry cutter or fork and knife to cut the butter into the flour.
  2. Transfer the dough mixture into a bowl and moisten with the water, starting with just a couple of tablespoons at first. Work the mixture until it forms a dough, adding water by the tablespoon only as needed if it feels dry.
  3. Form the dough into a small disk and wrap in plastic wrap. Refrigerate for at least 30 minutes or up to 24 hours before rolling it out.
For the filling:
  • 6 cups of fresh blueberries, rinsed and stems removed
  • ½ lemon, juiced and zested
  • ¼ cup flour
  • ½ cup sugar
  • 2 tbsp butter (unsalted), cut into small pieces 
To assemble:
  1. Combine all of the filling ingredients and set aside.
  2. Remove the dough from fridge and divide in half. On a floured work surface, roll out two equal discs about ⅛" thick. Lay one disc over a well-greased 9" pie pan and press down to line the dish with the dough.
  3. Pour the filling over the dough in the dish and dot with the pieces of butter.
  4. Cover the pie with the second piece of dough and use a fork to seal and crimp the edges all the way around. Trim any excess dough from the sides and use a knife to cut some slits in the dough to allow the steam to escape while baking.
  5. Blend an egg yolk with a few tablespoons of water and brush the egg wash over the top of the dough. 
  6. Bake at 425 degrees Fahrenheit for 15 minutes, then reduce the temperature to 350 degrees and continue baking for an hour until the blueberry juices are thickened and bubbling.
  7. Remove from the oven and transfer to a wire rack to cool before cutting.
Note: It may be helpful to cover the edges of the pie with aluminum foil as they brown faster than the middle. Also, put the pie dish on a baking tray so that it may catch any drippings. Although delicious when served warm, it is also harder to slice.

Wednesday, June 25, 2014

Early Grey Sweet Rolls with Cherry and White Chocolate


Our family has expanded yet again. Yesterday marked four years to the day since my aunt's cousin immigrated here with her husband and son from Israel. Since that time they have had a daughter, who will be turning two at the end of July, and now her brother and his family have immigrated as well. I thought it only fair to properly greet the new additions to the family with some baked goods.

A few months ago my friend had asked me if I ever tried baking with Earl Grey tea before, too which I replied that I had not. Since that time the idea was in the back of my mind but I honestly hadn't given it much thought until yesterday. I found this recipe for a sweet roll that incorporates Earl Grey tea within the dough. The original recipe called for a combination of fresh raspberries and white chocolate but I didn't have any raspberries on hand so I substituted some frozen cherries instead.

I baked the rolls in the afternoon and later that evening brought them with me to the park as I met the new family members. They were extremely nice and appreciate of the gesture, commenting that they especially enjoyed that the rolls were not overly sweet. We spent a nice evening together with the kids playing on the playground before we parted our separate ways. I was so pleased to have met them and look forward to the future occasions and celebrations we will share together.

Earl Grey Sweet Rolls with Cherry and White Chocolate

For the dough:
  • 1 package (8 grams) yeast
  • 1 teaspoon sugar
  • ½ cup warm water
  • 1 egg
  • 2 tablespoons oil
  • ¾ cup warm water
  • 4 cups flour, sifted
  • ¼ cup sugar
  • ¼ teaspoon salt
  • 2 Earl Grey tea bags 
  1. In a small bowl, mix the yeast, a teaspoon of sugar and a ½ cup of warm water. Set aside to sit and foam.
  2. In another small bowl, whisk together the egg, 2 tablespoons of oil and ¾ cup of warm water. Set aside.
  3. In a large bowl, sift 4 cups of flour with sugar, salt, tea powder and whisk everything together.
  4. Make a well in the center. Pour in your yeast and egg mixtures and using a wooden spoon, stir until roughly combined.
  5. Dump your dough onto a lightly floured surface and begin to knead for 5-10 minutes (you may have to lightly flour your surface again if your dough becomes too tacky). Once the dough starts to feel smooth, place it in an oiled bowl and cover with a tea towel. Place in a warm area or in a turned off oven and let rise for an hour to an hour and a half, until the dough has doubled in size. 
For the filling:
Note: You can substitute any fruit such as raspberries, strawberries, blueberries, or cherries. If using frozen fruit, make sure to not thaw and pulse a few times in the food processor so the pieces aren't too big. Then add 1 tbsp corn starch to the fruit before spreading on the dough.
  • ¼ cup sugar
  • ½ cup white chocolate chips
  • 2 cups fresh or frozen fruit, chopped into pieces
To assemble:
  1. Once the dough has risen, roll out into a 10" x 18" rectangle.
  2. Scatter dough evenly with sugar, white chocolate chips and fruit. Be sure to leave the top inch of your dough free of any toppings so you are able to seal your roll.
  3. Starting at the bottom, begin to roll up the dough and berries using firm pressure. Seal the border using a light coating of water. 
  4. Cut the rolls about 1-1½" thick (depending on how many you want to make).
  5. Place the rolls, cut side down, in an 11" x 13" well-greased or parchment-lined baking dish. (I actually cut my rolls to be about 1" thick and was able to make 18 all together, putting 9 into two different pans). Cover with a tea towel and let rise for another half hour.
  6. Bake the rolls at 350 degrees Fahrenheit for 30 minutes. 
For the glaze:
Optional but I would highly recommend as it is delicious and adds a great final touch.
  • ½ cup powdered sugar
  • 2-3 tbsp milk or cream (depending on how thin or thick you want the glaze to be)
  1. In the last few minutes while the rolls are finishing baking, whisk together the powdered sugar and milk/cream until a smooth mixture comes together.
  2. As soon as the rolls are ready, coat them with the glaze immediately. If there is enough left (or you can make some extra) glaze them again in 5 minutes.

Monday, March 31, 2014

Chocolate Chip Cookie Dough Cupcakes


In addition to making Nutella bomb cupcakes for my birthday Whistler trip with friends, I also made these cookie dough filled cupcakes. Ever since I made chocolate dulce de leche cupcakes back in January, I have been craving making another filled cupcake. I decided that between the two types that I made for my birthday at least one should have a filling.

This recipe was definitely more work than the average cupcake because it involved baking the cupcakes, making the filling, chilling the filling before cutting holes into the cupcakes and stuffing them, and finally frosting the cakes. I wish I could say that these cupcakes were truly amazing and worth all of that effort but the truth is that they were just okay. Personally, I felt that they were a little too sweet and I enjoyed the Nutella bomb cupcakes more. However my friends enjoyed both which just goes to show that everyone has different tastes. Regardless, I had a great time celebrating my birthday with my friends and I hope it was just the beginning of a great year to come.

Chocolate Chip Cookie Dough Cupcakes
Note: The original recipe was for 24 cupcakes, however I cut it in half and made only 12. The recipe below reflects the amounts I used. The original recipe can be found here.

For the cupcakes:
  • 1½ cups (16 tbsp) unsalted butter, room temperature
  • ¾ cups light brown sugar, packed
  • 2 large eggs
  • 1⅓ cups flour
  • ½ tsp baking powder
  • ½ tsp baking soda
  • ¼ tsp salt
  • ½ cup milk
  • 1 tsp vanilla extract
  • ½ cup chocolate chips 
  1. Combine the flour, baking powder, baking soda, and salt in a medium bowl. Stir together to blend and set aside.
  2. Beat the butter and brown sugar together on medium-high speed until light and fluffy, about 3 minutes.
  3. Mix in the eggs one at a time, beating well after each addition and scraping down the sides of the bowl as needed.
  4. Add the dry ingredients to the mixer bowl on low speed, alternating with the milk, beginning and ending with the dry ingredients, mixing each addition just until incorporated. 
  5. Blend in the vanilla and fold in the chocolate chips with a spatula.
  6. Divide the batter evenly in a well-greased or cupcake lined pan . Bake for 18-20 minutes at 350 degrees Fahrenheit, or until a toothpick inserted in the center comes out clean. 
  7. Allow to cool in the pan 5-10 minutes, then transfer to a wire rack to cool completely.
For the filling:
  • 2 tbsp unsalted butter, room temperature
  • 3 tbsp light brown sugar, packed
  • ½ cup + 1 tbsp flour
  • 3½ oz sweetened condensed milk
  • ¼ tsp vanilla extract
  • 2 tbsp mini chocolate chips
  1. Cream the butter and sugar in a mixing bowl on medium-high speed until light and fluffy, about 2 minutes. 
  2. Beat in the flour, sweetened condensed milk and vanilla until incorporated and smooth. 
  3. Stir in the chocolate chips. Cover with plastic wrap and refrigerate until the mixture has firmed up a bit, about an hour.
For the frosting:
  • ½ cup (8 tbsp) unsalted butter, room temperature
  • ¼ cup light brown sugar, packed
  • 1 cup powdered sugar
  • ⅓ cup flour
  • ¼ tsp salt
  • 1 tbsp milk
  • 1 tsp vanilla 
  1. Beat the butter and brown sugar together until creamy. 
  2. Slowly beat in the powdered sugar until smooth. 
  3. Beat in the flour and salt, then mix in the milk and vanilla until smooth and well blended.
To assemble:
  1. Cut a cone-shaped portion out of the center of each cupcake. Fill each hole with a chunk of the chilled cookie dough mixture.
  2. Remove the tip from the cupcake cones and press each top back onto the cupcake.
  3. Frost the cupcakes and sprinkle with some mini chocolate chips for garnish.

Saturday, August 10, 2013

Chocolate and Jam Twists


I found this recipe about a month ago but I was waiting until my brother came home from his month-long trip to Israel in order to make it. He is the biggest consumer of baked goods in our household and it didn't feel right baking something without him being present to sample it.

Of course after waiting for so long to make it, I kind of had high expectations. I was a little disappointed when my twists did not turn out as beautiful as the picture from the original recipe so I sprinkled some powdered sugar over them. However when I shared this detail with my mother she disagreed and said they looked nice on their own as well.

Later when I showed her the picture online, she helped me to discover that I had actually misread the recipe and combined the chocolate and jam in each twist, rather than make two separate flavors. This accounted for the extra thickness in the filling and the difficulty I experienced when twisting each strip of dough. But I think it actually turned out for the better in terms of flavor because I actually enjoyed the combination of chocolate and fruity jam in each bite. Therefore I think that if I make these twists again I will still make them the "wrong way" because I liked how it tasted.

Chocolate and Jam Twists
Note: I used chocolate ganache for the filling because I had it leftover from something else however the original recipe calls for using nutella and peanut butter. Also, the original recipe used only one filling and single layers of dough....I used two fillings and double layers.
  • 1 package puff pastry, thawed
  • Jam (any flavor)
  • Chocolate ganache (recipe here)
  • Optional: Powdered sugar for dusting
  1. On a lightly floured surface, roll out one block of the puff pastry dough to about 2 millimeter thickness.
  2. Cut the rolled dough in half horizontally. Spread jam on one half and the chocolate ganache on the other.
  3. Carefully place one half over the other, making sure the pieces match up as closely as possible and the filling is sandwiched in between. 
  4. Cut the dough vertically into strips about 1" wide. Carefully twist each strip and pinch the ends together. 
  5. Place the twisted strips onto a large baking tray lined with parchment paper. Make sure to leave some space between the strips as they will slightly unravel and puff outward in the oven.
  6. Repeat with the other block of dough and filling.
  7. Bake the twists for 15 minutes or until golden and puffed at 400 degrees Fahrenheit. Remove from the oven and allow them to cool and harden on the tray before transferring. Optional: sprinkle with some powdered sugar once cool.

Sunday, July 28, 2013

Cinnamon Rolls


Recently one of my best friends moved into a new place just two blocks away from the beach! After dealing with an ant-infested apartment for the past year I would say she truly deserves an upgrade. Last night I had the pleasure of seeing her new place and catching up with her over dinner. Afterward we walked over to the beach and watched the annual Celebration of Lights fireworks that take place every summer in Vancouver.

As a mini housewarming I decided to bake cinnamon rolls for my friend as they are one of her favorite desserts. I was actually surprised that I had yet to post any recipes of cinnamon rolls in the three years since I first started this blog. That's not to say I haven't baked any in that time, but somehow I was never completely satisfied with the recipe or the pictures.

Luckily this time was different. The rolls turned out flaky and soft with the perfect proportion of cinnamon filling. The original recipe called for an icing glaze but I personally love cream cheese frosting so I made that instead.

My friend's eyes lit up when she opened the door and saw the treat I had brought along. The expression on her face was worth the time I spent making the rolls, although truthfully it wasn't difficult at all. I had some extras left over and brought them to my cousin's house the next day, which she was equally grateful for.

Cinnamon Rolls
Note: This recipe makes 8-12 large or 12-16 small rolls, depending on how you cut them.

For the dough:
  • 6 ½ tbsp sugar
  • 1 tsp salt
  • 5 ½ tbsp unsalted butter
  • 1 large egg, slightly beaten
  • 1 tsp lemon extract or 1 tsp grated lemon zest
  • 3 ½ cups flour
  • 2 tsp instant (rapid rise) yeast
  • 1 1/8 to 1 ¼ cups whole milk or buttermilk, at room temperature
For the filling:
  • 6 ½ tbsp sugar
  • 1 ½ tsp ground cinnamon
  1. Beat the sugar, salt, and butter together on medium-high speed.
  2. Beat in the egg and lemon zest/extract until smooth.
  3. Add the flour, yeast and milk. Mix on low speed until the dough forms a ball. Switch to a dough hook and increase the speed to medium, mixing for approximately 10 minutes, or until the dough is silky and supple, tacky but not sticky. (You may have to add a little flour or water while kneading to achieve this texture.) Alternatively, hand-knead the dough until it is smooth.
  4. Lightly oil a large bowl and transfer the dough to the bowl, rolling it around to coat it with oil. Cover the bowl with plastic wrap and set aside in a warm place for approximately two hours, or until it has doubled in size.
  5. Once the dough is ready, roll it out into a rectangle about 2/3" thick and 14" x 12 for large rolls, 18" x 9" for smaller rolls. Make sure not to roll it out too thin otherwise the rolls will be chewy and tough.
  6. Combine the sugar and cinnamon for the filling and spread generously across the surface of the dough. Starting from one long edge, carefully roll the dough into a log.
  7. With the seam side down, cut the dough into 8 to 12 pieces about 1 ¾ inches thick for larger rolls or 12 to 16 pieces about 1 ¼ inches thick for smaller rolls.
  8. Set aside onto a baking sheet lined with parchment paper, placing the pieces about ½" apart so they aren’t touching but are close to one another.
  9. Cover loosely and allow them to proof at room temperature for 75-90 minutes, or until the pieces have grown into one another and have nearly doubled in size. (You may also retard the shaped buns in refrigerator for up to 2 days, pulling the pan out of the refrigerator 3-4 hours before baking to allow the dough to proof.)
  10. Bake at 350 degrees Fahrenheit for 20-30 minutes or until the rolls are golden brown. Cool for 10 minutes in the pan before glazing or frosting.
Note: The original recipe can be found on my favorite food blog Annie's Eats which also has the recipe for the icing glaze. I used half the amount from my standard cream cheese frosting recipe which can be found here.

Monday, June 24, 2013

Chocolate Pinwheel Cookies


For the past four years there has been established a much loved tradition in our Russian community of celebrating Father's Day with a giant picnic. Due to scheduling conflicts with the main organizer, this year's picnic was actually postponed and we all celebrated Father's Day one week later. The picnic has a lovely way of bringing together many of the smaller groups into one large gathering and everyone looks forward to it every year.

The picnic is held in a rather potluck style, with each family bringing what they can. There is usually a vast array of salads, meats, fruits, and dessert. Basically it's one big food fest with occasional drinking, singing along to guitar songs, soccer games, card playing, and general merriment.

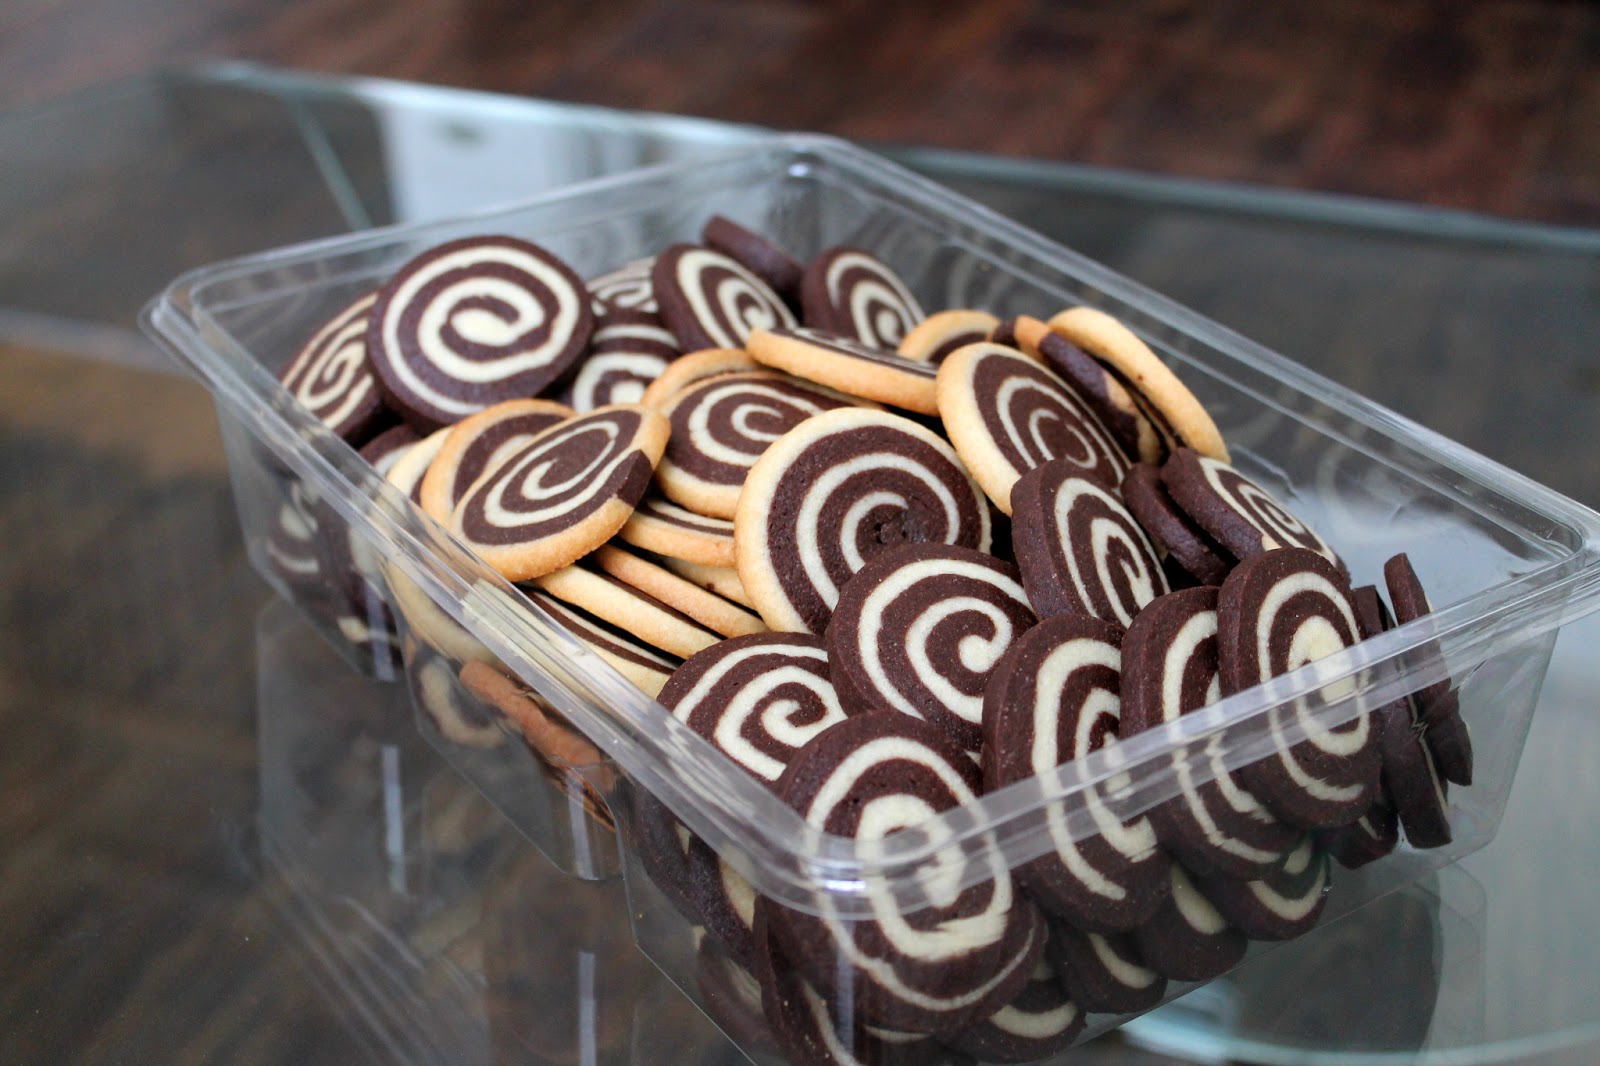
When I came across this recipe last week I thought it would be fun to bring to the picnic since these cookies look very visually appealing. Granted rolling the dough out was a little time consuming since it had to be done six times (three for each flavor) but once that was out of the way the rest was a breeze.

I split the task into two days, making the dough and shaping it into logs the night before the picnic and then slicing and baking the cookies the next morning. I have never made a "slice-and-bake" cookie dough before but having done it now I can see why it is so appealing; the preparation of the dough can be done well in advance and then frozen into logs. Then, once you're ready, you simply slice the log into cookies and bake. Best of all, you don't have to bake the whole log at once...you can decide to make as many or as few as you want at the given moment.

Although the cookies featured a chocolate and vanilla dough the taste of the chocolate was quite strong, therefore the cookies simply tasted like chocolate cookies. However the pinwheel design was quite intriguing and earned many "oohs" and "aahs" from those at the picnic. They were definitely a hit and enjoyed by young and old alike.

Chocolate Pinwheel Cookies
Makes approximately 100 palm-sized cookies.
  • 1¼ cups butter, slightly softened
  • 1¼ cups sugar
  • 1 egg
  • 1 tsp vanilla extract
  • 3 cups flour
  • ½ tsp salt
  • ¼ tsp baking soda
  • 2 tbsp strong coffee, cooled
  • 4 tbsp unsweetened cocoa powder
  • 4 oz (112 g) bittersweet chocolate, melted and still warm
  1. In a large bowl cream the butter for 2 minutes until smooth.
  2. Mix in the sugar and beat for an additional 2 minutes.
  3. Add the egg and vanilla and beat until well combined.
  4. Sift in the flour, salt, and baking soda and mix until just combined.
  5. Remove 2 cups of the dough and set aside.
  6. Add the cooled coffee and cocoa powder to the remaining dough.
  7. Mix in the melted chocolate until well combined.
  8. Divide each dough into three equal pieces, so as to have 3 chocolate and 3 vanilla.
  9. Shape each piece into a 5×5 square on wax or parchment paper, top with another piece of wax or parchment, and the roll each square into a 7×7 square. (The dimensions don't have to be 100% accurate, just make sure to roll the dough out to be thin and approximately the same size). Refrigerate for 15 minutes.
  10. Take one vanilla square and one chocolate square and remove one piece of waxed paper from each. Align the two layers together evenly, one on top of the other, and gently press to seal both layers together.
  11. Take off top layer of wax paper and slowly start to curl edge of the dough up and over using the bottom waxed paper for help, not rolling it into the cookies.
  12. Roll the dough into a tight spiral roll, pinwheel, avoiding spaces in-between.
  13. Once formed, gently but firmly roll back and forth to compact the roll and make it about 9 inches long, 1½" thick. Cover in plastic wrap, twisting ends to seal it closed. Repeat with remaining layers.
  14. Refrigerate for 3 hours before using or freeze for up to two months.
  15. Once ready to bake slice the cookie log into ¼" thick cookie slices and lay out onto a parchment-lined cookie sheet. The cookies won't spread too much so don't worry about spacing them too far apart.
  16. Bake for 12-14 minutes at 350 degrees Fahrenheit and transfer warm cookies to wire rack to cool.

Sunday, June 23, 2013

Lahmacun


I originally intended on trying this recipe two months ago but several things got in the way and I didn't have a chance to get around to it until last week. This recipe is for a Turkish flatbread called Lahmacun, which is kind of similar to a thin crust pizza except for the fact that it features a lot of meat and no cheese. The idea is to create a vegetable/spice mixture that is added to ground meat and spread in a thin layer over some dough.

The recipe I found was quite simple and claimed that the flatbreads could be baked in a matter of minutes on the grill or a flat-top. When my mom and I tried to bake the first one on the flat-top it created a big mess and we couldn't figure out how to make the top bake through, so for the rest we switched to the oven.

It was definitely time consuming not because it was difficult, but rather because we didn't have enough room in the oven to bake more than two at a time, therefore extending the baking into an hour long process. However I think the finished product was worth it in the end. The lahmacun had a pleasant meaty/tomato flavor and we topped it with some hot sauce and tzatziki for an extra spice and creaminess. I think in the future I might add some red chili flakes and possibly chili powder to the spice mix just to give it some extra heat.

The lahmacun was also convenient to have on hand the next day and simply reheat in the oven, especially when my brother came home super hungry (his usual state) looking for something to eat. Of course being the meat and cheese lover that he is, he added slices of sausage and sprinkled cheese on top. By that point it turned into a thin crust meat lover's pizza, which I guess suited him just fine.

Lahmacun

For the dough:
  • 5 cups flour
  • 1½ cup of milk
  • ¼ cup vegetable oil
  • 3 tsp salt
  • 1 tsp sugar
  • 1 package insant yeast (10 grams)
  1. Combine all the ingredients for the dough in a bowl or stand-mixer. 
  2. Kneed or mix the dough for about five minutes until it comes together. (My dough was a little dry at first and I had to add a little extra water).
  3. Cover the dough loosely with a towel and set aside for at least two hours in a warm place for it to rise.
For the meat: 
  • 1 lb ground beef
  • 1 red bell pepper
  • 2 large tomatoes
  • 1 large onion
  • 1 tbsp tomato paste
  • 2 tsp paprika
  • 1½ tsp cumin
  • 1½ tsp ground black pepper
  • 2 tsp salt
  • ¼-½ bunch Italian flat-leaf parsley
  • ¼ cup olive oil
  1. Combine the bell pepper, tomatoes, onion, and parsley in a food processor and mix until completely well mixed.
  2. Add the vegetable mixture, along with the spices, tomato paste, and olive oil, to the ground beef. Use your hands to mix thoroughly.
To assemble:
  1. Depending on how many you want and the size, tear a large chunk (about the size of a tennis ball) from the dough. 
  2. Keep the remaining dough covered while rolling out the torn chunk as thin as possible (about two millimeters thick).
  3. Top the rolled dough with a thin layer of the meat mixture, spreading it evenly over the entire surface.
  4. Bake the lahmacun for 5-10 minutes (depending on the size and thinness of the dough) at 425 degrees Fahrenheit. Repeat with the remaining dough and meat.
Note: Based on my experience of tennis ball-sized chunks, we made six lahmacuns which turned out to be approximately the same size as a large serving plate. Obviously the number and size will vary depending on how big the torn off dough is. Also, we realized they tasted best when they were hot out of the oven, so don't be afraid to dig in to the first one while making the rest.

Sunday, May 5, 2013

Perogies


Last week my mom and I were in the store and I saw a perogy press mold. I begged my mom to buy it, claiming that I would use it right away. My mom gave in because she said she remembered how her family used to have a similar one when she was a little girl and started to recall some of her childhood memories in the kitchen. The fact that it was on sale also helped.

True to my word I used the perogy mold later that same week. Earlier that day I had visited my grandmother for lunch and told her of my intentions to make fresh perogies, or as we call them in Russian "varyeniki", from scratch. In a conversation with my mother the next day, my grandmother said she could tell that physically I was present but mentally I was thinking all about the perogies...which was totally true.

The concept of the perogy mold was good: make the dough, roll it out and cut into strips, press into the mold, fill each cavity with the filling, lay a second sheet over-top, and then use a rolling pin to apply pressure and seal the perogies. Then pop out the finished product and BAM... six perogies all at once. The problem was that the mold was not well designed and the perogies were not as easy to seal and pop out as they should have been. The mold itself was not heavy, therefore it tended to slide on the counter when using the rolling pin. Also, the ridges were not as pronounced as they should have been, meaning that after using the rolling pin we still had to use our fingers to apply pressure on specific parts of the mold for the perogies to properly seal. Despite our initial difficulties we eventually got the hang of it and admitted that there was a certain convenience to being able to make and fill six perogies at a time, even with the flaws in the mold.

We used a traditional potato and onion filling, with a few select ones having cheese as well for my brother's sake. After boiling them off, we also pan-fried them for an extra crunch and served them with caramelized onions and sour cream. Personally I have always loved perogies and was really proud of the finished product. More so, I was happy to spend the time in the kitchen with my mom knowing that she had done the same with her mom when she was a young girl.

Perogies
Note: It is best to make the filling first and allow it to cool while making the dough because it cannot be hot when making the perogies, otherwise it will melt the dough. This recipe makes approximately 36 perogies.

For the dough:
  • 3 cups flour
  • 1 tsp salt
  • 1 large egg
  • ¾ cup water
  • 2 tbsp oil
  1. Combine the flour and salt and set aside.
  2. Whisk together the egg, water, and oil. Stir into flour mixture, adding up to 2 tbsp more water if needed to make a soft, but not sticky dough.
  3. Knead the dough on a lightly floured surface about 10 times, or until it is smooth. Cover with plastic wrap or a damp towel and allow it to rest for about 10 minutes.
For the filling:
  • 1 lb potatoes, peeled and cubed
  • 2 medium sized onions, chopped
  • Olive oil 
  • Salt and pepper
  1. Place the potatoes in a large pot and cover with water. Add salt and bring to a boil. Reduce heat so that water is gently boiling and cook potatoes for 10-15 minutes, or until the pieces can be easily pierced with a fork. 
  2. Drain the water from the potatoes and mash well so that no chunks remain.
  3. While the potatoes are boiling, pour some olive oil into a large pan and saute the onions over medium heat until deep golden in color and caramelized.
  4. Combine ¾ of the onions with the mashed potatoes and season to taste with salt and pepper. Reserve the remainder to serve with the finished perogies.  
To assemble and cook:
Note: The assembly instructions are based on making each perogy one at a time, without the use of any tools or molds. Although not necessary, pan-frying the perogies at the end makes them taste even better and I would highly recommend it.
  1. Divide the dough into quarters and work with one portion at a time, keeping the rest covered with a towel.
  2. Roll the dough out onto a lightly floured surface until almost translucent.
  3. Using a 3" round cutter, cut the dough into rounds and place approximately 1 tsp of filling on each round.
  4. Lightly moisten the edge of half of the round with water. Fold over the filling and pinch edges together to seal.
  5. Place finished perogy on a flour-dusted cloth or plate and cover with a towel to prevent from drying out. Repeat with the remaining dough and filling.
  6. In large pot of boiling salted water, cook the perogies, in batches and stirring gently, until floating and tender, about 5 minutes. Use a slotted spoon to remove to a colander to drain.
  7. If desired, melt a little bit of butter in a pan and quickly fry the perogies, about 5-8 minutes on each side, until golden brown. Serve with reserved onions and sour cream.

Sunday, April 21, 2013

Peanut Butter and Jelly Squares


My friends and I recently had a small get-together to celebrate finally being finished with nursing school. As always, I decided to bake a yummy treat and bring it with me. I wanted to make peanut butter and jelly squares because I had baked them before and they were quite successful. Similar to my grandmother's berry crumb bars, these little squares feature a shortbread dough, topped with jam, and then more dough crumbled on top. The difference, of course, is that there is peanut butter in the dough and also chopped peanuts mixed with the topping.

The first time I made these squares I brought them with me to the hospital to share with other staff on the unit halfway through my final practicum. At the time I was in a rush and didn't have the chance to take any pictures, therefore I couldn't post the recipe. However they were eaten up instantly and I knew that I had to make them again. This time around I made sure to take pictures before I packed up the squares to bring to my friend's place.

My friends all enjoyed the peanut butter and jelly squares, as did my mother and brother who had a few pieces that I left behind for the family. I was flattered when my friend asked me for the recipe the next day and admitted that she and her husband ate the leftovers for breakfast that morning. Originally I told her that I would send her a link to the post on my blog but she wanted to bake them immediately. Lucky for her I have a good memory and I was able to rattle off the list of ingredients and recipe in a quick email to her.

Peanut Butter and Jelly Squares
  • ½ cup butter, room temperature
  • 1½ cups flour
  • ½ tsp baking soda
  • ¼ tsp salt
  • 1 cup brown sugar
  • 1 large egg
  • ½ cup peanut butter (I recommend using creamy)
  • ½ cup chopped peanuts
  • ¾ cup jam (any flavor)
  1. Sift together flour, baking soda, and salt. Set aside.
  2. Cream butter and sugar together on medium speed until smooth. Beat in peanut butter and then the egg.
  3. Reduce speed to low and mix in flour mixture until evenly incorporated.
  4. Pat down ¾ of dough into greased 8" x 8" pan. Spread jam evenly over top.
  5. Combine the remaining ¼ dough with the chopped nuts. Crumble the mixture over top of the jam layer.
  6. Bake at 350 degrees Fahrenheit for 30-35 minutes until the top becomes golden brown. Allow the pan to cool completely before removing and slicing.

Thursday, March 7, 2013

Peanut Butter and Chocolate Cookies


I haven't baked cookies in a while and when I saw this recipe it instantly appealed to me because it promised for the softest cookies ever. Also I thought they looked cool with the light and dark combination of peanut butter and chocolate.

Between the two cookie halves I preferred the chocolate side to the peanut butter and I think that in the future I might just make the chocolate part as its own cookie. However it was fun to bite into the cookie directly in the middle and experience both flavors at once. My family was surprised when I made them and said they could eat all of them, meaning I wasn't baking them for any event or meeting but rather just for us to enjoy. Granted with two different cookies squished together they turned out much larger than my usual cookie but indulgence is nice every once in a while.

Peanut Butter and Chocolate Cookies
Note: This recipe makes 3 dozen very large cookies.

For the chocolate dough:
  • ½ cup unsalted butter, softened to room temperature
  • ½ cup sugar
  • ½ cup brown sugar
  • 1 large egg
  • 1 tsp vanilla
  • 1 cup flour
  • ½ cup + 2 tbsp cocoa powder
  • 1 tsp baking soda
  • ½ tsp salt
  • 2 tbsp milk
  • 1 cup chocolate chips
  1. Cream the butter and sugars together with a hand or stand mixer on medium speed until light and fluffy. 
  2. Beat in the egg and vanilla until combined, scraping down the sides of the bowl as needed. 
  3. In a separate bowl, combine the flour, cocoa powder, baking soda, and salt. 
  4. Slowly mix the dry ingredients into the wet ones. With a spoon or rubber spatula, mix in the milk and then fold in the chocolate chips. 
For the peanut butter dough:
  • ½ cup unsalted butter, softened to room temperature
  • ½ cup brown sugar 
  • ¼ cup sugar
  • 1 large egg
  • ¾ cup creamy peanut butter
  • 1 teaspoon vanilla extract
  • ½ teaspoon baking soda
  • 1¼ cups flour
  • ¼ teaspoon salt
  • 1 cup dark chocolate chips
  1. Cream the butter and sugars together with a hand or stand mixer on medium speed until light and fluffy.
  2. Mix in the peanut butter, egg, and vanilla, in that order, and scrape down the sides as needed.
  3. Slowly mix in the baking soda and flour. Then fold in the chocolate chips. 
To Assemble:
Note: I found it easiest to roll out all of the chocolate balls first, then the peanut butter, and then to put them together.
  1. Allow both doughs to chill in the refrigerator for 1-2 hours to make assembly easier.
  2. Measure out about 2 tbsp of each dough and roll into a ball. 
  3. Squish the two balls together and roll into one large ball. Repeat with the remaining dough and place the cookies about 2" apart on a parchment-lined cookie sheet.
  4. Bake the cookies for 11-13 minutes at 350 degrees Fahrenheit or until they start to crack on top. They may still look a little under baked but it is important to take them out of the oven and leave them on the tray as they will continue to bake and "set up".

Saturday, February 9, 2013

Caramelized Onion and Mushroom Pizza with Cream Sauce


My friends and I are in the last term of our nursing program and just finished our last group clinical before our final practicum. To celebrate I decided to host a dinner at my house and made fresh pizza. My friends are somewhat picky eaters and it's hard for everyone to agree on one food type so I made two pizzas: one classic vegetarian pizza and one more upscale pizza with caramelized onions, sauteed mushrooms, and a creamy herb and garlic sauce. I was a little unsure whether the second pizza would go over well but my friends loved it and finished the entire thing.

I think my friends were most impressed by the fact that I made the dough from scratch and how light and airy the crust turned out. Interestingly enough, there was a lot of moisture in the air that day and as a result I had to add more flour than usual to make the dough. Apart from that, the pizza was extremely easy to make. The process of caramelizing the onions took some time but I made the most of it by vacuuming and mopping the entire first floor in anticipation of them coming over. Every few minutes I would return to the stove and stir the onions. I made sure to prepare the onions, mushrooms, and sauce ahead of time so that everything would have a chance to cool before assembling the pizza.

Because of my planning I was then able to assemble the pizza and stick it in the oven in under ten minutes and actually have it ready by the time my friends came. The rest of the evening was spent chatting, playing games, and enjoying each others' company. Overall it was a great night and I was so glad that everyone managed to come.

Caramelized Onion and Mushroom Pizza with Cream Sauce
Note: The below ingredients are enough dough to make two pizzas but toppings for one.
  • Pizza dough (recipe found here)
  • 2 medium sized onions, thinly sliced
  • 10-12 mushrooms, chopped (depending on size)
  • 2 tsp dried oregano
  • 2 tsp dried thyme
  • 1-2 cloves garlic, minced
  • 1 tbsp butter
  • 4 oz cream cheese
  • ½ cup milk
  • Mozzarella cheese, grated
  • Olive oil
  • Salt and pepper
  1. Heat some olive oil in a large skillet over medium heat. Add the onions to the pan and reduce the heat to medium low. Saute the onions, stirring every 2-3 minutes and allow them to slowly caramelize. They will be ready once they are a deep golden color, about 35-45 minutes. Once finished, put into a bowl and set aside to cool.
  2. Using the same pan, turn the heat up to medium-high and add the chopped mushrooms. Add one teaspoon each of the dried oregano and thyme and mix to incorporate. Saute the mushrooms until they soften and turn brown, about 5-7 minutes. Season with salt and pepper and pour into a bowl and set aside to cool.
  3. To make the sauce: In a small saucepan melt the tablespoon of butter then add the minced garlic. Lightly saute until the garlic becomes fragrant, about 30 seconds, then add the cream cheese and milk. Add the remaining teaspoon of dried oregano and thyme and stir through. Continue to heat and stir until the cream cheese melts completely and the sauce becomes uniform. Set aside to cool.
 To Assemble:
  1. If using a pizza stone, put it in the oven and allow it to preheat with the oven at 500 degrees Fahrenheit for about 30 minutes before transferring the pizza to it.  
  2. Punch down the dough and then separate into two equal pieces. Shape each piece into a smooth, round ball and allow it to sit on a lightly floured surface for 10 minutes (this will make it easier to roll/stretch).
  3. Proceed to roll/stretch out the dough until it is of the desired size then brush the edges with olive oil. 
  4. Spread the cream sauce over the surface of the dough. Top generously with the onions and mushrooms and then sprinkle some of the freshly grated cheese.
  5. Transfer the pizza to the oven and bake at 500 degrees for 15-18 minutes, or until the crust is golden and the cheese is bubbling. If not using a pizza stone the baking time may be greater, around 18-20 minutes.

Wednesday, January 16, 2013

Cheese and Chive Biscuits


Out in the food blogging community there is something called the Daring Bakers Challenge. Every single month a prominent food blogger proposes some sort of food item that everyone has to make. Generally it involves some sort of interesting technique or is considered a complicated item...hence the "challenge". Most times there are some sort of rules as well, such as how and what type of variations can be made. Each challenge lasts for the duration of the month and then starts all over again in the next month with a new featured food item.

I have never actually participated in the Daring Bakers Challenge nor do I know how the hosts get chosen, let alone if there are any winners. However when I browse tastespotting.com I can always tell when a new challenge has started because all of a sudden there will be many recipes all featuring the same type of food, just with different styles and variations.

As it happens, when I was looking for a good recipe for scones and biscuits to make for my family high tea I found out that it was the theme of the Daring Bakers Challenge exactly a year ago in January 2012. I decided to use the recipe provided by the host of the challenge and in the process I learned the difference between scones and biscuits. It turns out that what we call "scones" in North America are actually called "rock cakes" in England and Australia, and that which we call "biscuits" here are called "scones" over there. It's all trivial information but interesting when talking to someone from a different part of the world and finding out about these slight nuances.

For the high tea I wanted to stick with traditional flavors so I decided to make the biscuits using Gruyere cheese and chopped chives. According to the host he bookmarked over 288 recipes and tried 16 different batches before coming up with the best technique and recipe. In the end he had very simple instructions with plenty of pictures, which I appreciated. Since the techniques were not that hard or time consuming I decided not to skip any steps and follow all of his specific instructions.

It was nice to see the rationale explained behind each specific technique, such as triple sifting the dry ingredients in order to allow plenty of air to become incorporated into the mixture as well as evenly distributing the rising agents. Supposedly this gives the scones maximal lightness, though I can't honestly say whether my scones achieved this. They were extremely light and fluffy and very layered, thanks to the kneading technique also outlined in the recipe, but since I only made one batch I didn't have anything else to compare them to in order. I'll just have to trust that triple sifting the ingredients led to a better biscuit than if I had simply mixed the ingredients together.

In terms of taste the biscuits turned out deliciously and were especially enjoyed by my mother and brother. I was especially pleased that my mom liked the biscuits because she often complains that biscuits sold in stores are too hard, though I think her complaints are aimed more toward scones rather than biscuits. She said she loved the flaky layers and softness of the biscuits. Personally I enjoyed the subtly of the Gruyere cheese but my brother asked that next time I use a stronger cheese, such as cheddar, for a more intense and cheesier flavor. The great thing about the recipe is that it provides a base and can then be modified to individual preference.

Cheese and Chive Biscuits
Note: This recipe makes about 16 palm-sized biscuits.
  • 2 cups flour
  • 4 tsp baking powder
  • 1 tsp baking soda
  • 1 tsp ground mustard seeds (dry mustard powder)
  • ½ tsp salt
  • 1 cup freshly grated cheese (any variety)
  • 4 tbsp chives, finely chopped
  • 4 tbsp cold unsalted butter, cut into pieces
  • 1 cup cold milk
  1. Triple sift the flour, baking powder, baking soda, dried mustard, and salt together into a large bowl.
  2. Add the grated cheese and chopped chives and mix in with the dry ingredients.
  3. Rub the butter pieces into the dry ingredients until the mixture resembles large, beach-sized sands pieces and the butter is well coated with the flour.
  4. Add the milk to the mixture and mix until it just starts to form a wet and sticky dough. Turn the dough out onto a lightly floured surface and gently shape it into a ball.
  5. To achieve a layered effect, gently knead and press down on the dough to form a large rectangle. Fold it into thirds on itself then turn 90° and repeat the process 3-4 times.
  6. On the last turn pat the dough down so that it is ¾"-1" thick. Use a well-floured 2"-3" biscuit cutter (depending on how big you want them) to cut out the biscuits. Sprinkle with a little bit of cracked pepper and place on a parchment or wax paper lined baking tray 2" apart.
  7. Bake for 8-10 minutes at 475 degrees Fahrenheit. Take the biscuits out of the oven as soon as the tops turn golden and immediately remove from the tray and place on a plate or cooling rack to prevent the bottoms from burning.

Monday, January 14, 2013

Cranberry and Orange Scones


This past Saturday I hosted a high tea for all of the female members of my family. One of the many items I prepared were these cranberry and orange scones. If you have ever had the pleasure of attending high tea you would know that the food selection almost always includes some sort of sweet and fruity scone served alongside jam and cream.

I decided to go to my favorite food blog Annie's Eats and use her recipe for cranberry scones, but pair it with orange rather than lemon because I had only recently baked some cranberry lemon squares over the holidays. The nice thing about the recipe was that the scones could be made in advance and then baked once the time came, ensuring they were hot and fresh from the oven when serving them.

Everyone seemed to enjoy the scones, especially my aunt and grandmother. They were perfectly tender and crumbly and the sprinkled sugar on top added a nice crust. I truly felt that I properly represented this traditional high tea goodie and was impressed with how it turned out so well.

Cranberry and Orange Scones
Note: This recipe makes 15-20 palm-sized scones.
  • 2½ cups flour
  • ½ cup + 3 tbsp sugar
  • 1 tbsp baking powder
  • ½ tsp salt
  • 1 orange, zested
  • 6 tbsp cold unsalted butter, cut into pieces
  • 1¼ cups fresh or frozen cranberries, coarsely chopped
  • 1 large egg + 1 egg yolk
  • 1 cup heavy cream
  1. In the bowl of a food processor (or a large bowl) combine the flour, half cup of sugar, baking powder, salt, and orange zest. Pulse a few times to briefly blend together.
  2. Add the pieces of butter and continue to pulse until the mixture becomes mealy and the butter pieces become the size of large peas. If you don't have a food processor use a fork or or your hands.
  3. In a separate bowl combine the chopped cranberries with the three tablespoons of sugar and mix to ensure the cranberries are evenly coated. Stir the cranberries into the flour and butter mixture.
  4. Combine the whole egg, egg yolk, and cream and whisk to blend in a small bowl.
  5. Add the liquid mixture to the dry ingredients and stir gently with a spatula or wooden spoon until the dough starts to come together.
  6. Turn the dough out onto a lightly floured surface and gently knead it just so that it stays together. Be careful not to overwork the dough.
  7. Shape the dough into a round disk and gently pat it down so that it is about ½"-1" thick, depending on how thick you want the scones to turn out. Use a well floured biscuit cutter to punch out small 2"-3" rounds (also dependent on how big you want them). 
  8. Gather the scraps and gently mold together and repeat the process with the remaining dough. Alternatively the dough can simply be patted down and then cut regularly into triangular wedges or squares.
  9. The shaped scones can be refrigerated, frozen, or baked right away. If freezing, flash freeze them on a baking tray directly in the freezer then put into freezer-safe bags and store. If refrigerating, arrange on a baking tray and cover with plastic wrap. 
  10. Once ready to bake, brush the tops with the leftover egg white and sprinkle them lightly with some additional sugar. Place them about 2"-3" apart on a baking sheet lined with parchment or wax paper and bake for 15-20 minutes at 400 degrees Fahrenheit, or until they are a touch golden. (If baking from the freezer they may require an extra 3-5 minutes.)

Friday, December 28, 2012

Cranberry Lemon Squares


It seems as though my holiday break this year has been characterized by a few things, namely cooking and knitting. I have become slightly obsessed with knitting in the past month and have made several scarves as holiday gifts for friends and family. I have fallen into somewhat of a nightly ritual as I sit on the couch each evening watching Friends and knitting yet another scarf. I don’t know exactly how long this new obsession of mine will last…it could just be a passing thing or it could stick like my love of cooking. In any case I am quite proud of the results so far and everyone who received one of my scarves as a gift thanked me with kind words and lots of hugs.

Besides the knitting, I have also been in the kitchen quite a bit these past few weeks. I almost feel like it’s making up for lost time as I was so busy before. Along with cooking and baking some family favorites I have also had the chance to try out some recipes that I had been saving for a while.
One such recipe was for these cranberry lemon squares. I don’t know why cranberries are associated with the holidays considering they taste good year round. Maybe it has to do with the traditional cranberry sauce that most people eat with their holiday turkey this time of year. Regardless of the reason, the extra emphasis on cranberries during the holiday season makes me crave them in my cooking and baking. 

These little squares I baked up the other day were a perfect cranberry treat because of the wonderful combination of flavors. The sweet, buttery, lemon-zested crust was contrasted beautifully by the tartness of the cranberry filling. I greatly enjoyed these squares because they were quite similar to my grandmother’s berry crumb bars, but the fact that there were whole cranberries in the filling gave it an extra pop and burst of flavor in the mouth. Once again another holiday success!

Cranberry Lemon Squares 

For the dough:
  • 3 cups of flour
  • 1 tsp baking powder
  • ¾ cup sugar
  • 1 lemon, zested and juiced (juice reserved for filling)
  • 1 cup, cold unsalted butter, cubed
  • 1 large egg
  • 2-3 tbsp water
  • 1 tsp vanilla 
For the filling:
  • 1 bag fresh or frozen cranberries (about 500 grams)
  • ½ cup sugar
  • Reserved lemon juice
  • 2 tbsp corn starch
  1. Combine the ingredients for the filling and set aside. 
  2. Mix the flour, baking powder, sugar, and lemon zest.
  3. Using a food processor or mixer, slowly mix in the cubed butter pieces. The butter should become coated in the crumbly mixture and become the size of little peas. Don't overmix.
  4. Mix in the egg, vanilla, and a few tablespoons of water. The dough will remain crumbly but it should be easy to clump together.
  5. Press about ¾ of the dough down into a parchment-lined 9" x 13" pan. Spread the filling over top. The cranberries will not cover all of the dough but try to spread them out evenly all over the pan.
  6. Use your fingers to crumble the remaining dough over top of the filling. Don't press it down.
  7. Bake for 30-35 minutes at 375 degrees Fahrenheit or until the dough on top becomes golden.
  8. Remove from the oven and allow to cool to room temperature before slicing.