Monday, October 5, 2015

Mini Frozen Blueberry Cheesecakes


Truth be told, I'm actually a little embarrassed as to how long it has taken me to write up this post. I think I first made these cheesecakes at the beginning of the summer...maybe June or July. I don't quite remember since it has been so long. The cheesecakes met all the requirements for a post: I had good pictures, good reviews, and a good recipe. I just couldn't find the time or energy to actually sit down and write it all out. But now, finally, many months later I can share it on my blog.

Part of the reason why I think these cheesecakes were so successful was because of their semi-frozen nature. We experienced a very beautiful, although hot, summer in Vancouver this year. When it's close to 30 degrees Celsius outside, the last thing anyone wants to be doing is turning on the oven. That's why I looked to more no-bake type desserts to fulfill the need for sweetness on a warm summer day. I adapted a pre-existing no-bake cheesecake recipe I already had and incorporated fresh blueberries, my favorite summertime fruit. Because of their mini size, the cheesecakes were able to freeze quickly and also thawed at a slow enough rate that they remained semi-frozen if eaten about ten minutes after serving.

Mini Frozen Blueberry Cheesecakes 
Note: I used my mini cheesecake pan and was able to make 18-21 cheesecakes (different sized blueberries resulted in varying amounts of batter). A cupcake pan with liners would also work.

For the crust:
  • 1½ cups graham cracker crumbs
  • 1½ tbsp sugar
  • ¼ cup (4 tbsp) unsalted butter, melted
Combine all of the ingredients together in a small bowl. Add one tablespoon into each well of a lined cupcake tray. Press down gently. Bake at 350 degrees Fahrenheit for seven minutes. Remove from oven and set aside to cool.

For the cheesecakes:
  • 1 block (8 oz) cream cheese, room temperature
  • 1½-2 cups fresh or frozen blueberries, rinsed and dried
  • 1 cup heavy whipping cream, cold
  • 1 cup powdered sugar (split into ¼ and ¾)
  • 1 tsp vanilla
  • 1 tsp unflavored gelatin
  • 4 tsp cold water
  1. Beat the cream cheese on medium-high speed for a few minutes, until whipped and smooth.
  2. Turn down the speed to low and beat in the ¾ cup powdered sugar. Increase the speed and continue mixing for a few minutes until well mixed. Set aside.
  3. In a small pan, combine the gelatin and cold water and let it stand for a minute until thick.
  4. Place the pan over low heat, stirring constantly, until the gelatin dissolves. 
  5. Remove from the heat and set aside so that it cools to room temperature, but do not let it set.
  6. Meanwhile, start whipping the cream on low speed. Once bubbles start to form, add the ¼ cup remaining powdered sugar and vanilla and increase the speed slightly.
  7. Slowly pour in the gelatin while continuing to whip the cream. If the gelatin has set, place it briefly over the heat to loosen it again, however make sure it is not hot when adding it to the cream as it will set upon contact with the cold cream and create chunks.
  8. Once all the gelatin has been added, increase the speed to high and continue to whip until stiff peaks form.
  9. Using a spatula, gently fold the whipped cream into the cheesecake mixture. Make sure it is all incorporated but try not to overmix so that it keeps its airiness. 
  10. Gently fold in the blueberries, trying not to squeeze them so that they don't leak.
  11. Divide the batter amongst the wells of the pan, filling them completely to the top. Use a spoon or spatula to even out the tops, making them smooth.
  12. Put the pan in the freezer for two hours. Touch the tops of the cakes to make sure they are solid before removing from the pan and transferring back to the freezer in a container. 
Note: I recommend removing them from the freezer about 10-15 minutes before wanting to serve them so that they have time to thaw a little but still remain semi-frozen.

Thursday, June 4, 2015

Roasted Summer Cherry Tart


A long time ago I bought a tart pan but sadly I have only used it a couple of times. Personally, I think tarts are very simple and elegant but since I tend to bake cakes for most occasions tarts aren't deemed special enough. Last week my parents were invited for a summer barbeque and my mother was in search of an easy appetizer she could make and bring. The idea to make a tart using roasted tomatoes had crossed my mind before and when I proposed it to her she was in favor of it.

Since I also had friends coming over that night we decided to make two and each bring one to our respective get-togethers. Normally, I like to make everything from scratch but we were pressed for time so we bought store-made pie dough and a goat cheese blend with herbs. To balance the tangy flavor of the goat cheese we also mixed it with a little bit of dill and regular cream cheeses. After finishing both tarts in under two hours, we were quite pleased with our impromptu appetizer creation. The tart was light and refreshing with the sweetness of the tomatoes against the tangy goat cheese. Also we sprinkled a little bit of white balsamic over top for a touch of acidity. Both groups enjoyed the tarts and complimented us on the taste.

Roasted Summer Cherry Tart
  • Pie dough (can be store bought or made from scratch)
  • Goat cheese (optional goat cheese blend with herbs or pepper)
  • Cream cheese
  • Optional: 2-3 cloves garlic, finely minced
  • Cherry tomatoes
  • White Balsamic vinegar
  1. Bake the shell of the tart in a 10" tart pan according to the package instructions (store bought) or recipe (home made). Make sure to prick the bottom of the dough with a fork prior to baking to keep the crust flat.
  2. Mix the goat cheese with cream cheese and garlic, if using. The quantities are purely based on personal preference. We used about 150 g goat cheese, 50 g dill cream cheese, and 100 g regular cream cheese, but we also had leftovers.
  3. Once the tart shell is baked, spread an even layer of the mixture across the bottom. The layer should be present, but not too thick.
  4. Slice the tomatoes in half, lengthwise, and arrange in concentric circles across the tart. Try to leave as little space as possible between the tomatoes as they will shrink in the oven.
  5. Return the tart to the oven and place under the broiler for 3-5 minutes. Watch carefully as the broiler can heat up very quickly. Remove the tart from the oven once the tomatoes start to wrinkle and pop. They will continue to shrink a little after so better to remove earlier rather than later.
  6. Allow the tart to cool for a few minutes then sprinkle with a little of the white balsamic prior to serving.

Thursday, May 28, 2015

Mini Pomegranate and Pistachio No-bake Cheesecakes


I've kind of been on a no-bake cheesecake spree these days. It all started innocently enough when I made mini peanut butter cheesecakes for my friends. Then, for my cousin's birthday, I made a nutella swirl no bake cheesecake. When the long weekend came around a few weeks ago, my parents were invited to a friend's house for dinner and asked to bring dessert. Even though I was scheduled to work the whole weekend, I had a few days off before it started and I asked my mom if I could make these mini cheesecakes for her to bring. She was more than enthused at the idea and agreed without any hesitation.

In my previous no-bake cheesecakes, I had used only whipping cream in the cake. However this recipe used gelatin instead and I was curious to see how it would turn out. Gelatin is great because it adds structure and shape to many desserts, but I am always cautious to use too much as it can also provide a bit of a slimy texture.

The original recipe called for cherry and pistachio flavors, but since I already had an open bottle of POM juice I decided to substitute it in. The cakes turned out quite cute and colorful, especially because I added a drop of gel-based food coloring. More importantly, they tasted great! My parents saved a few for me and my brother and I was impressed with how they turned out. Not only were the flavors of both the pomegranate and the pistachio pronounced, but my texture concerns were completely unfounded. These little cakes have a lot of potential to be featured again soon.

Mini Pomegranate and Pistachio No-bake Cheesecakes
Note: I used my mini cheesecake pan and was able to make 24 cheesecakes. I had a little extra and poured it into a few cupcake liners but unfortunately they didn't come well. If not making minis, the cheesecake could also be made in a larger, 9" size but would have to stay in the freezer longer to ensure that it sets properly.

For the crust:
  • 1 cup graham cracker crumbs
  • ¼ cup unsalted butter, melted
  • 1/6 cup sugar
Combine all of the ingredients and distribute evenly amongst the wells of the muffin/cheesecake pan. Lightly pat down the bottoms and bake for five minutes at 350 degrees Fahrenheit. Set aside to cool.

For the cheesecake:
  • 2 lbs (4 blocks) cream cheese, room temperature
  • 2 envelopes gelatin
  • 1 cup sugar
  • 1 cup pomegranate juice
  • 1 cup water
  • ½ cup pistachios
  • Optional: red and green food coloring (to make the color stand out more)
  1. Finely grind the pistachios until they become almost like a paste. Set aside.
  2. Mix one envelope of the gelatin with ½ cup of the sugar in a small bowl. Bring one cup of water to a boil and add to the sugar-gelatin mixture. Stir well for about five minutes or until the gelatine is completely dissolved.
  3. Repeat the same process with the second envelope of gelatin and remaining ½ cup of sugar, this time using the pomegranate juice instead of water.
  4. Beat the cream cheese on medium-high speed for a few minutes, until whipped and smooth.
  5. Divide the cream cheese in half. With one half, beat in the pistachio paste and, if using, a drop of green food coloring. Continue to beat until it is smooth and all the color has been evenly incorporated. 
  6. Slow down the speed and gradually beat in the plain sugar-gelatin mixture. Continue beating until the gelatin water has been completely mixed in. 
  7. Divide the batter amongst the wells of the pan, filling them halfway to the top. Place the pans in the freezer while finishing the pomegranate batter.
  8. With the remaining half of the cream cheese, beat in the drop of red food coloring, if using, and slowly mix in the pomegranate-gelatin mixture.
  9. Once again, divide the batter evenly amongst the wells, this time filling each completely to the top. Use a spoon or spatula to even out the tops, making them smooth. Return the pans to the freezer for about two hours, or until firm. 
  10. Once firm, carefully remove from the pans. The cakes can be stored in the fridge until ready to serve.

Nutella Swirl No-bake Cheesecake


Back in the beginning of the month it was my lovely cousin's twentieth birthday and we had, as per usual, a big family celebration. For most family occasions, I am given free reign over what kind of dessert to make and my cousin's only request was for something either with chocolate or nutella. I decided to include both, though mostly focusing on the nutella with this no-bake cheesecake.

Funny enough, even though I consider myself to be quite the cheesecake expert having baked dozens over the years, I have only recently started to foray into the world of no-bake cheesecakes. It all started with the mini peanut butter cheesecakes I made a few months ago when my friends came over. Since then, I have come to the realization that there are many flavor combinations I have yet to explore in the no-bake category which makes me quite excited because I now have a whole new world of cheesecake possibilities open to me.

With this cake in particular, I tried to model it somewhat after the pecan pie cheesecake I made for my own birthday, except I made a chocolate ganache layer with chopped hazelnuts over the crust rather than a caramel layer with pecans. The result, however, did not turn out quite as I anticipated as the ganache froze and became difficult to cut into. Since the cake was set in the freezer and not baked like the previous cheesecake, I had not taken that into account.

Also, to make this cake I adapted the recipe from the mini peanut butter cheesecakes but substituted nutella in for the peanut butter. Unfortunately, I don't think my proportions translated well when I converted the recipe from "mini" form into one big ten inch cake. Since there was no gelatin in the cake and it relied purely on whipped cream to give it structure, the resulting cheesecake was very soft, almost like ice cream. Everyone in my actually loved this "soft serve" texture but I wish it had a little more shape to it. I tried to keep it in the freezer as long as possible, transferring it to the fridge mere hours before the party once I piped on the whipped cream topping. Still, even the six hours it spent in the fridge softened the cake and likely it would have had more structure had we eaten it straight from the freezer.

Overall, it was a good venture into the world of no-bake cheesecakes and I will continue to try out new recipes to create the perfect base cake, just as I have with my regular cheesecakes. After that, I'm confident I will truly be the cheesecake queen!

Nutella Swirl No-bake Cheesecake
Note: I think it best to omit the ganache/hazelnut layer from the crust since it clearly did not work for this type of cheesecake. Therefore, I have included the recipe for just a simple crust.

For the crust:

  • 2 cups graham cracker crumbs 
  • ¼ cup brown sugar
  • ⅓ cup butter, melted
Combine all of the ingredients in a bowl and then transfer to an 10" springform pan. Gently press down all along the bottom and bake at 350 degrees Fahrenheit for 8 minutes.

For the cheesecake:
  • 2 blocks (16 oz) cream cheese, room temperature
  • 2 cups heavy whipping cream
  • 1 cup nutella
  • 1½ cups powdered sugar
  1. Whip the heavy cream on medium-high speed until light and fluffy with soft peaks. Set aside in the fridge.
  2. Beat the cream cheese on medium-high speed for a few minutes, until whipped and smooth.
  3. Turn down the speed to low and beat in the sugar. Increase the speed and continue mixing for a few minutes until well mixed.
  4. Divide the batter in half. To one half, beat in the nutella until completely smooth and incorporated. 
  5. Using a spatula, gently fold the half the whipped cream into the plain batter and the other half into the nutella batter. Make sure all of the whipped cream is incorporated but try not to overmix so that it keeps its airiness. 
  6. Pour half the nutella batter into the pan over the crust. Carefully spoon half of the plain batter in small dollops over top. Use a thin spatula or knife to swirl the two mixtures. Repeat the process and swirl again.
  7. Put the pan in the freezer for at least four hours, though preferably overnight. Touch the top of the cake to make sure it is solid before removing from the pan and transferring to the fridge.
For the whipped cream topping:
Note: The topping is completely optional. I made stabilized whipped cream and then piped it in a circular pattern across the top. However because the whipped cream cannot be frozen, the cake had to be returned to the fridge rather than the freezer. If you will be wanting to serve the cake much later, I suggest skipping the topping and simply serving the cake as is from the freezer.
  • 1 cup heavy whipping cream, cold
  • ¼ cup powdered sugar
  • 1 tsp vanilla
  • 1 tsp unflavored gelatin
  • 4 tsp cold water
  1. In a small pan, combine the gelatin and cold water and let it stand for a minute until thick.
  2. Place the pan over low heat, stirring constantly, until the gelatin dissolves. 
  3. Remove from the heat and set aside so that it cools to room temperature, but do not let it set.
  4. Meanwhile, start whipping the cream on low speed. Once bubbles start to form, add the powdered sugar and vanilla and increase the speed slightly.
  5. Slowly pour in the gelatin while continuing to whip the cream. If the gelatin has set, place it briefly over the heat to loosen it again, however make sure it is not hot when adding it to the cream as it will set upon contact with the cold cream and create chunks.
  6. Once all the gelatin has been added, increase the speed to high and continue to whip until stiff peaks form.
  7. Transfer the whipped cream to a piping bag fitted with a decorative nozzle and pipe in any design across the top of the cake. Once finished, return the cake to the fridge until ready to serve. 

Thursday, May 21, 2015

Curried Cauliflower Soup


Over a month ago I made this delicious curried cauliflower soup, mostly because I had some leftover coconut milk I wanted to use up. The soup was very popular with my family but I never blogged about it because at the time I didn't think it was anything special so I never bothered to take a picture of it. However when my mom recently came back from her vacation she asked me to make it again and this time I decided it was worth writing about.

Even though I have made a similar roasted cauliflower soup in the past, this one turned out better. I think that one of the reasons why my family enjoyed this soup was because it was smooth but still had chunks in it. That is because after roasting the cauliflower, I set aside a quarter of it to add to the soup later. When I finished making the soup, I pureed it using my hand immersion blender, then added back the pieces. Personally I prefer chunky soups over completely creamy ones because I like to have something to bite into and chew. This met my expectations while still delivering an overall creamy texture thanks to the coconut milk.

Curried Cauliflower Soup
  • 1 head cauliflower, florets cut into bite size pieces
  • 1 large onion, diced
  • 3-4 cloves garlic, finely chopped
  • 1 tsp cumin
  • 1 tsp coriander
  • 1 tsp turmeric
  • 1 tbsp red curry paste
  • 6 cups chicken or vegetable stock
  • 1 can coconut milk
  • 1 lemon, juiced
  • Olive oil
  • Salt and pepper
  1. Toss the cauliflower pieces with some olive oil, salt and pepper, and the cumin, coriander, and turmeric. Arrange in a flat layer on a baking tray and roast in the oven for about 20 minutes at 400 degrees Fahrenheit. Stir about halfway through to ensure even baking and keep in the oven until the cauliflower starts to soften and becomes golden. 
  2. While the cauliflower is roasting, saute the chopped onion in a large pot over medium heat with some olive oil until the pieces start to become translucent, about 3-5 minutes. Add the chopped garlic and continue to saute for about 30 seconds, or until fragrant.
  3. Mix in the tablespoon of red curry paste then add ¾ of the roasted cauliflower pieces. 
  4. Pour the stock into the pot and bring to a boil. Once boiling, reduce the heat to low and simmer the soup, covered, for 30 minutes or until the cauliflower starts to easily break down. Stir occasionally.
  5. Add the coconut milk and stir through. Puree the soup using a hand blender or transfer in batches to a blender and return to the pot. 
  6. Add the remaining cauliflower pieces to the soup and season to taste with the lemon juice, salt, and pepper. 

Bolognese Pasta Bake


A few weeks ago my parents went on a transatlantic cruise which left my brother and me alone while they were on vacation. As is the usual case, I was in charge of all the meals while they were away. For the most part, I tend not to try anything new while my parents are away because a) my brother is sometimes a picky eater and may not like it b) there are less mouths to feed and if my brother doesn't like it I have to eat it all myself which gets tiring.

However when I came across this recipe online I was pretty certain my brother would enjoy it and my instincts served me well. He downright gobbled almost the entire casserole dish on his own, leaving me with just two portions, one immediately after I cooked it and one the next day for lunch. By the time I came home from work the following day, it was all eaten up and I had to come up with something last minute for dinner.

One of the reasons why I suspect my brother liked it so much was because it was simple and had two ingredients he loves: noodles and meat. In fact he said it was practically like lasagna except it didn't require the extra effort of layering everything. Although making the meat sauce was a long process (over two hours for it to simmer and develop a strong flavor) it wasn't actually difficult because it just required occasional stirring. Also I didn't mind because it smelled great and filled the kitchen with a wonderful aroma. When my parents returned from their trip I told them how much my brother enjoyed the dish and my mom requested I make it again so that she may try it too.

Bolognese Pasta Bake

For the Bolognese sauce:
Note: This sauce can be made on its own ahead of time and then combined with the noodles and baked in a casserole dish. Alternatively, the sauce can just be made for regular pasta.
  • 1 lb ground beef
  • 2 796 ml cans crushed tomatoes
  • 1 large onion, finely diced
  • 3 cloves garlic, finely minced
  • 1 cup beef stock
  • ¼ cup red wine
  • 5-6 fresh basil leaves, torn
  • Handful fresh parsley, roughly chopped
  • Salt and pepper
  • Olive oil
  1. Heat some olive oil over high heat in a large skillet and add the ground beef. Cook until no pink is visible then drain the beef and set aside.
  2. Using the same pan, heat some new olive oil and sauté the chopped onions over medium heat until translucent, about 3-5 minutes. 
  3. Add the garlic and cook for another minute, until fragrant.
  4. Turn the heat up to high and add the red wine. Deglaze the pan by scraping any bits off the bottom.
  5. Once the wine has cooked out, reduce the heat to medium and add the tomatoes. Divide the beef stock evenly between the two empty cans and swish it around to release any chunks left behind then add the stock to the pot.
  6. Add half of the fresh basil and parsley and bring the sauce up to a boil. Once boiling, drop the heat to low and allow it to simmer for about two hours, stirring occasionally.
  7. Once the sauce has thickened considerably, season with salt and pepper and add the remaining basil and parsley.
To assemble:
Note: Any type of pasta can be used for this though I used egg noodles.
  • 1 package egg noodles (about 340 g)
  • 100 g light part skim mozzarella cheese, grated
  • 2 tbsp Parmesan cheese, grated
  1. Cook the pasta according to the package instructions but for half the time recommended for "al dente".
  2. Drain the pasta then add to the pot containing the meat sauce. If the sauce is very thick you may want to add a little of the water from the pasta to thin it out, though I found this unnecessary.
  3. Mix everything well to evenly coat the noodles with sauce then transfer to a large greased casserole dish.
  4. Sprinkle the pasta with the grated cheeses and cover with aluminum foil. Bake for 40 minutes at 375 degrees Fahrenheit then remove the foil and place under the broiler for about five minutes, or until the cheese is bubbly and slightly browned. 

Wednesday, April 15, 2015

Mini Peanut Butter Cheesecakes


If anyone were to ask me what is my favorite TV show I would not even hesitate before responding...Friends. I've long lost track of how many times I have seen each episode, but let's just say I can quote every single one. My friend recently just finished watching all ten seasons and was super excited when I told her that I own the Friends Scene-it DVD game. She insisted that we play it even though I warned her no one can beat me. In fact I haven't played the game in over six years because everyone refuses to play with me. Still, she begged me to play so I invited her and a few others over and ordered in some sushi.

Seeing as I had the day off I thought it would be nice to make something for dessert and we could eat it while playing the game. I decided to make something easy and had one block of cream cheese left over from my birthday cake. I found a simple recipe online and used my mini cheesecake pan. At first I was a little confused why there were no eggs listed, but then I realized that it was actually a no-bake cheesecake. This made me excited because, despite the fact that I have made many cheesecakes, I have never made a no-bake cheesecake.

The recipe was quick and easy to follow and the cakes were ready after two hours in the freezer. I'm sure the recipe could be adapted to other flavors as well. To top them I made "stabilized whipped cream". I had heard of the concept before and wanted to try it out. Basically, it is whipped cream that has a little bit of gelatin added to it so that it can keep its shape, making it ideal for frosting or decorating cakes ahead of time. The whipped cream held up for days afterward in the fridge and still tasted just as good. My mom pointed out that if you think about it, it's kind of like a semi-mousse because it uses all the same ingredients, just much less gelatin. Even so, it's a great way to be able to make whipped cream and save it for later use.

Mini Peanut Butter Cheesecakes
Note: I used my mini cheesecake pan and was able to make 18 cheesecakes. A cupcake pan with liners would also work. The cheesecake could also be made in a larger, 9" size but would have to stay in the freezer longer to ensure that it sets properly.

For the crust:

  • 1½ cups graham cracker crumbs
  • 1½ tbsp sugar
  • ¼ cup (4 tbsp) unsalted butter, melted
Combine all of the ingredients together in a small bowl. Add one tablespoon into each well of a lined cupcake tray. Press down gently. Bake at 350 degrees Fahrenheit for seven minutes. Remove from oven and set aside to cool.

For the cheesecake:
  • 1 block (8 oz) cream cheese, room temperature
  • 1 cup heavy whipping cream
  • 1 cup creamy peanut butter (make sure it is smooth!)
  • 1 cup powdered sugar
  1. Whip the heavy cream on medium-high speed until light and fluffy with soft peaks. Set aside in the fridge.
  2. Beat the cream cheese on medium-high speed for a few minutes, until whipped and smooth.
  3. Turn down the speed to low and beat in the sugar and peanut butter. Increase the speed and continue mixing for a few minutes until well mixed. 
  4. Using a spatula, gently fold the whipped cream into the cheesecake mixture. Make sure it is all incorporated but try not to overmix so that it keeps its airiness. 
  5. Divide the batter amongst the wells of the pan, filling them completely to the top. Use a spoon or spatula to even out the tops, making them smooth.
  6. Put the pan in the freezer for two hours. Touch the tops of the cakes to make sure they are solid before removing from the pan and transferring to the fridge. 
For the whipped cream:
Makes approximately 2 cups.
  • 1 cup heavy whipping cream, cold
  • ¼ cup powdered sugar
  • 1 tsp vanilla
  • 1 tsp unflavored gelatin
  • 4 tsp cold water
  1. In a small pan, combine the gelatin and cold water and let it stand for a minute until thick.
  2. Place the pan over low heat, stirring constantly, until the gelatin dissolves. 
  3. Remove from the heat and set aside so that it cools to room temperature, but do not let it set.
  4. Meanwhile, start whipping the cream on low speed. Once bubbles start to form, add the powdered sugar and vanilla and increase the speed slightly.
  5. Slowly pour in the gelatin while continuing to whip the cream. If the gelatin has set, place it briefly over the heat to loosen it again, however make sure it is not hot when adding it to the cream as it will set upon contact with the cold cream and create chunks.
  6. Once all the gelatin has been added, increase the speed to high and continue to whip until stiff peaks form. 
Note: The whipped cream can be set aside in the fridge for later use though I suggest if using it for decoration, such as piping, use it right away. 

Thursday, April 9, 2015

Pecan Pie Cheesecake


Yes, that's right. I am once again posting another cheesecake recipe. In my opinion, cheesecakes are the best type of cake so it's no wonder I chose to bake one for my birthday. In the weeks leading up to my birthday this year I was actually quite busy so I didn't have too much extra time to browse through recipes. At first I was just going to make a simple chocolate cheesecake since it's always popular with my family, but then I happened upon this recipe and I decide to give it a shot.

I know I may have said this in the past, but this was the BEST CHEESECAKE EVER!!! The bottom
half consisted of a pecan pie filling (yum) and the top half was the creamy cheese layer. It was amazing! The pecan pie portion had this rich, caramel type flavor and the top half was so smooth it melted in your mouth. Not only did certain members of my family help themselves to seconds, but the leftovers were finished super fast the next day. My mother has already requested that I make it again with no occasion in mind, just because.

Pecan Pie Cheesecake

For the crust:
  • 2 cups graham cracker crumbs 
  • ¼ cup brown sugar
  • ⅓ cup butter, melted
Combine all of the ingredients in a bowl and then transfer to an 11" springform pan. Gently press down all along the bottom and bake at 350 degrees Fahrenheit for 8 minutes.

For the pecan pie layer:
  • 1½ cups sugar
  • 1 cup corn syrup
  • ½ cup butter, melted
  • 3 large eggs
  • 2 cups chopped pecans
  • 1 tsp vanilla 
  1. Combine all of the ingredients except the pecans together in a medium saucepan. 
  2. Heat over medium-high heat, stirring well, until it comes to a boil. Once boiling, reduce the heat so that it is gently simmering, and continue cooking and stirring until the mixture thickens, about 8-10 minutes.
  3. Remove the mixture from the heat and stir in the chopped pecan pieces. Pour the mixture into the springform pan over the crust.
For the cheesecake layer:
  • 2 lbs (4 blocks) cream cheese, room temperature
  • 1½ cups brown sugar
  • 3 tbsp flour
  • 4 large eggs
  • 1 cup heavy cream
  • 1 tsp vanilla
  1. Beat the cream cheese on medium-high speed for about a minute, until smooth.
  2. Beat in the sugar and flour and continue beating on medium speed until the cream cheese is fluffy. Scape down the sides of the bowl as necessary.
  3. Beat in the eggs, one at a time, making sure to incorporate each one before adding the next.
  4. Reduce the speed to low and beat in the heavy cream and vanilla. Make sure everything is incorporated but do not overmix the batter.
  5. Pour the mixture into springform pan over the pecan pie layer. You may see the pecan mixture shift and come up the sides a little, just make sure the cheesecake batter covers the entire surface. 
  6. Bake for 50 minutes at 325 degrees Fahrenheit using a hot water bath or by placing a pan of hot water on the lowest rack beneath the cake.
  7. Without opening the oven door, turn off the oven and leave the cake to cool for 1½-2 hours inside the oven. Afterward, remove from the oven and cool to room temperature before refrigerating for at least 4 hours, though preferably overnight.

Wednesday, April 8, 2015

Saffron Risotto with Butternut Squash


Wow I can't believe I haven't written a post since November. Actually, scratch that...I can. The truth is in the past few months I have been very busy. I secured a full-time, regular position at work and I bought an apartment. My life has been overwhelmed with changes, luckily all positive, but it's taken a toll on my blog.

When I first started this blog, almost five years ago, I had the goal of teaching myself how to become a better cook. By researching different recipes and trying many new techniques I learned so much. And truthfully, having the blog motivated me to keep going. However, now I have come to the point where I don't feel tempted to write a post after every single venture in the kitchen. Beyond the fact that I often repeat past recipes, I also find myself more and more just cooking on a whim without following any specific recipe. But when I think about it, I don't regret this. The blog served its ultimate purpose, which was to broaden my food horizons and take me out of my comfort zone in the kitchen. Now it serves a new purpose to act as my digital cookbook of sorts, allowing me to keep track of recipes that I truly loved and would want to repeat in the future.

I am very thankful to my small community of loyal followers (AKA close friends and family) who encouraged me to keep up with the blog and provided feedback on the food I made. There were plenty of times when I felt they were just as invested as I was in the success of my food adventures. I hope they enjoyed reading the blog as much as I loved writing it and I promise I will keep feeding them even if I'm not writing blog posts.

Now that I've confessed and owned up to my hibernation from the blog...I actually do have a recipe to share! A few months ago, back when it was still cold and chilly outside, I came up with the idea that I wanted to take advantage of the beautiful and delicious squash that was in season. When I traveled to Italy years ago, I brought back a little jar of saffron threads which I still had not used. I decided to make a creamy, aromatic saffron risotto and add some roasted butternut squash to it.

My first attempt at this did not turn out exactly as I had imagined. When I searched online for a saffron risotto recipe, I found one with many positive reviews so I decided to use it and add my own twist with the butternut squash. According to the directions, I was supposed to add a pinch of saffron threads to the chicken stock before slowly stirring it into the rice. The problem is that "a pinch" is not very specific and I guess my pinch was too small because the finished risotto did not have that bright yellow color typical of a saffron-infused food. Also the flavor of the butternut squash overtook the saffron.

Even though the risotto end up the way I wanted it to, it was still very creamy and was eaten up quickly by the family. I still had extra chicken stock left over so when I suggested making it again everyone was in favor. This time, I "pinched" a lot more...between ¼-½ teaspoon. The result was more in line with my expectations; a bright yellow risotto with the aroma of the saffron and the hint of sweetness from the butternut squash. Success!

Saffron Risotto with Butternut Squash
  • 1 lb butternut squash, cut into pieces
  • 1 large onion, diced
  • 2 cups Arborio rice
  • ¼-½ tsp saffron threads
  • 4-5 cups chicken stock, kept warm
  • 1½ cups dry white wine
  • 2 tbsp butter
  • ½ cup grated Parmesan cheese  
  • Olive oil
  • Salt and pepper
  1. Sprinkle salt and pepper generously on the butternut squash pieces and coat in olive oil. 
  2. Spread in an even layer on a baking sheet and bake at 400 degrees Fahrenheit for 25-30 minutes, or until the pieces are fork tender. Stir them around halfway through to ensure even baking. Once tender, remove from the oven and set aside.
  3. Use a large pan to heat some olive oil over medium heat and saute the chopped onions for 3-5 minutes, or until they start to become translucent.
  4. Turn up the heat to medium-high and add the rice. Cook for 3-4 minutes until the rice becomes slightly toasted.
  5. Meanwhile, add the saffron threads to a small pot with the chicken stock in it. The stock should turn bright yellow. Keep the liquid constantly warm by having it on a burner with low heat. 
  6. Add the wine to the pan with the rice until it is completely covering the surface. Season with some salt and pepper and cook over medium heat, stirring continuously until the wine has been absorbed. 
  7. Slowly add the saffron chicken stock to the pan until it covers the rice. Keep stirring and cooking until the stock has been absorbed, just like the wine. 
  8. Repeat the process with the stock until only about a cup remains. Once the rice is creamy, bite into a few grains to be sure the rice is cooked. If still slightly crunchy, add a little more stock and continue to cook until it is absorbed. 
  9. When the rice is done cooking, add the butter and grated Parmesan cheese then whip together until completely incorporated. To finish, stir in the pieces of roasted butternut squash.

Sunday, November 30, 2014

Brownie Cookie Sandwich with Salted Caramel


For the past several years I have made it an annual tradition to bake holiday treats and distribute them to my close friends and family. At first I started off small, but by now the box has grown to include more goodies. Of course I always try to improve upon the previous year and use the month or so leading up to the holidays to test recipes for potential new additions to the box.

Last year, I tried a few recipes but ultimately was not satisfied with any of them so I left the box the same as the year before. It contained cranberry bliss bars, berry crumb bars, chocolate crinkle cookies, and almond biscotti. I felt as though I was missing some sort of treat in the "caramel" category but couldn't settle on anything to fulfill it.

So for the past few weeks I have been once again testing nutty/caramel recipes, trying to find something new to include in this year's box. In order to get more opinions, I have gotten in the habit of bringing my baked goods to work and seeing my coworkers' reactions. The first item I tried to make was a pecan pie thumbprint cookie. Although it tasted good, I was not satisfied with the filling-to-dough ratio so for the next batch I reworked it into more of a mini pecan tartlette. This time the filling was much more prominent and I felt the caramel and nut combination stood out.

Then I came across a recipe saved on my browser that I had found months ago but had not yet tested. It was for a cookie that resembled the taste of a brownie, with dulce de leche sandwiched in the middle. You know those two-bite brownies sold in the paper bags at most grocery stores...well believe it or not but these cookies taste exactly like them! The cookie was flaky on the outside and chewy on the inside, simply the perfect bite. Rather than use dulce de leche, I just substituted the salted caramel sauce that I had already made for the previous treats but the result was fantastic.

As soon as I took a bite I knew this cookie was exactly what I was looking for, especially with the slightly salty caramel to offset the rich chocolate, and it fit the bill for the holiday box. Unfortunately, since I already have the chocolate crinkle cookies and two chocolate cookies is too much, I think it will have to replace them. So once again I am faced with a dilemma whether to try and find yet another new recipe, probably something with nuts, or to just swap out the chocolate cookies and leave the box with only four types of treats. I still have a few weeks to decide and test some more recipes.

Brownie Cookie Sandwich with Salted Caramel
Note: This recipe makes about 30 sandwich cookies, 60 cookies overall.
  • 300 grams bittersweet chocolate
  • ½ cup (8 tbsp) unsalted butter, cut into pieces
  • ¾ cups flour
  • ½ tsp salt
  • ½ tsp baking powder
  • 3 large eggs
  • 1 cup sugar
  • 2 tbsp brown sugar
  • 2 tbsp cocoa powder
  • 1 tsp vanilla
  1. Using a double broiler, combine the butter and chocolate and melt over low heat until completely smooth and thickened. Set aside.
  2. Sift together the flour, salt, and baking powder and set aside.
  3. Combine the eggs, sugars, and cocoa powder and mix on medium-high speed until the mixture has doubled in volume and becomes very thick, about 4-5 minutes.
  4. Reduce the speed to medium and the melted chocolate. Continue to mix until well combined. Mix in the vanilla.
  5. Reduce the speed to low and add the flour mixture. Mix just until the flour is incorporated.
  6. Drop spoonfuls of the batter onto a parchment-lined baking tray. The cookies don't spread too much so they can be spaced closely together and flattened if you want them bigger.
  7. Bake for 10 minutes at 350 degrees Fahrenheit. The tops of the cookies should look cracked but inside they will be slightly soft and under-baked.
For the salted caramel:
Note: This makes more than enough caramel for the cookies so there will be plenty of extra. Another option is to use dulce de leche as the original recipe suggests.
  • 1 cup sugar
  • 6 tbsp butter (salted or unsalted), cut into pieces
  • ½ cup heavy cream
  • ½-1 tsp fine sea salt
  1. Heat the sugar in a medium, heavy-bottomed saucepan over medium heat. Stir constantly with a rubber spatula. The sugar will start to form clumps and eventually melt into a thick amber-colored liquid.
  2. Once the sugar is completely melted, immediately add the butter. Be careful because the caramel will start to bubble rapidly.
  3. Stir the butter into the caramel until it is completely melted, about 2-3 minutes.
  4. Very slowly, drizzle the cream into the pan while whisking. Once again, watch out for the bubbling and splatter.
  5. Allow the mixture to boil for one minute then remove from the heat and stir in ½-1 teaspoon of salt, depending on how pronounced you want the taste.   
  6. Cool the caramel before straining into a container. Can be stored for two weeks in the refrigerator tightly sealed.
To assemble the cookies: Place half the cookies flat side up. Warm the caramel if directly from the fridge so it is more spreadable (but let it cool and thicken a little as well). Add a teaspoon or so of caramel to one cookie half and top with another. 

Sunday, November 16, 2014

Butternut Squash, Kale and Sausage Hash


There's nothing like digging through your fridge, throwing a bunch of random ingredients into the pan, cooking them up together and then calling it a "hash". Just like the word entails, a hash is really just a modge-podge of many different ingredients and a great way to use up random things you may have lying around. More importantly, it's a great way to make an easy carefree breakfast that can also be reheated later for lunch or dinner.

I first made this hash about a month ago but I have to admit it was a planned dish and not just random leftovers. I had seen a recipe that for something similar that combined butternut squash and sausage. Although the butternut squash and kale are both ingredients typically found in my fridge, the sausage was not and I had to specifically go to the store to buy it.

What I liked about this particular hash is that the mild spice of the sausage balanced the sweetness of the butternut squash, a flavor that can sometimes be too strong and overwhelming. Combined with the fresh tomatoes and bitter kale, the dish had the perfect balance. It was great on its own and also the next day when I made it even more "breakfasty" by reheating it and cracking two eggs over top then lightly frying just until the egg whites cooked through and the yolks were still runny.

Butternut Squash, Kale and Sausage Hash
Note: I didn't measure everything precisely so these are just estimates as to the quantities I used as far as the spices go.
  • 2 lbs butternut squash, peeled and cubed
  • 5 small mild Italian sausage (or other type if preferred)
  • 1 small onion, chopped
  • 2-3 cloves garlic, minced
  • 1 red bell pepper, chopped
  • 2 large tomatoes, roughly chopped
  • 2 cups baby kale, rinsed and drained
  • 1 twig rosemary, finely chopped
  • 3 tsp dried basil
  • 3 tsp dried thyme
  • 3 tsp dried oregano
  • Olive oil
  • Salt and pepper
  1. In a large bowl, combine the cut pieces of butternut squash, the chopped rosemary, 1 teaspoon each of the dried basil, thyme, and oregano. Drizzle with a little bit of olive oil and add some salt and pepper. Stir well to evenly coat the butternut squash with the herbs.
  2. Lay out the pieces of butternut squash in a single layer of a large baking tray. Bake for 20 minutes at 400 degrees Fahrenheit. Once the butternut squash is tender enough to poke through with a fork, remove from the oven and set aside.
  3. Meanwhile, while the squash is baking, prepare the sausage by removing from the casing and frying over medium-high heat until completely cooked through and no pink remains. Drain the sausage from the pan and set aside.
  4. Heat some olive oil over medium heat and saute the chopped onions for 3-5 minutes, or until they start to become translucent.
  5. Add the chopped garlic and continue to cook for another minute until the garlic becomes fragrant.
  6. Add the chopped pepper and tomatoes and cook for another 3-5 minutes or until it begins to soften. Mix in the remaining 2 teaspoons of dried basil, thyme, and oregano and stir to combine.
  7. Add the cooked sausage back into the pan as well as the pieces of butternut squash and kale. Season to taste with salt and pepper.
  8. Briefly cover the pan with a lid to allow the kale to gently wilt. Remove from the heat and serve warm.

Wednesday, November 12, 2014

Plum Pie


When my parents returned from their trip to Europe, my mother had a sudden craving to make plum pie after seeing it in a bakery window in Baden-Baden. Plum season was just about ending but we bought some nice, juicy plums and I scoured online until I found a good recipe. The pie turned out great and we ate it all up within two days.

Apparently one pie was not enough to satisfy my mother's cravings. Recently, I myself traveled to Europe and when I returned my mom asked me if I wanted to make the pie again. Technically, it was mostly her as I was still kind of tired and jet-lagged and only helped by rolling out the dough. This time the pie turned out even better than the first time. As it came out of the even, golden brown and looking absolutely beautiful, it was almost like torture waiting for it to cool so that we could slice into it.

Once again we devoured the pie quickly and started thinking of more pies we could make. I questioned my mother about her comment a few months prior when my brother asked for a pie for his birthday and she said "we're not pie people". However my mother clarified that although pie is delicious, what she meant by that was that pie is wonderful and homey but not good enough for a birthday celebration. Regardless, I think this plum pie proved that we are in fact "pie people" and now I look forward to the next pie we decide to bake.

Plum Pie

For the dough:
Note: This recipe is enough to make two 9" crusts.
  • 2¼ cups flour
  • 1 tbsp sugar
  • 1 tsp salt
  • ¾ cup unsalted butter, chilled and cut into chunks
  • ⅔ cup cold water
  1. Whisk together the flour, salt, and sugar in a large bowl.
  2. Rub the butter pieces into the mixture until coarse and approximately pea-sized.
  3. Stir in the water using a fork. You may not have to use all of the water but just enough until the dough forms. 
  4. Split the dough evenly and form each half into a ball. Wrap in plastic and refrigerate for at least 30-60 minutes before using.
For the filling:
  • 2 lbs fresh plums, cut into chunks
  • 1 cup sugar 
  • ¼ cup cornstarch
  • ¼ tsp salt
  • 1 tsp vanilla
To assemble:
  1. Mix the pieces of plum with the remaining ingredients and stir well to evenly coat. Set aside.
  2. Roll out one ball of dough into a large circle, about 10"-11" so that there is an overhang around the edge of the pie plate. 
  3. Carefully transfer the rolled out dough onto a lightly floured and greased 9" pie plate, making sure the dough comes up evenly around the sides.
  4. Fill the pie crust with the plum mixture. Roll out the second ball of dough and lay on top of the filling.
  5. Crimp or pinch the dough edges to seal the filling completely.
  6. Brush the top of the pie with some milk and sprinkle generously with sugar.
  7. Cut about 5-7 slits on the top of the dough using a sharp knife. This will help steam to escape and is absolutely necessary.
  8. Bake for 65-75 minutes at 375 degrees Fahrenheit, until the crust is golden brown and the filling starts to bubble through the vents on top of the pie.
  9. Cool pie completely before slicing to ensure that the filling thickens and sets.
Note: The first time we made the pie we had difficulty cutting it as it had stuck to the glass dish. The second time we lined the dish with parchment paper and had no troubles whatsoever. 

Sunday, September 14, 2014

Pecan Tarts


After making blueberry pie last week I had some leftover pie dough and decided to make these little pecan tarts using my little 4" tart pans. I actually bought the pans a long time ago but have only ever used them once before to make french pear tarts with almond cream, which were actually quite delicious.

The beauty of these tarts was that they were super easy to assemble, given that I already had the dough made. The filling came together quickly and then it was just a matter of pouring it over the layer of pecans sitting over top the dough in the pans. Due to the golden corn syrup, the filling had a taste very reminiscent of caramel, something my cousin really appreciated. I only had enough dough to make three tarts, but the filling supposedly could be divided into five or six as it puffs up while baking anyway.

Pecan Tarts:
Note: Since I used leftover pie dough, I don't have proportions for the dough recipe. However I do have a pre-existing dough recipe which I know would be enough for one 9" tart or 5-6 mini 4" tarts. It can be found here.

For the filling:
  • 1½ tbsp unsalted butter 
  • cup packed dark brown sugar
  • ¼ cup plus 1 tsp golden syrup 
  • tsp fine salt
  • ½ tsp vanilla extract
  • 1 egg, lightly beaten 
  • 1 tsp all-purpose flour 
  • ⅔ cup whole pecans
  1. Combine the butter, brown sugar, golden syrup and salt in a small saucepan and bring to a boil. 
  2. Remove from heat and let cool to room temperature. 
  3. Whisk in the vanilla, egg and flour until smooth. 
  4. On a lightly floured work surface, roll dough out to " thickness and cut out as many 5-6" circles as you can. Re-roll scrap pastry and cut out another circle so that you have five in total. Fit each round into the 4" tart pans with removable bottoms. 
  5. Prick pastry shells several times with a fork and scatter pecans evenly in a single layer over the base of each one. 
  6. Pour the filling over to cover the nuts, dividing it evenly. Place tart pans on a baking tray and bake on the bottom rack of the oven at 375 degrees Fahrenheit until the filling has puffed and the pastry is nicely browned, 25-30 minutes. Transfer to a wire rack and let cool slightly before serving.

Saturday, September 13, 2014

Blueberry Pie

 
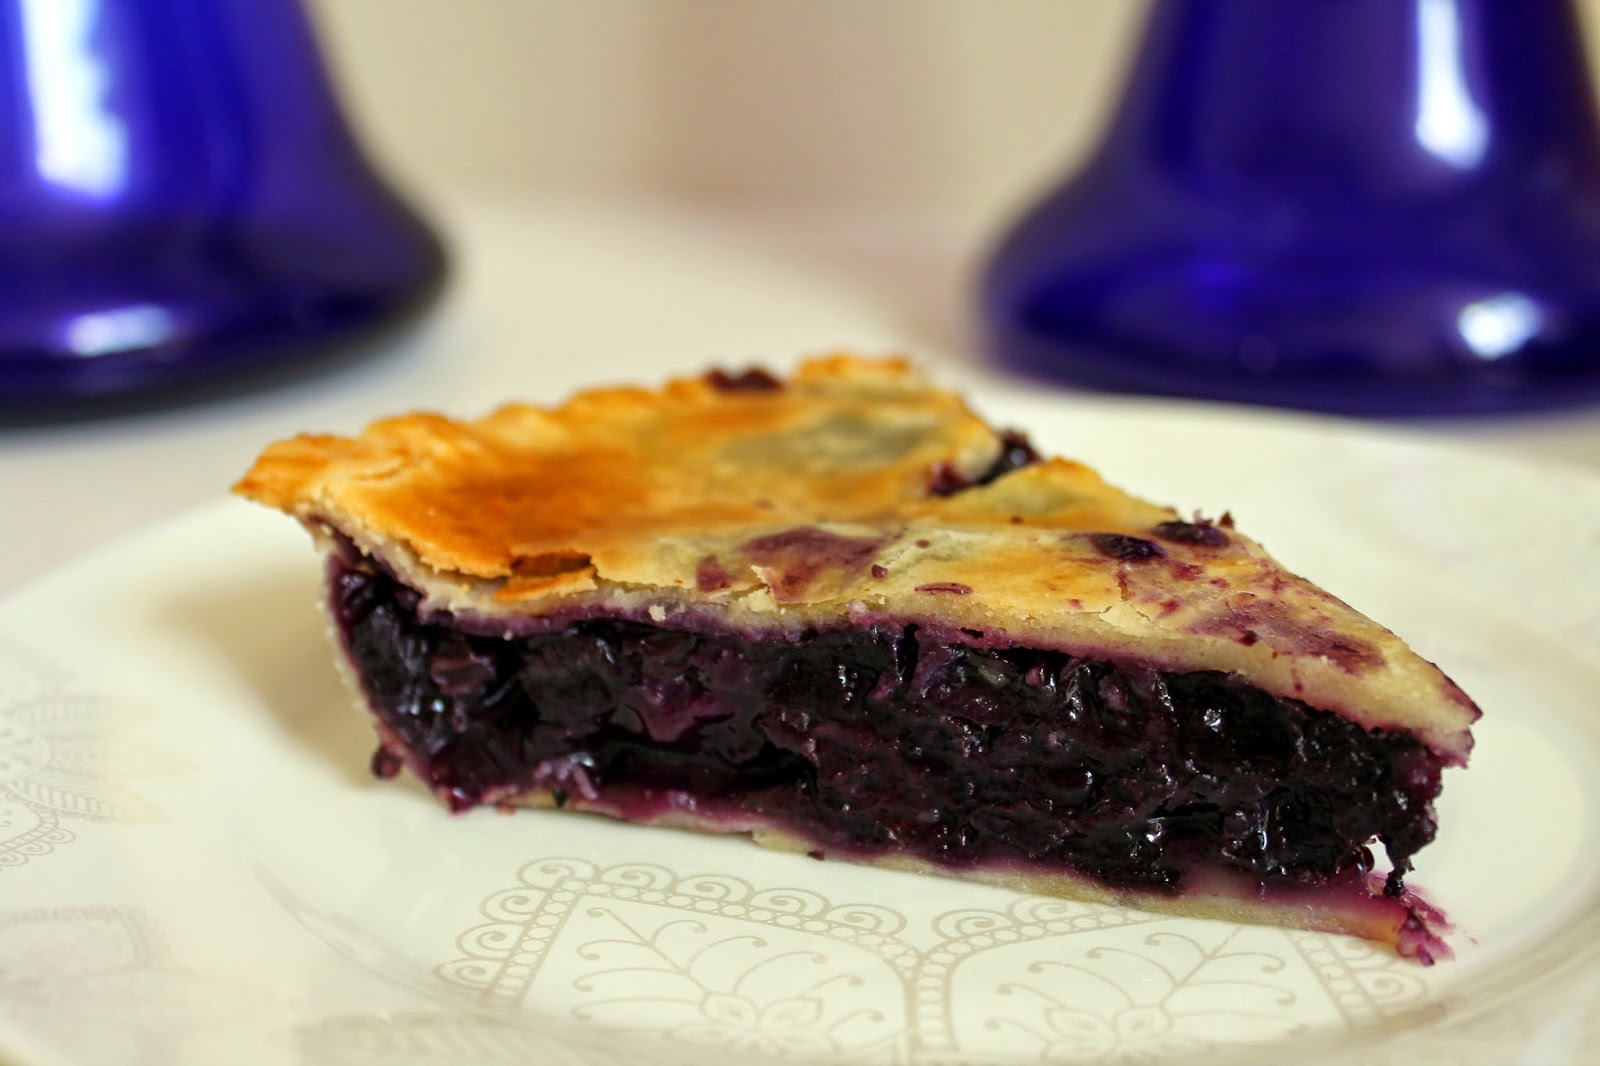
A few weeks ago we were celebrating my brother's birthday and he asked me to bake a pie. My mom said that she didn't think pie was good enough for a birthday so we agreed upon a cake instead. As a compromise, I promised him that I would make him a pie sometime in the near future. In that same week, my mom also bought a 10 lb box of blueberries, knowing they are my favorite berry and that the season was ending. As much as I love blueberries, it is difficult to eat 10 lbs on my own so I was looking for some recipe that would use up a significant amount. That's when I got the idea to make a blueberry pie, therefore fulfilling my brother's request and serving my blueberry purpose.

I've only baked a pie once before, almost two years ago when my friend asked me to help her make an apple pie. Unfortunately, since she took it home with her I never had the chance to taste it. This time I definitely made sure I had a nice big slice when I invited my cousins and grandparents over for dinner one evening. The pie was delicious and I enjoyed a slice for breakfast the next morning as well.

Blueberry Pie

For the dough:
Note: This is enough to make one 9" crust. To make the top layer double-up the ingredients.

  • 1¼ cups flour
  • 1 tbsp sugar
  • ¼ tsp salt
  • ½ cup (8 tbsp) cold unsalted butter, cut into pieces
  • 3-4 tbsp ice cold water
  1. Combine the flour, sugar, and salt and pulse a couple of times in a food processor. Add the chunks of butter into the processor and pulse until the butter pieces are roughly the size of walnuts. If you don't have a food processor use a pastry cutter or fork and knife to cut the butter into the flour.
  2. Transfer the dough mixture into a bowl and moisten with the water, starting with just a couple of tablespoons at first. Work the mixture until it forms a dough, adding water by the tablespoon only as needed if it feels dry.
  3. Form the dough into a small disk and wrap in plastic wrap. Refrigerate for at least 30 minutes or up to 24 hours before rolling it out.
For the filling:
  • 6 cups of fresh blueberries, rinsed and stems removed
  • ½ lemon, juiced and zested
  • ¼ cup flour
  • ½ cup sugar
  • 2 tbsp butter (unsalted), cut into small pieces 
To assemble:
  1. Combine all of the filling ingredients and set aside.
  2. Remove the dough from fridge and divide in half. On a floured work surface, roll out two equal discs about ⅛" thick. Lay one disc over a well-greased 9" pie pan and press down to line the dish with the dough.
  3. Pour the filling over the dough in the dish and dot with the pieces of butter.
  4. Cover the pie with the second piece of dough and use a fork to seal and crimp the edges all the way around. Trim any excess dough from the sides and use a knife to cut some slits in the dough to allow the steam to escape while baking.
  5. Blend an egg yolk with a few tablespoons of water and brush the egg wash over the top of the dough. 
  6. Bake at 425 degrees Fahrenheit for 15 minutes, then reduce the temperature to 350 degrees and continue baking for an hour until the blueberry juices are thickened and bubbling.
  7. Remove from the oven and transfer to a wire rack to cool before cutting.
Note: It may be helpful to cover the edges of the pie with aluminum foil as they brown faster than the middle. Also, put the pie dish on a baking tray so that it may catch any drippings. Although delicious when served warm, it is also harder to slice.

Friday, September 5, 2014

Lemon Blueberry Pancakes


Last month was the first time in the history of this blog that I did not have a single post. Part of the reason was because I traveled with my brother to Europe for two weeks to celebrate his graduation from high school. When we returned it was his birthday shortly after and I made many dishes including a roasted beet quinoa salad, stuffed mushrooms, and chocolate creme brulee for dessert. I did make one new thing: grape leaves stuffed with dried figs, goat cheese, and walnuts. Even though it was actually very well received I felt it was too simple to dedicate an entire post to.

However last weekend was Labor Day and for some odd reason I woke up very early on Monday morning in the mood for pancakes. Recently my mother had purchased a 10 lb box of blueberries because she knows that I love them and the season is coming to an end. I decided to use the blueberries in the pancakes and also make a blueberry compote topping.

The pancakes were very simple and also quite fluffy because of all the baking powder. I was quite pleased that it made a small batch perfect for two people to enjoy for breakfast. When my brother woke up he happily ate the pancakes along with me. Overall it was a nice relaxing morning and my pancake craving was fulfilled.

Lemon Blueberry Pancakes
Makes about 13 palm-sized pancakes
  • 1½ cups flour
  • 1 tbsp baking powder
  • 2 tbsp sugar
  • 1 lemon, juiced and zested
  • ½ tsp salt
  • 1 large egg
  • 2 tbsp oil
  • 1 cup milk
  • 1⅓ cups fresh blueberries (can use frozen as well)
For the blueberry compote:
  • 1 cup fresh or frozen blueberries
  • ¼ cup water
  • 2 tbsp sugar
  1. In a medium-sized bowl, whisk together the flour, baking powder, lemon zest, sugar, and salt.
  2. Add the egg, oil, milk, and lemon juice. Mix well until a batter forms. If it is too thick, add some extra milk, one tablespoon at a time.
  3. Gently fold in the blueberries, being careful not to break them.
  4. Heat a griddle or large skillet over medium heat. Once heated, reduce the temperature to medium low and pour cup of batter onto the cooking surface. Allow the pancake to cook until bubbles start to form on the top surface, about 20-25 seconds, then use a large spatula to gently flip the pancake over. Cook the other side until it is light and golden and fully cooked through. Repeat with remaining batter.
  5. Meanwhile, combine the ingredients for the blueberry compote in a small saucepan and bring to a boil. Once the cranberries start to pop, reduce the heat to a simmer and keep heating while making the pancakes. Stir occasionally until compote thickens, then remove from heat. 
Note: You may have to go through a couple of "test" pancakes before you achieve the right temperature on the griddle or skillet. Finished pancakes can be kept warm in the oven at 200 degrees Fahrenheit while the rest are cooking.

Friday, July 18, 2014

Red Quinoa Salad with Cilantro Lime Dressing


In addition to making the grilled chicken kabobs for dinner the other  night, I also made a quinoa salad which I served in the shell of the pineapple. This was actually my first time using red quinoa as opposed to the regular white or yellow looking quinoa.

There are actually three types of quinoa: regular, red, and black. I was curious about the difference between the three and supposedly the red and  black varieties have "nuttier" flavor as opposed to the regular one.  According to some sources, it is best to use the red and black quinoa for things like a salad or any dish that you would want the grains to remain as  individual pieces. However in dishes where the quinoa is used as more of a stuffing medium, such as stuffed peppers or even patties made of quinoa, it is better to use regular quinoa as it clumps together more.

I have to admit I don't think I tasted any stronger flavor from the red quinoa but it definitely made for an interesting appearance to the salad. Maybe next time I will try the black quinoa and see whether I notice any different taste to it.

Red Quinoa Salad with Cilantro Lime Dressing
  • 3 cups cooked quinoa
  • 2 cups shelled edamame beans
  • 2 cups corn kernels
  • 1 cup baby tomatoes, quartered or halved
  • 1 cup mini bocaccini, quartered
  • ¼-½ bunch fresh cilantro (I used ½ cilantro, ½ Italian parsley combination)
  • 2-3 cloves garlic
  • 1 lime, juiced
  • ½ tsp salt
  • ¼ tsp pepper
  • 2-3 tbsp olive oil
  • Optional: 1-2 tbsp hot sauce
  1. In a food processor, combine the cilantro, garlic cloves, lime juice, salt, pepper, olive oil, and hot sauce if using. Blend until smooth and the dressing comes together.
  2. In a large bowl mix together the quinoa, edamame, corn, tomatoes, and bocaccini.
  3. Pour the dressing over top and mix thoroughly. Cover and refrigerate for a few hours in order to chill the salad.

Thursday, July 17, 2014

Grilled Jerk Chicken Kabobs with Mango and Avocado Salsa


About two months ago my mother and I attended the annual Eat! Vancouver festival that took place downtown. Unfortunately it feels like from year to year the number of booths and vendors has decreased but still we had a good time. At the end of the day we received a "goody bag" which included a bottle of Jerk flavored marinade.

Earlier this week I decided to try out the marinade by making some grilled chicken kabobs with pinapple and red pepper. The kabobs turned out well, though I did need some help managing the barbeque. However the real star of the show was the mango and avacado salsa that I made to accompany the chicken. It was bright and fresh and perfect for a summer barbeque. In fact my mom liked it so much that I made some more that we just ate on its own with some tortilla chips. I can definitely see myself repeating this meal again, especially since I have another bottle of the marinade at home.

Grilled Jerk Chicken Kabobs with Mango and Avocado Salsa

For the chicken kabobs:
  • 1 bottle (270 mL) Jerk marinade
  • 1 pinapple, cut into chunks,
  • 1 bell pepper, cut into large pieces
  • 2 lbs chicken, breast or thighs 
  • Bamboo skewers
  1. Cut the chicken into bite sized pieces. Pour the marinade overtop the chicken and make sure it is evenly coated. Refrigerate for at least four hours, preferably overnight.
  2. Once ready to grill, prepare the kabobs by soaking the bamboo sticks for a few minutes then skewering the chicken pieces as well as pineapple and pepper. I made mine with the pattern of 3 chicken pieces, 1 pineapple, 2 chicken, 1 pepper, 2-3 chicken, 1 pineapple, and 1-2 chicken.
  3. While getting the kabobs ready, preheat the barbeque on medium-high heat. Once ready to grill, rub the cut side of an onion on the grates to prevent the chicken from sticking.
  4. Place the kabobs on the grill and turn every 2-3 minutes until the chicken is fully cooked through and no pink remains.
For the mango and avocado salsa:
  • 1 mango, peeled and cut into bite sized pieces
  • 1 avocado, cut into bite sized pieces
  • 1 small cucumber, peeled and sliced
  • ¼ red onion, finely chopped
  • Handful fresh cilantro, chopped
  • 1 lime, juiced
  • 1-2 tbsp hot sauce (I like to use Frank's Chili and Lime flavor)
  • Olive oil
  • Salt
  1. Combine the mango, cucumber, red onion, and cilantro. 
  2. Pour the lime juice and hot sauce on top and drizzle with some olive oil. Mix well.
  3. Add the avocado and gently stir in, trying not to mash it too much. Season to taste with salt.

Wednesday, June 25, 2014

Early Grey Sweet Rolls with Cherry and White Chocolate


Our family has expanded yet again. Yesterday marked four years to the day since my aunt's cousin immigrated here with her husband and son from Israel. Since that time they have had a daughter, who will be turning two at the end of July, and now her brother and his family have immigrated as well. I thought it only fair to properly greet the new additions to the family with some baked goods.

A few months ago my friend had asked me if I ever tried baking with Earl Grey tea before, too which I replied that I had not. Since that time the idea was in the back of my mind but I honestly hadn't given it much thought until yesterday. I found this recipe for a sweet roll that incorporates Earl Grey tea within the dough. The original recipe called for a combination of fresh raspberries and white chocolate but I didn't have any raspberries on hand so I substituted some frozen cherries instead.

I baked the rolls in the afternoon and later that evening brought them with me to the park as I met the new family members. They were extremely nice and appreciate of the gesture, commenting that they especially enjoyed that the rolls were not overly sweet. We spent a nice evening together with the kids playing on the playground before we parted our separate ways. I was so pleased to have met them and look forward to the future occasions and celebrations we will share together.

Earl Grey Sweet Rolls with Cherry and White Chocolate

For the dough:
  • 1 package (8 grams) yeast
  • 1 teaspoon sugar
  • ½ cup warm water
  • 1 egg
  • 2 tablespoons oil
  • ¾ cup warm water
  • 4 cups flour, sifted
  • ¼ cup sugar
  • ¼ teaspoon salt
  • 2 Earl Grey tea bags 
  1. In a small bowl, mix the yeast, a teaspoon of sugar and a ½ cup of warm water. Set aside to sit and foam.
  2. In another small bowl, whisk together the egg, 2 tablespoons of oil and ¾ cup of warm water. Set aside.
  3. In a large bowl, sift 4 cups of flour with sugar, salt, tea powder and whisk everything together.
  4. Make a well in the center. Pour in your yeast and egg mixtures and using a wooden spoon, stir until roughly combined.
  5. Dump your dough onto a lightly floured surface and begin to knead for 5-10 minutes (you may have to lightly flour your surface again if your dough becomes too tacky). Once the dough starts to feel smooth, place it in an oiled bowl and cover with a tea towel. Place in a warm area or in a turned off oven and let rise for an hour to an hour and a half, until the dough has doubled in size. 
For the filling:
Note: You can substitute any fruit such as raspberries, strawberries, blueberries, or cherries. If using frozen fruit, make sure to not thaw and pulse a few times in the food processor so the pieces aren't too big. Then add 1 tbsp corn starch to the fruit before spreading on the dough.
  • ¼ cup sugar
  • ½ cup white chocolate chips
  • 2 cups fresh or frozen fruit, chopped into pieces
To assemble:
  1. Once the dough has risen, roll out into a 10" x 18" rectangle.
  2. Scatter dough evenly with sugar, white chocolate chips and fruit. Be sure to leave the top inch of your dough free of any toppings so you are able to seal your roll.
  3. Starting at the bottom, begin to roll up the dough and berries using firm pressure. Seal the border using a light coating of water. 
  4. Cut the rolls about 1-1½" thick (depending on how many you want to make).
  5. Place the rolls, cut side down, in an 11" x 13" well-greased or parchment-lined baking dish. (I actually cut my rolls to be about 1" thick and was able to make 18 all together, putting 9 into two different pans). Cover with a tea towel and let rise for another half hour.
  6. Bake the rolls at 350 degrees Fahrenheit for 30 minutes. 
For the glaze:
Optional but I would highly recommend as it is delicious and adds a great final touch.
  • ½ cup powdered sugar
  • 2-3 tbsp milk or cream (depending on how thin or thick you want the glaze to be)
  1. In the last few minutes while the rolls are finishing baking, whisk together the powdered sugar and milk/cream until a smooth mixture comes together.
  2. As soon as the rolls are ready, coat them with the glaze immediately. If there is enough left (or you can make some extra) glaze them again in 5 minutes.

Tuesday, June 24, 2014

Individual Nutella and White Chocolate Mousse Cakes


In addition to making the dolmathes as one of the many appetizers we had during my brother's celebratory dinner last week, I also prepared a dessert. A year ago I bought a "mini cheesecake pan" which I used to make over 72 little cheesecakes last year for my dad's big 50th birthday party. Since that time I have used the pan repeatedly to make miniature cheescakes for various occasions. This year we are having a smaller scale party and I wanted to make individual desserts again but rather than cheesecake I wanted to make mousse cake.

I decided to use nutella rather than chocolate, just for some variety, and when I searched for nutella mousse recipes most came back with just two ingredients: nutella and whipping cream. I wasn't sure if the mousse cakes would hold up without any stabilizing factors in them so I decided to experiment and make one batch regular and add gelatin to the second.

Although both initially came out of the molds easily, after about twenty minutes it was clear that the regular batch was starting to soften and lose its shape while the gelatin ones remained in perfect form. The gelatin definitely was more practical in terms of serving the cakes at a party because they didn't have to be consumed right away. However convenience came at at a price: the regular mousse cakes were definitely creamier and, in my opinion, tasted better than the gelatin version.

Still not satisfied, I decided to experiment further by using slightly less of the nutella mousse and adding some white chocolate flavored mousse to the top of the cakes. I decided to use the gelatin again but this time divide it between the two flavors. The end result was closer to the creamy taste of the regular mousse, though not exactly the same, but still had enough stability from the added gelatin. My mom was extremely pleased with the individual cakes and approved of them for the upcoming birthday party.


Individual Nutella and White Chocolate Mousse Cakes
Note: Makes 12 individual mousse cakes. If you do not own a pan where you can easily unmold the mousse cakes I suggest using a large cupcake liner that can be peeled away.


For the crust:
  • ½ cup graham cracker crumbs
  • ½ tbsp powdered sugar
  • ½ tbsp cocoa powder
  • 2 tbsp butter, melted
Combine all of the ingredients for the crust in a small bowl and distribute evenly amongst the 12 cups or liners. Bake at 350 degrees for five minutes. Remove from the oven and set aside to cool.

For the mousse:
  • ½ cup nutella
  • ¼ tsp espresso powder
  • 3 oz (85 g) white chocolate
  • 1 tsp vanilla
  • 2 cups heavy whipping cream
  • 1 envelope (1 tbsp) gelatin
  • 4 tbsp water

  1. Mix the espresso powder with the nutella and set aside.
  2. In a small saucepan, heat ½ cup of the whipping cream on a low heat until it starts to simmer and almost boil.
  3. While the cream is heating, dissolve the gelatin in the water. Once the cream is heated through, add the dissolved gelatin and mix thoroughly to incorporate.
  4. Divide the heated cream evenly between the bowl containing the nutella and another containing the white chocolate. (You may want to pour the cream into a measuring cup so that you know how much is half)
  5. Mix the hot cream in each bowl with the ingredients inside, making sure it is well mixed and smooth. Add the teaspoon of vanilla to the white chocolate bowl as well.
  6. Beat the remaining 1½ cups of whipping cream on high speed until soft peaks form.
  7. Add a little more than half of the whipped cream to the nutella bowl and the remaining whipped cream to the white chocolate bowl. The easiest way to do this is to add a little bit of whipped cream to the bowl first, mix it well, then add the rest and gently fold in until no streaks remain.
  8. Distribute the nutella mousse amongst the cups, making sure to not let it get on the sides, then top with the white chocolate mousse.
  9. Put the mousse cakes in the fridge for at least 3-4 hours to allow the mousse to set then serve by either gently unmolding them or peeling away the liner.