Sunday, November 30, 2014

Brownie Cookie Sandwich with Salted Caramel


For the past several years I have made it an annual tradition to bake holiday treats and distribute them to my close friends and family. At first I started off small, but by now the box has grown to include more goodies. Of course I always try to improve upon the previous year and use the month or so leading up to the holidays to test recipes for potential new additions to the box.

Last year, I tried a few recipes but ultimately was not satisfied with any of them so I left the box the same as the year before. It contained cranberry bliss bars, berry crumb bars, chocolate crinkle cookies, and almond biscotti. I felt as though I was missing some sort of treat in the "caramel" category but couldn't settle on anything to fulfill it.

So for the past few weeks I have been once again testing nutty/caramel recipes, trying to find something new to include in this year's box. In order to get more opinions, I have gotten in the habit of bringing my baked goods to work and seeing my coworkers' reactions. The first item I tried to make was a pecan pie thumbprint cookie. Although it tasted good, I was not satisfied with the filling-to-dough ratio so for the next batch I reworked it into more of a mini pecan tartlette. This time the filling was much more prominent and I felt the caramel and nut combination stood out.

Then I came across a recipe saved on my browser that I had found months ago but had not yet tested. It was for a cookie that resembled the taste of a brownie, with dulce de leche sandwiched in the middle. You know those two-bite brownies sold in the paper bags at most grocery stores...well believe it or not but these cookies taste exactly like them! The cookie was flaky on the outside and chewy on the inside, simply the perfect bite. Rather than use dulce de leche, I just substituted the salted caramel sauce that I had already made for the previous treats but the result was fantastic.

As soon as I took a bite I knew this cookie was exactly what I was looking for, especially with the slightly salty caramel to offset the rich chocolate, and it fit the bill for the holiday box. Unfortunately, since I already have the chocolate crinkle cookies and two chocolate cookies is too much, I think it will have to replace them. So once again I am faced with a dilemma whether to try and find yet another new recipe, probably something with nuts, or to just swap out the chocolate cookies and leave the box with only four types of treats. I still have a few weeks to decide and test some more recipes.

Brownie Cookie Sandwich with Salted Caramel
Note: This recipe makes about 30 sandwich cookies, 60 cookies overall.
  • 300 grams bittersweet chocolate
  • ½ cup (8 tbsp) unsalted butter, cut into pieces
  • ¾ cups flour
  • ½ tsp salt
  • ½ tsp baking powder
  • 3 large eggs
  • 1 cup sugar
  • 2 tbsp brown sugar
  • 2 tbsp cocoa powder
  • 1 tsp vanilla
  1. Using a double broiler, combine the butter and chocolate and melt over low heat until completely smooth and thickened. Set aside.
  2. Sift together the flour, salt, and baking powder and set aside.
  3. Combine the eggs, sugars, and cocoa powder and mix on medium-high speed until the mixture has doubled in volume and becomes very thick, about 4-5 minutes.
  4. Reduce the speed to medium and the melted chocolate. Continue to mix until well combined. Mix in the vanilla.
  5. Reduce the speed to low and add the flour mixture. Mix just until the flour is incorporated.
  6. Drop spoonfuls of the batter onto a parchment-lined baking tray. The cookies don't spread too much so they can be spaced closely together and flattened if you want them bigger.
  7. Bake for 10 minutes at 350 degrees Fahrenheit. The tops of the cookies should look cracked but inside they will be slightly soft and under-baked.
For the salted caramel:
Note: This makes more than enough caramel for the cookies so there will be plenty of extra. Another option is to use dulce de leche as the original recipe suggests.
  • 1 cup sugar
  • 6 tbsp butter (salted or unsalted), cut into pieces
  • ½ cup heavy cream
  • ½-1 tsp fine sea salt
  1. Heat the sugar in a medium, heavy-bottomed saucepan over medium heat. Stir constantly with a rubber spatula. The sugar will start to form clumps and eventually melt into a thick amber-colored liquid.
  2. Once the sugar is completely melted, immediately add the butter. Be careful because the caramel will start to bubble rapidly.
  3. Stir the butter into the caramel until it is completely melted, about 2-3 minutes.
  4. Very slowly, drizzle the cream into the pan while whisking. Once again, watch out for the bubbling and splatter.
  5. Allow the mixture to boil for one minute then remove from the heat and stir in ½-1 teaspoon of salt, depending on how pronounced you want the taste.   
  6. Cool the caramel before straining into a container. Can be stored for two weeks in the refrigerator tightly sealed.
To assemble the cookies: Place half the cookies flat side up. Warm the caramel if directly from the fridge so it is more spreadable (but let it cool and thicken a little as well). Add a teaspoon or so of caramel to one cookie half and top with another. 

Sunday, November 16, 2014

Butternut Squash, Kale and Sausage Hash


There's nothing like digging through your fridge, throwing a bunch of random ingredients into the pan, cooking them up together and then calling it a "hash". Just like the word entails, a hash is really just a modge-podge of many different ingredients and a great way to use up random things you may have lying around. More importantly, it's a great way to make an easy carefree breakfast that can also be reheated later for lunch or dinner.

I first made this hash about a month ago but I have to admit it was a planned dish and not just random leftovers. I had seen a recipe that for something similar that combined butternut squash and sausage. Although the butternut squash and kale are both ingredients typically found in my fridge, the sausage was not and I had to specifically go to the store to buy it.

What I liked about this particular hash is that the mild spice of the sausage balanced the sweetness of the butternut squash, a flavor that can sometimes be too strong and overwhelming. Combined with the fresh tomatoes and bitter kale, the dish had the perfect balance. It was great on its own and also the next day when I made it even more "breakfasty" by reheating it and cracking two eggs over top then lightly frying just until the egg whites cooked through and the yolks were still runny.

Butternut Squash, Kale and Sausage Hash
Note: I didn't measure everything precisely so these are just estimates as to the quantities I used as far as the spices go.
  • 2 lbs butternut squash, peeled and cubed
  • 5 small mild Italian sausage (or other type if preferred)
  • 1 small onion, chopped
  • 2-3 cloves garlic, minced
  • 1 red bell pepper, chopped
  • 2 large tomatoes, roughly chopped
  • 2 cups baby kale, rinsed and drained
  • 1 twig rosemary, finely chopped
  • 3 tsp dried basil
  • 3 tsp dried thyme
  • 3 tsp dried oregano
  • Olive oil
  • Salt and pepper
  1. In a large bowl, combine the cut pieces of butternut squash, the chopped rosemary, 1 teaspoon each of the dried basil, thyme, and oregano. Drizzle with a little bit of olive oil and add some salt and pepper. Stir well to evenly coat the butternut squash with the herbs.
  2. Lay out the pieces of butternut squash in a single layer of a large baking tray. Bake for 20 minutes at 400 degrees Fahrenheit. Once the butternut squash is tender enough to poke through with a fork, remove from the oven and set aside.
  3. Meanwhile, while the squash is baking, prepare the sausage by removing from the casing and frying over medium-high heat until completely cooked through and no pink remains. Drain the sausage from the pan and set aside.
  4. Heat some olive oil over medium heat and saute the chopped onions for 3-5 minutes, or until they start to become translucent.
  5. Add the chopped garlic and continue to cook for another minute until the garlic becomes fragrant.
  6. Add the chopped pepper and tomatoes and cook for another 3-5 minutes or until it begins to soften. Mix in the remaining 2 teaspoons of dried basil, thyme, and oregano and stir to combine.
  7. Add the cooked sausage back into the pan as well as the pieces of butternut squash and kale. Season to taste with salt and pepper.
  8. Briefly cover the pan with a lid to allow the kale to gently wilt. Remove from the heat and serve warm.

Wednesday, November 12, 2014

Plum Pie


When my parents returned from their trip to Europe, my mother had a sudden craving to make plum pie after seeing it in a bakery window in Baden-Baden. Plum season was just about ending but we bought some nice, juicy plums and I scoured online until I found a good recipe. The pie turned out great and we ate it all up within two days.

Apparently one pie was not enough to satisfy my mother's cravings. Recently, I myself traveled to Europe and when I returned my mom asked me if I wanted to make the pie again. Technically, it was mostly her as I was still kind of tired and jet-lagged and only helped by rolling out the dough. This time the pie turned out even better than the first time. As it came out of the even, golden brown and looking absolutely beautiful, it was almost like torture waiting for it to cool so that we could slice into it.

Once again we devoured the pie quickly and started thinking of more pies we could make. I questioned my mother about her comment a few months prior when my brother asked for a pie for his birthday and she said "we're not pie people". However my mother clarified that although pie is delicious, what she meant by that was that pie is wonderful and homey but not good enough for a birthday celebration. Regardless, I think this plum pie proved that we are in fact "pie people" and now I look forward to the next pie we decide to bake.

Plum Pie

For the dough:
Note: This recipe is enough to make two 9" crusts.
  • 2¼ cups flour
  • 1 tbsp sugar
  • 1 tsp salt
  • ¾ cup unsalted butter, chilled and cut into chunks
  • ⅔ cup cold water
  1. Whisk together the flour, salt, and sugar in a large bowl.
  2. Rub the butter pieces into the mixture until coarse and approximately pea-sized.
  3. Stir in the water using a fork. You may not have to use all of the water but just enough until the dough forms. 
  4. Split the dough evenly and form each half into a ball. Wrap in plastic and refrigerate for at least 30-60 minutes before using.
For the filling:
  • 2 lbs fresh plums, cut into chunks
  • 1 cup sugar 
  • ¼ cup cornstarch
  • ¼ tsp salt
  • 1 tsp vanilla
To assemble:
  1. Mix the pieces of plum with the remaining ingredients and stir well to evenly coat. Set aside.
  2. Roll out one ball of dough into a large circle, about 10"-11" so that there is an overhang around the edge of the pie plate. 
  3. Carefully transfer the rolled out dough onto a lightly floured and greased 9" pie plate, making sure the dough comes up evenly around the sides.
  4. Fill the pie crust with the plum mixture. Roll out the second ball of dough and lay on top of the filling.
  5. Crimp or pinch the dough edges to seal the filling completely.
  6. Brush the top of the pie with some milk and sprinkle generously with sugar.
  7. Cut about 5-7 slits on the top of the dough using a sharp knife. This will help steam to escape and is absolutely necessary.
  8. Bake for 65-75 minutes at 375 degrees Fahrenheit, until the crust is golden brown and the filling starts to bubble through the vents on top of the pie.
  9. Cool pie completely before slicing to ensure that the filling thickens and sets.
Note: The first time we made the pie we had difficulty cutting it as it had stuck to the glass dish. The second time we lined the dish with parchment paper and had no troubles whatsoever. 

Sunday, September 14, 2014

Pecan Tarts


After making blueberry pie last week I had some leftover pie dough and decided to make these little pecan tarts using my little 4" tart pans. I actually bought the pans a long time ago but have only ever used them once before to make french pear tarts with almond cream, which were actually quite delicious.

The beauty of these tarts was that they were super easy to assemble, given that I already had the dough made. The filling came together quickly and then it was just a matter of pouring it over the layer of pecans sitting over top the dough in the pans. Due to the golden corn syrup, the filling had a taste very reminiscent of caramel, something my cousin really appreciated. I only had enough dough to make three tarts, but the filling supposedly could be divided into five or six as it puffs up while baking anyway.

Pecan Tarts:
Note: Since I used leftover pie dough, I don't have proportions for the dough recipe. However I do have a pre-existing dough recipe which I know would be enough for one 9" tart or 5-6 mini 4" tarts. It can be found here.

For the filling:
  • 1½ tbsp unsalted butter 
  • cup packed dark brown sugar
  • ¼ cup plus 1 tsp golden syrup 
  • tsp fine salt
  • ½ tsp vanilla extract
  • 1 egg, lightly beaten 
  • 1 tsp all-purpose flour 
  • ⅔ cup whole pecans
  1. Combine the butter, brown sugar, golden syrup and salt in a small saucepan and bring to a boil. 
  2. Remove from heat and let cool to room temperature. 
  3. Whisk in the vanilla, egg and flour until smooth. 
  4. On a lightly floured work surface, roll dough out to " thickness and cut out as many 5-6" circles as you can. Re-roll scrap pastry and cut out another circle so that you have five in total. Fit each round into the 4" tart pans with removable bottoms. 
  5. Prick pastry shells several times with a fork and scatter pecans evenly in a single layer over the base of each one. 
  6. Pour the filling over to cover the nuts, dividing it evenly. Place tart pans on a baking tray and bake on the bottom rack of the oven at 375 degrees Fahrenheit until the filling has puffed and the pastry is nicely browned, 25-30 minutes. Transfer to a wire rack and let cool slightly before serving.

Saturday, September 13, 2014

Blueberry Pie

 
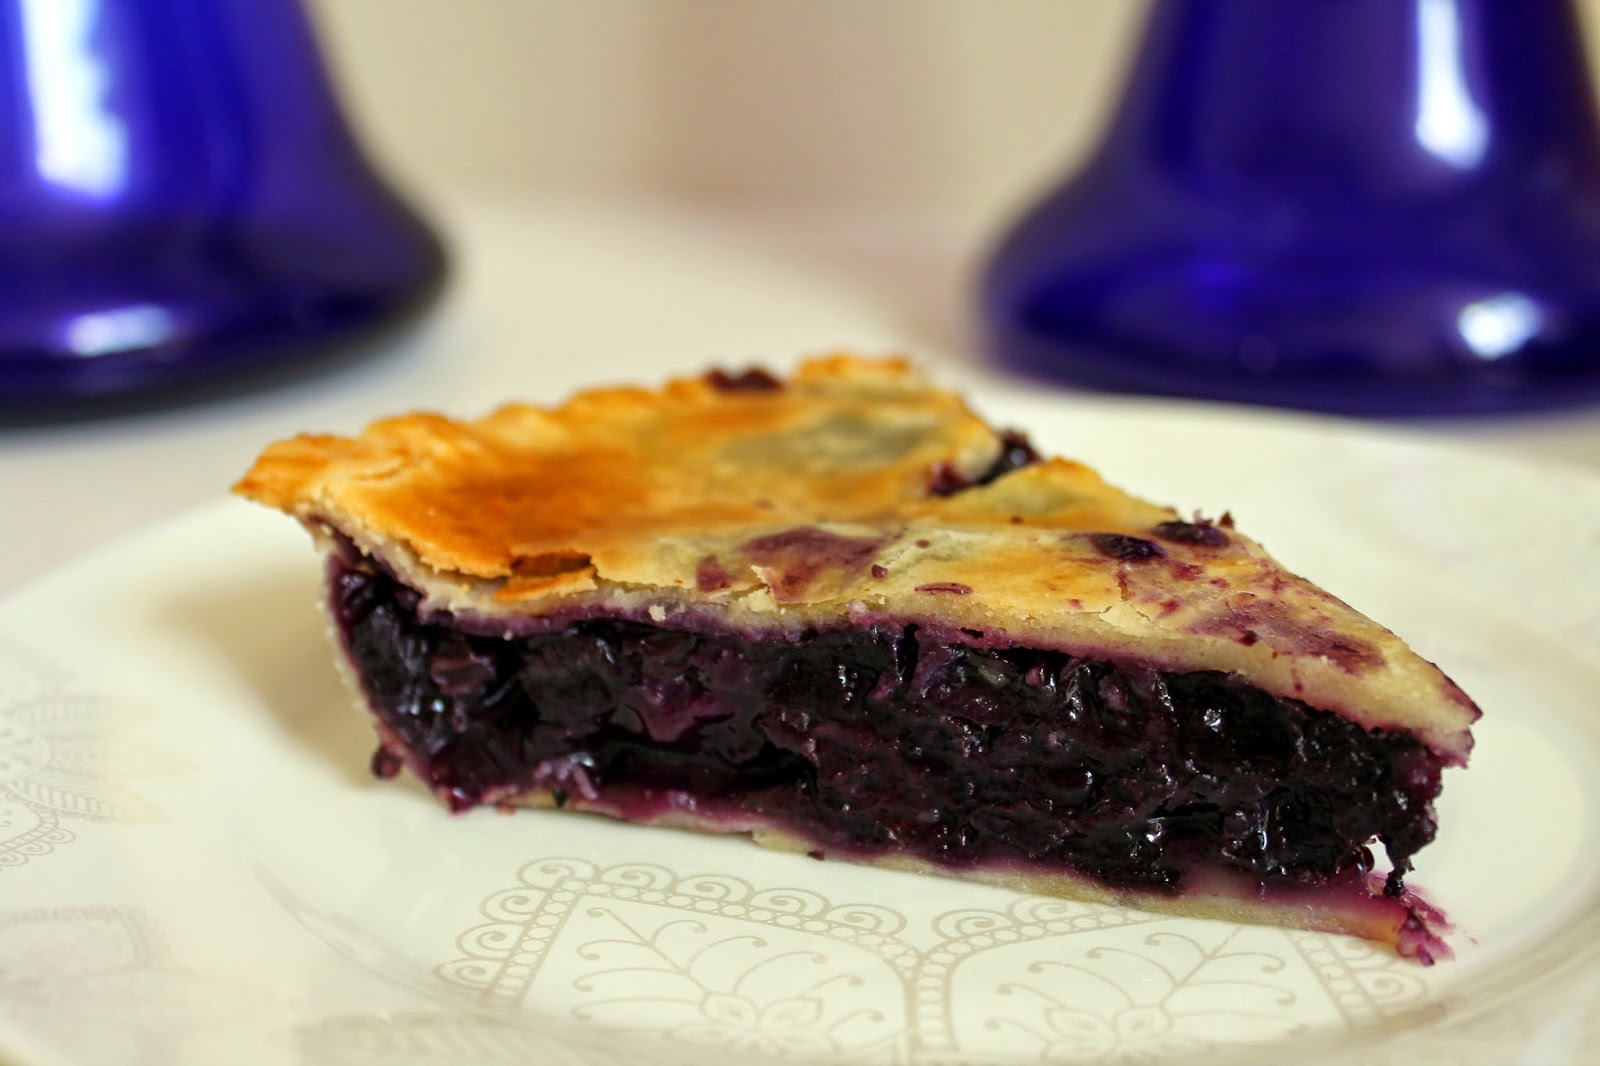
A few weeks ago we were celebrating my brother's birthday and he asked me to bake a pie. My mom said that she didn't think pie was good enough for a birthday so we agreed upon a cake instead. As a compromise, I promised him that I would make him a pie sometime in the near future. In that same week, my mom also bought a 10 lb box of blueberries, knowing they are my favorite berry and that the season was ending. As much as I love blueberries, it is difficult to eat 10 lbs on my own so I was looking for some recipe that would use up a significant amount. That's when I got the idea to make a blueberry pie, therefore fulfilling my brother's request and serving my blueberry purpose.

I've only baked a pie once before, almost two years ago when my friend asked me to help her make an apple pie. Unfortunately, since she took it home with her I never had the chance to taste it. This time I definitely made sure I had a nice big slice when I invited my cousins and grandparents over for dinner one evening. The pie was delicious and I enjoyed a slice for breakfast the next morning as well.

Blueberry Pie

For the dough:
Note: This is enough to make one 9" crust. To make the top layer double-up the ingredients.

  • 1¼ cups flour
  • 1 tbsp sugar
  • ¼ tsp salt
  • ½ cup (8 tbsp) cold unsalted butter, cut into pieces
  • 3-4 tbsp ice cold water
  1. Combine the flour, sugar, and salt and pulse a couple of times in a food processor. Add the chunks of butter into the processor and pulse until the butter pieces are roughly the size of walnuts. If you don't have a food processor use a pastry cutter or fork and knife to cut the butter into the flour.
  2. Transfer the dough mixture into a bowl and moisten with the water, starting with just a couple of tablespoons at first. Work the mixture until it forms a dough, adding water by the tablespoon only as needed if it feels dry.
  3. Form the dough into a small disk and wrap in plastic wrap. Refrigerate for at least 30 minutes or up to 24 hours before rolling it out.
For the filling:
  • 6 cups of fresh blueberries, rinsed and stems removed
  • ½ lemon, juiced and zested
  • ¼ cup flour
  • ½ cup sugar
  • 2 tbsp butter (unsalted), cut into small pieces 
To assemble:
  1. Combine all of the filling ingredients and set aside.
  2. Remove the dough from fridge and divide in half. On a floured work surface, roll out two equal discs about ⅛" thick. Lay one disc over a well-greased 9" pie pan and press down to line the dish with the dough.
  3. Pour the filling over the dough in the dish and dot with the pieces of butter.
  4. Cover the pie with the second piece of dough and use a fork to seal and crimp the edges all the way around. Trim any excess dough from the sides and use a knife to cut some slits in the dough to allow the steam to escape while baking.
  5. Blend an egg yolk with a few tablespoons of water and brush the egg wash over the top of the dough. 
  6. Bake at 425 degrees Fahrenheit for 15 minutes, then reduce the temperature to 350 degrees and continue baking for an hour until the blueberry juices are thickened and bubbling.
  7. Remove from the oven and transfer to a wire rack to cool before cutting.
Note: It may be helpful to cover the edges of the pie with aluminum foil as they brown faster than the middle. Also, put the pie dish on a baking tray so that it may catch any drippings. Although delicious when served warm, it is also harder to slice.

Friday, September 5, 2014

Lemon Blueberry Pancakes


Last month was the first time in the history of this blog that I did not have a single post. Part of the reason was because I traveled with my brother to Europe for two weeks to celebrate his graduation from high school. When we returned it was his birthday shortly after and I made many dishes including a roasted beet quinoa salad, stuffed mushrooms, and chocolate creme brulee for dessert. I did make one new thing: grape leaves stuffed with dried figs, goat cheese, and walnuts. Even though it was actually very well received I felt it was too simple to dedicate an entire post to.

However last weekend was Labor Day and for some odd reason I woke up very early on Monday morning in the mood for pancakes. Recently my mother had purchased a 10 lb box of blueberries because she knows that I love them and the season is coming to an end. I decided to use the blueberries in the pancakes and also make a blueberry compote topping.

The pancakes were very simple and also quite fluffy because of all the baking powder. I was quite pleased that it made a small batch perfect for two people to enjoy for breakfast. When my brother woke up he happily ate the pancakes along with me. Overall it was a nice relaxing morning and my pancake craving was fulfilled.

Lemon Blueberry Pancakes
Makes about 13 palm-sized pancakes
  • 1½ cups flour
  • 1 tbsp baking powder
  • 2 tbsp sugar
  • 1 lemon, juiced and zested
  • ½ tsp salt
  • 1 large egg
  • 2 tbsp oil
  • 1 cup milk
  • 1⅓ cups fresh blueberries (can use frozen as well)
For the blueberry compote:
  • 1 cup fresh or frozen blueberries
  • ¼ cup water
  • 2 tbsp sugar
  1. In a medium-sized bowl, whisk together the flour, baking powder, lemon zest, sugar, and salt.
  2. Add the egg, oil, milk, and lemon juice. Mix well until a batter forms. If it is too thick, add some extra milk, one tablespoon at a time.
  3. Gently fold in the blueberries, being careful not to break them.
  4. Heat a griddle or large skillet over medium heat. Once heated, reduce the temperature to medium low and pour cup of batter onto the cooking surface. Allow the pancake to cook until bubbles start to form on the top surface, about 20-25 seconds, then use a large spatula to gently flip the pancake over. Cook the other side until it is light and golden and fully cooked through. Repeat with remaining batter.
  5. Meanwhile, combine the ingredients for the blueberry compote in a small saucepan and bring to a boil. Once the cranberries start to pop, reduce the heat to a simmer and keep heating while making the pancakes. Stir occasionally until compote thickens, then remove from heat. 
Note: You may have to go through a couple of "test" pancakes before you achieve the right temperature on the griddle or skillet. Finished pancakes can be kept warm in the oven at 200 degrees Fahrenheit while the rest are cooking.

Friday, July 18, 2014

Red Quinoa Salad with Cilantro Lime Dressing


In addition to making the grilled chicken kabobs for dinner the other  night, I also made a quinoa salad which I served in the shell of the pineapple. This was actually my first time using red quinoa as opposed to the regular white or yellow looking quinoa.

There are actually three types of quinoa: regular, red, and black. I was curious about the difference between the three and supposedly the red and  black varieties have "nuttier" flavor as opposed to the regular one.  According to some sources, it is best to use the red and black quinoa for things like a salad or any dish that you would want the grains to remain as  individual pieces. However in dishes where the quinoa is used as more of a stuffing medium, such as stuffed peppers or even patties made of quinoa, it is better to use regular quinoa as it clumps together more.

I have to admit I don't think I tasted any stronger flavor from the red quinoa but it definitely made for an interesting appearance to the salad. Maybe next time I will try the black quinoa and see whether I notice any different taste to it.

Red Quinoa Salad with Cilantro Lime Dressing
  • 3 cups cooked quinoa
  • 2 cups shelled edamame beans
  • 2 cups corn kernels
  • 1 cup baby tomatoes, quartered or halved
  • 1 cup mini bocaccini, quartered
  • ¼-½ bunch fresh cilantro (I used ½ cilantro, ½ Italian parsley combination)
  • 2-3 cloves garlic
  • 1 lime, juiced
  • ½ tsp salt
  • ¼ tsp pepper
  • 2-3 tbsp olive oil
  • Optional: 1-2 tbsp hot sauce
  1. In a food processor, combine the cilantro, garlic cloves, lime juice, salt, pepper, olive oil, and hot sauce if using. Blend until smooth and the dressing comes together.
  2. In a large bowl mix together the quinoa, edamame, corn, tomatoes, and bocaccini.
  3. Pour the dressing over top and mix thoroughly. Cover and refrigerate for a few hours in order to chill the salad.

Thursday, July 17, 2014

Grilled Jerk Chicken Kabobs with Mango and Avocado Salsa


About two months ago my mother and I attended the annual Eat! Vancouver festival that took place downtown. Unfortunately it feels like from year to year the number of booths and vendors has decreased but still we had a good time. At the end of the day we received a "goody bag" which included a bottle of Jerk flavored marinade.

Earlier this week I decided to try out the marinade by making some grilled chicken kabobs with pinapple and red pepper. The kabobs turned out well, though I did need some help managing the barbeque. However the real star of the show was the mango and avacado salsa that I made to accompany the chicken. It was bright and fresh and perfect for a summer barbeque. In fact my mom liked it so much that I made some more that we just ate on its own with some tortilla chips. I can definitely see myself repeating this meal again, especially since I have another bottle of the marinade at home.

Grilled Jerk Chicken Kabobs with Mango and Avocado Salsa

For the chicken kabobs:
  • 1 bottle (270 mL) Jerk marinade
  • 1 pinapple, cut into chunks,
  • 1 bell pepper, cut into large pieces
  • 2 lbs chicken, breast or thighs 
  • Bamboo skewers
  1. Cut the chicken into bite sized pieces. Pour the marinade overtop the chicken and make sure it is evenly coated. Refrigerate for at least four hours, preferably overnight.
  2. Once ready to grill, prepare the kabobs by soaking the bamboo sticks for a few minutes then skewering the chicken pieces as well as pineapple and pepper. I made mine with the pattern of 3 chicken pieces, 1 pineapple, 2 chicken, 1 pepper, 2-3 chicken, 1 pineapple, and 1-2 chicken.
  3. While getting the kabobs ready, preheat the barbeque on medium-high heat. Once ready to grill, rub the cut side of an onion on the grates to prevent the chicken from sticking.
  4. Place the kabobs on the grill and turn every 2-3 minutes until the chicken is fully cooked through and no pink remains.
For the mango and avocado salsa:
  • 1 mango, peeled and cut into bite sized pieces
  • 1 avocado, cut into bite sized pieces
  • 1 small cucumber, peeled and sliced
  • ¼ red onion, finely chopped
  • Handful fresh cilantro, chopped
  • 1 lime, juiced
  • 1-2 tbsp hot sauce (I like to use Frank's Chili and Lime flavor)
  • Olive oil
  • Salt
  1. Combine the mango, cucumber, red onion, and cilantro. 
  2. Pour the lime juice and hot sauce on top and drizzle with some olive oil. Mix well.
  3. Add the avocado and gently stir in, trying not to mash it too much. Season to taste with salt.

Wednesday, June 25, 2014

Early Grey Sweet Rolls with Cherry and White Chocolate


Our family has expanded yet again. Yesterday marked four years to the day since my aunt's cousin immigrated here with her husband and son from Israel. Since that time they have had a daughter, who will be turning two at the end of July, and now her brother and his family have immigrated as well. I thought it only fair to properly greet the new additions to the family with some baked goods.

A few months ago my friend had asked me if I ever tried baking with Earl Grey tea before, too which I replied that I had not. Since that time the idea was in the back of my mind but I honestly hadn't given it much thought until yesterday. I found this recipe for a sweet roll that incorporates Earl Grey tea within the dough. The original recipe called for a combination of fresh raspberries and white chocolate but I didn't have any raspberries on hand so I substituted some frozen cherries instead.

I baked the rolls in the afternoon and later that evening brought them with me to the park as I met the new family members. They were extremely nice and appreciate of the gesture, commenting that they especially enjoyed that the rolls were not overly sweet. We spent a nice evening together with the kids playing on the playground before we parted our separate ways. I was so pleased to have met them and look forward to the future occasions and celebrations we will share together.

Earl Grey Sweet Rolls with Cherry and White Chocolate

For the dough:
  • 1 package (8 grams) yeast
  • 1 teaspoon sugar
  • ½ cup warm water
  • 1 egg
  • 2 tablespoons oil
  • ¾ cup warm water
  • 4 cups flour, sifted
  • ¼ cup sugar
  • ¼ teaspoon salt
  • 2 Earl Grey tea bags 
  1. In a small bowl, mix the yeast, a teaspoon of sugar and a ½ cup of warm water. Set aside to sit and foam.
  2. In another small bowl, whisk together the egg, 2 tablespoons of oil and ¾ cup of warm water. Set aside.
  3. In a large bowl, sift 4 cups of flour with sugar, salt, tea powder and whisk everything together.
  4. Make a well in the center. Pour in your yeast and egg mixtures and using a wooden spoon, stir until roughly combined.
  5. Dump your dough onto a lightly floured surface and begin to knead for 5-10 minutes (you may have to lightly flour your surface again if your dough becomes too tacky). Once the dough starts to feel smooth, place it in an oiled bowl and cover with a tea towel. Place in a warm area or in a turned off oven and let rise for an hour to an hour and a half, until the dough has doubled in size. 
For the filling:
Note: You can substitute any fruit such as raspberries, strawberries, blueberries, or cherries. If using frozen fruit, make sure to not thaw and pulse a few times in the food processor so the pieces aren't too big. Then add 1 tbsp corn starch to the fruit before spreading on the dough.
  • ¼ cup sugar
  • ½ cup white chocolate chips
  • 2 cups fresh or frozen fruit, chopped into pieces
To assemble:
  1. Once the dough has risen, roll out into a 10" x 18" rectangle.
  2. Scatter dough evenly with sugar, white chocolate chips and fruit. Be sure to leave the top inch of your dough free of any toppings so you are able to seal your roll.
  3. Starting at the bottom, begin to roll up the dough and berries using firm pressure. Seal the border using a light coating of water. 
  4. Cut the rolls about 1-1½" thick (depending on how many you want to make).
  5. Place the rolls, cut side down, in an 11" x 13" well-greased or parchment-lined baking dish. (I actually cut my rolls to be about 1" thick and was able to make 18 all together, putting 9 into two different pans). Cover with a tea towel and let rise for another half hour.
  6. Bake the rolls at 350 degrees Fahrenheit for 30 minutes. 
For the glaze:
Optional but I would highly recommend as it is delicious and adds a great final touch.
  • ½ cup powdered sugar
  • 2-3 tbsp milk or cream (depending on how thin or thick you want the glaze to be)
  1. In the last few minutes while the rolls are finishing baking, whisk together the powdered sugar and milk/cream until a smooth mixture comes together.
  2. As soon as the rolls are ready, coat them with the glaze immediately. If there is enough left (or you can make some extra) glaze them again in 5 minutes.

Tuesday, June 24, 2014

Individual Nutella and White Chocolate Mousse Cakes


In addition to making the dolmathes as one of the many appetizers we had during my brother's celebratory dinner last week, I also prepared a dessert. A year ago I bought a "mini cheesecake pan" which I used to make over 72 little cheesecakes last year for my dad's big 50th birthday party. Since that time I have used the pan repeatedly to make miniature cheescakes for various occasions. This year we are having a smaller scale party and I wanted to make individual desserts again but rather than cheesecake I wanted to make mousse cake.

I decided to use nutella rather than chocolate, just for some variety, and when I searched for nutella mousse recipes most came back with just two ingredients: nutella and whipping cream. I wasn't sure if the mousse cakes would hold up without any stabilizing factors in them so I decided to experiment and make one batch regular and add gelatin to the second.

Although both initially came out of the molds easily, after about twenty minutes it was clear that the regular batch was starting to soften and lose its shape while the gelatin ones remained in perfect form. The gelatin definitely was more practical in terms of serving the cakes at a party because they didn't have to be consumed right away. However convenience came at at a price: the regular mousse cakes were definitely creamier and, in my opinion, tasted better than the gelatin version.

Still not satisfied, I decided to experiment further by using slightly less of the nutella mousse and adding some white chocolate flavored mousse to the top of the cakes. I decided to use the gelatin again but this time divide it between the two flavors. The end result was closer to the creamy taste of the regular mousse, though not exactly the same, but still had enough stability from the added gelatin. My mom was extremely pleased with the individual cakes and approved of them for the upcoming birthday party.


Individual Nutella and White Chocolate Mousse Cakes
Note: Makes 12 individual mousse cakes. If you do not own a pan where you can easily unmold the mousse cakes I suggest using a large cupcake liner that can be peeled away.


For the crust:
  • ½ cup graham cracker crumbs
  • ½ tbsp powdered sugar
  • ½ tbsp cocoa powder
  • 2 tbsp butter, melted
Combine all of the ingredients for the crust in a small bowl and distribute evenly amongst the 12 cups or liners. Bake at 350 degrees for five minutes. Remove from the oven and set aside to cool.

For the mousse:
  • ½ cup nutella
  • ¼ tsp espresso powder
  • 3 oz (85 g) white chocolate
  • 1 tsp vanilla
  • 2 cups heavy whipping cream
  • 1 envelope (1 tbsp) gelatin
  • 4 tbsp water

  1. Mix the espresso powder with the nutella and set aside.
  2. In a small saucepan, heat ½ cup of the whipping cream on a low heat until it starts to simmer and almost boil.
  3. While the cream is heating, dissolve the gelatin in the water. Once the cream is heated through, add the dissolved gelatin and mix thoroughly to incorporate.
  4. Divide the heated cream evenly between the bowl containing the nutella and another containing the white chocolate. (You may want to pour the cream into a measuring cup so that you know how much is half)
  5. Mix the hot cream in each bowl with the ingredients inside, making sure it is well mixed and smooth. Add the teaspoon of vanilla to the white chocolate bowl as well.
  6. Beat the remaining 1½ cups of whipping cream on high speed until soft peaks form.
  7. Add a little more than half of the whipped cream to the nutella bowl and the remaining whipped cream to the white chocolate bowl. The easiest way to do this is to add a little bit of whipped cream to the bowl first, mix it well, then add the rest and gently fold in until no streaks remain.
  8. Distribute the nutella mousse amongst the cups, making sure to not let it get on the sides, then top with the white chocolate mousse.
  9. Put the mousse cakes in the fridge for at least 3-4 hours to allow the mousse to set then serve by either gently unmolding them or peeling away the liner.

Monday, June 23, 2014

Dolmathes with Avgolemono Sauce


This past weekend was my brother's graduation from high school. Although he hasn't been little for a long time now I still can't believe how grown up he is and that he is moving on to the next chapter of his life. His graduation was on a beautiful sunny Saturday at UBC and we of course took many pictures of the proud graduate in his cap and gown.

The night before we hosted the family for a celebratory dinner. A few weeks ago my mother and I went to an Italian festival and while we were there we happened to stop by a local specialty grocery store and bought some grape leaves. The leaves were already cleaned and preserved in jars within a salty brine.

Our plan was to make a Greek dish called Dolmathes using the grape leaves. This popular dish is usually served as an appetizer and involves rolling some sort of filling, be it the traditional meat or a vegetarian option, in the grape leaves and then simmering them in stock until the filling is cooked through.

At first I was a little nervous because I had never worked with grape leaves before and I didn't know whether they would be difficult to handle. However I was pleasantly surprised with how easy it was to roll the grape leaves around the filling. Also we happened to buy grape leaves that were already de-stemmed so I didn't have to worry about that step either and only had to wash the brine off the leaves before using them.

There were so many grape leaves in the jar we still had extra left over, despite using over 1.5 lbs of ground beef for the filling and stacking the dolmathes in three layers within the pot. The dolmathes turned out great and were a big hit with the family, especially one of my cousins who raved about them and said she ate four in one go!

On a separate note, I recently noticed that my blog is now four years old. Usually I write a little post detailing what has happened in the last year but the truth of the matter is that my blog has taken a bit
of a backseat this past year. I still try new recipes and write about them when I have the chance but I no longer have the blog at the forefront of my thoughts.

I started this blog four years ago based on a friend's suggestion mostly as an entertaining way to keep track of my improvements in the kitchen. I would research many recipes online, always searching for new things to try or new techniques to teach myself. I still spend my free time perusing blogs and websites for recipes, but I'm also much more comfortable in the kitchen and like to experiment with my own creations. I also used to have a "monthly minimum" that I would try to meet but as my life has become more busy I've become more laid back and simply try to do as much as I can given my schedule.

I didn't know when I first started it how much I would enjoy writing my blog and what a great source it would become for new friendships. It's also a good conversation starter when introducing myself and talking about my hobbies. I don't know how long I will keep blogging and what form it may take in the future but for now I'm content with how things are and I will always be glad I followed my friend's suggestion way back when.

Dolmathes with Avgolemono Sauce
Note: Depending on the size of the grape leaves and the amount in the jar, the filling may have to be doubled.
  • 1 16 oz jar grape leaves
  • 1 lb ground beef or lamb
  • 1 cup uncooked rice (presoaked to soften and absorb some liquid)
  • ¼-½ cup fresh Italian leaf parsley, chopped
  • 1 large onion, chopped
  • 1 tsp dried dill
  • 1 tsp dried oregano
  • 2-3 tbsp olive oil
  • Salt and Pepper
  • 2 cups chicken or vegetable stock
  • 1 lemon, juiced
  • ¼ cup olive oil 
  1. Mix together all of the ingredients starting with the ground meat through the salt and pepper fo the filling and season to taste. Set aside.
  2. Drain the brine from the grape leaves and lay them flat in a large shallow bowl. Soak them for five minutes in hot water then drain and rinse off with cold water. (You may have to do this in batches in order for the leaves to be easier to handle.) Keep the leaves laying in cold water once rinsed.
  3. If the leaves have stems, cut off the stems then lay them on a flat surface, with the veins facing up.
  4. Place 2-3 tablespoons of filling onto the bottom third of the grape leaf.
  5. Roll up the bottom of the leaf to cover the filling, then bring in the sides, and then roll the rest of the way to the top.
  6. Place some torn up grape leaves (I used cabbage leaves because I didn't want to waste any of the grape leaves) on the bottom of a large pot. Lay the rolled dolmathes, seam side down, on top.
  7. Keep placing each side by side, filling the bottom of the pot in a single layer. Once filled, stack the next layer on top.
  8. Once all of the dolmathes have been rolled and stacked in the pot, pour the chicken stock, lemon juice, and olive oil over top. Add enough water so that the dolmathes are covered by about ½" of liquid.
  9. Put an inverted plate over top to apply some pressure on the dolmathes. Heat the pot on medium-high heat until boiling, then reduce to medium-low and continue to simmer for 35-45 minutes.
  10. To check for doneness remove one from the pot and slice in half to make sure the rice and meat have cooked through. The dolmathes can be served warm or at room temperature with the avgolemono sauce. 
To make the sauce:
  • 1 cup chicken or vegetable sauce
  • 1 lemon, juiced
  • 3 egg yolks
  • 1 tbsp butter

  1. Whisk the egg yolks together with the lemon juice.
  2. Add the stock and heat in a small saucepan over medium heat until boiling. Whisk the sauce often so that the egg yolks don't start to cook.
  3. Once boiling, reduce to a simmer and add the butter. Continue to heat until the sauce thickens slightly.

Tuesday, June 10, 2014

Hasselback Caprese Tomatoes


Last weekend was the first time this year that my family ate dinner outside in the backyard which, to me, signifies the official beginning of summer. My dad had spent the day repairing our broken gate and my mom and I went to an Italian festival. I was inspired by the festival to create this simple appetizer which I had seen a picture of a few weeks ago on Pinterest.

The idea comes from a caprese salad but rather than completely slice the tomatoes they are cut in a "hasselback" style and the fresh Basil and Mozzarella are stuffed in between the slits. Once I started assembling the tomatoes my mom was reminded of when I made hasselback yams and sweet potatoes when I first started the blog four years ago. Unfortunately back then the potatoes did not turn out as I had expected them to but this time the tomatoes gave me no problems.

I think these hasselback caprese tomatoes are a great summer appetizer because they take advantage of fresh ingredients and are super simple to make. However despite their simplicity they give off a nice and elegant appearance and are sure to please any guests.

Hasseback Caprese Tomatoes
  • 8-10 Roma tomatoes
  • Ball of fresh Mozzarella cheese (soft, not hard)
  • Handful fresh Basil
  • Balsamic vingegar
  • Extra virgin olive oil
  1. Wash the tomatoes and cut slits into them about ¼" apart. Cut the slits almost all the way through but make sure there is still a little bit of room on the bottom so that it stays together.
  2. Roughly slice the Mozzarella cheese into pieces similarly sized to the tomato slits.
  3. Carefully slide a piece of cheese and a Basil leaf between each slit of the tomato.
  4. Drizzle the tomatoes with balsamic vinegar and extra virgin olive oil on top and serve.

Friday, May 30, 2014

Avocado Brownies


A week ago while we were sitting and eating my breakfast one of my brothers asked me to make black bean brownies again. Unfortunately we didn't have any black beans in the pantry and I didn't feel like going to the store just for one item. However the request inspired me to research more "healthy" brownie recipes and I found one for avocado brownies. I was intrigued because the recipe seemed relatively easy and I already had all of the ingredients.

While I was making the brownies my mother was very doubtful about how they would taste given the unusual ingredient list. I assured her that she was under no obligation to try them but in the end she decided to have a small piece. She was actually quite impressed with their taste, especially because they weren't too sweet and my mother prefers desserts that way.

My brother came over once I let him know the brownies were ready and he enjoyed them as well. After the fall out from the black bean brownies, I was hesitant to tell my other brother about the avocado and decided to just let him enjoy the brownies. Not only did he like them, but his friends came over the next day and ate them as well, no one the wiser about the mystery ingredient. To this day I still haven't told him...I decided that since he liked them and already ate them there's really no reason to go and disappoint him now.

Avocado Brownies
  • 4 oz (112 g) bittersweet chocolate
  • 1 tbsp coconut oil
  • 1 avocado
  • ¼ cup almond butter
  • ½ cup honey
  • 3 eggs
  • ¼ cup cocoa powder
  • 1 tbsp vanilla
  • 1 tbsp almond flour
  • 1 tsp baking soda
  • ½ tsp salt
  • Optional: ½ cup chopped nuts or chocolate chips
  1. Puree the avocado flesh in a food processor until absolutely no lumps remain.
  2. Melt the bittersweet chocolate together with the coconut oil in a small saucepan over low heat.
  3. Beat the melted chocolate mixture along with the pureed avocado and the rest of the ingredients on medium speed for about 2-3 minutes, or until well mixed.
  4. Stir in any add-ins such as chopped nuts or chocolate chips.
  5. Pour the batter into a well-greased or parchment lined 9" x 9" pan. Bake at 350 degrees Fahrenheit for 25-30 minutes or until a toothpick inserted into the center comes out clean.
  6. Allow to cool before slicing and serving.

Friday, May 23, 2014

Asian Coleslaw


The other day my mother asked me to prepare some chicken for dinner, specifically in a way that my brother would find appealing. Last week, after coming back from Mexico she had requested I make something Mexican-inspired so I made shrimp tacos. Part of the reason why they taste so good is because of the cabbage slaw that goes along with them. My mom was a big fan and asked that I repeat the slaw in addition to whatever chicken dish I made.

I decided to go Asian this time and made a peanut chicken stir-fry with some mushrooms, bell peppers, and snow peas. As a side I made quinoa and also this Asian coleslaw. It was light and refreshing and didn't take long to put together. I have a new found love of all things sesame lately so I particularly enjoyed the dressing that included sesame oil.

Making dinner that day was even more fun because my cousin came over and helped me with it. Although she refused to touch the chicken she did help me by chopping the vegetables and following the recipe to make the peanut sauce. Afterward she reaped the benefits by staying over for dinner while we watched some television together.

Asian Coleslaw
  • ½ head purple cabbage, thinly sliced
  • ½ head green cabbage, thinly sliced
  • ½ cup carrots, grated or thinly sliced
  • 1 small cucumber, halved lengthwise, seeded, and thinly sliced
  • 1 green onion, chopped
  • Handful fresh cilantro, chopped
  • 2-3 tbsp black and white sesame seeds
  • 1 tbsp sesame oil
  • 1 tbsp olive oil
  • 2 tbsp soy sauce
  • 1 tbsp rice vinegar
  • 1 tbsp honey
  • 1 tbsp fresh ginger, finely chopped
  • 1 tbsp lemon juice
  • Salt and Pepper
  1. In a large bowl combine the cabbage, carrots, cucumber, green onion, and cilantro.
  2. In a small bowl, whisk together the sesame oil, olive oil, soy sauce, rice vinegar, honey, ginger, and lemon juice. Allow the dressing to sit for a few minutes to come together.
  3. Pour the dressing over the vegetables and mix well to ensure everything is evenly coated. Sprinkle the sesame seeds over top and season to taste with salt and pepper.

Monday, May 19, 2014

Vanilla Chocolate Marble Cupcakes


During the first week of May I traveled to Mexico for a relaxing vacation which happened to include a wedding of a family friend. Truthfully, I hadn't seen her in years as she now lives in Montreal but as I love weddings and I love vacations I decided to make the effort to go to hers. The wedding was beautiful and intimate, only 25 guests, with the ceremony held right on the beach and the reception on a terrace just above it. As much as I loved Mexico it seemed that it did not love me as much, or maybe it loved me too much. I got extremely sun burnt and definitely suffered for it.

The day that I left for my trip also happened to be my good friend's birthday. Since I could not attend her celebration I thought that I would at least contribute in a small way by baking some cupcakes for her. Also it gave me a great excuse to use my new cupcake tray and carrier that another friend had gotten me for my own birthday a month prior.

My friend loves pretty much any dessert but I decided to go with simple and basic flavors: vanilla and chocolate. The challenge was that the recipe involved making two flavors of frosting and piping them together from the same bag. It was a little tricky but it had the right effect once I got the hang of it.

When I came back from my trip I received a message from my friend thanking me for the cupcakes. Since I had to deliver them to her the day before her birthday and I dropped them off with her boyfriend, I wondered if she actually waited until the next day to try them. Even if she sneaked one ahead of time I wouldn't have minded because, after all, they were for her birthday so who am I to judge?

Vanilla Chocolate Marble Cupcakes
Note: This recipe makes 12 cupcakes.
 
For the cupcakes:
  • 1⅔ cups flour
  • ½ tsp baking powder
  • ¼ tsp baking soda
  • ½ tsp salt
  • ½ cup (8 tbsp) unsalted butter, melted
  • 1 cup sugar
  • 1 large egg
  • ¼ cup yogurt or sour cream
  • ¾ cup + 1 tbsp milk, divided
  • 1 tsp vanilla extract
  • ¼ cup cocoa powder
  1. Combine the flour, baking powder, baking soda, and salt. Set aside. 
  2. Whisk the sugar with the melted butter.
  3. Stir in the egg, yogurt or sour cream, the ¾ cup milk, and vanilla extract until combined.
  4. Slowly mix in the dry ingredients until no lumps remain. The batter should be fairly thick.
  5. Transfer ¾ cup of the batter to another bowl. Mix in the cocoa powder and 1 tbsp milk until combined. The chocolate batter will be extremely thick.
  6. Spoon about a tablespoon of vanilla batter into each well of a 12-cup paper-lined cupcake tray.
  7. Top with a spoonful of chocolate batter, then more vanilla batter on top until both batters have been used up. Lightly swirl the batters together using a toothpick. 
  8. Bake the cupcakes for 20-24 minutes at 350 degrees Fahrenheit or until a toothpick inserted in the center comes out clean. Allow cupcakes to cool completely before frosting.
For the frosting:
Note: Each frosting listed makes enough to frost half (6 cupcakes) on its own or combined the two are enough to frost all twelve cupcakes. If choosing not to make both simply double one of the listed recipes and use it to frost all of the cupcakes. 

Chocolate Frosting
  • 1¾ cups icing sugar
  • ¼ cup cocoa powder
  • ½ cup (8 tbsp) unsalted butter, softened to room temperature
  • 2 tbsp heavy cream
  • 1 tsp vanilla extract
  • Pinch of salt
  1. Sift together the icing sugar and cocoa powder to assure there are no lumps. Set aside. 
  2. Beat the butter on medium speed until creamy, about 2 minutes. 
  3. Gradually add the sifted sugar/cocoa powder alternately with the heavy cream and vanilla. 
  4. Beat on low speed after each addition. 
  5. Once all added, beat on high speed until creamy and combined for at least 2 minutes. Add a pinch of salt if frosting is too sweet.
Vanilla Frosting
  • 1¾ cups icing sugar
  • ¼ cup cocoa powder
  • ½ cup (8 tbsp) unsalted butter, softened to room temperature
  • 2 tbsp heavy cream
  • 1 tsp vanilla extract
  • Pinch of salt
  1. To make the vanilla frosting use the same directions as with the chocolate frosting but omit the cocoa powder. 
  2. Once both frosting flavors are made, fill the piping bag with one frosting on each side. Don't worry if one is a little more than the other, just try to make them as equal as possible. 
  3. Try to squeeze the bag evenly when frosting so that both flavors become swirled together.

Tuesday, April 15, 2014

New York Cheesecake with Strawberry Sauce


Despite being well known amongst my friends and family for making all sorts of cheesecakes, I realized that I have never made the most traditional type: New York Cheesecake. Sure, I've made variations of it, but never a true New York Cheesecake. I decided that I would remedy that by making it for my birthday this year when my family came over to celebrate.

Normally when it comes to making cheesecake for family gatherings I use an 11" pan, my biggest one, and 2 lbs of cream cheese. This recipe used a 9" pan and 3 lbs of cream cheese. Not only that, but it also used 7 whole eggs and 2 egg yolks in addition to sour cream. As you can imagine, the resulting cake was super rich and extremely tall. In fact, when I was pouring the batter into the pan I was afraid of how full it was so I scooped about two cups out and made them into mini cheesecakes.

In my opinion, the perfect New York cheesecake is always accompanied by a fresh fruit sauce and the
classic is always strawberry. I have to admit that once I poured it onto the cake, the sauce kind of made it look sloppy because the strawberries had somewhat discolored and were breaking down. However the taste more than made up for it because it was delicious!

The cake was well received by my family and I was happy to cross such an iconic cake off my list. I don't know if I will repeat the recipe,  because it is truly an extremely rich cake, but I would definitely recommend it for its ease and simplicity.

New York Cheesecake

For the crust:

  • 1 cups graham cracker crumbs
  • 2½ tbsp unsalted butter, melted
  • 1½ tbsp sugar
Combine all of the ingredients in a bowl and then transfer to a 9" springform pan. Gently press down all along the bottom and bake at 350 degrees Fahrenheit for 8 minutes. Set aside to cool.

For the cheesecake:
  • 3 lbs (6 blocks) cream cheese, room temperature
  • 1½ cups sugar
  • 7 large eggs + 2 egg yolks
  • 1 cups sour cream
  • ½ tsp salt
  • Zest of one lemon
  1. Beat the cream cheese on medium-high speed for about a minute, until smooth.
  2. Beat in the sugar and salt and then the sour cream. Scape down the sides of the bowl as necessary.
  3. Beat in the eggs, one at a time, at low speed. Beat in the lemon zest and continue mixing until everything is combined.
  4. Pour the mixture into the cooled springform pan and bake for 60 minutes at 325 degrees Fahrenheit using a hot water bath or by placing a pan of hot water on the lowest rack beneath the cake.
  5. Without opening the oven door, turn off the oven and leave the cake to cool for 2½-3 hours inside the oven. Afterward, remove from the oven and cool to room temperature before refrigerating for at least 4 hours, though preferably overnight.
For the strawberry sauce:
  • 2 lbs fresh strawberries, cut into halves or quarters
  • ½ cup sugar
  • 1 cup water
  1. Combine the strawberries, sugar, and water in a saucepan and heat over medium heat until the berries start to break down. 
  2. Reduce the heat to a simmer and continue cooking for another 15-20 minutes while the sauce thickens. 
  3. Remove from the heat and allow to cool before straining strawberries and spooning over top of the cheesecake. 
  4. Optional: the leftover liquid strawberry sauce can be served on the side to pour over individual slices.

Monday, April 14, 2014

Strawberry Balsamic Salad


After returning from Whistler my family came over a couple of weeks ago to celebrate my birthday at home. Most of the food we made consisted of old time favorites but with my burning desire to always try something new I thought to make a different salad than usual. As spring is in the air I thought to take advantage of all the fresh fruit now appearing in grocery stores.

This salad was quite simple: it featured spinach, blueberries, goat cheese, roasted beets and candied pecans. It was tied together through a sweet but tangy strawberry balsamic vinaigrette. I think that there are a variety of ingredients that could be put in the salad but I decided to go for blueberries and beets because I really love them. Also candying the pecans gave them a great crunch and added the necessary amount of texture to the salad.

Note: I will post the recipe for the salad dressing and how to make candied pecans. The rest of the ingredients can be chosen based on what you have/what is in season.

Strawberry Balsamic Vinaigrette
Note: This is more than enough dressing for one large salad. I drizzled some on the salad and served the rest on the side for those who wanted extra.
  • 1 lb fresh strawberries
  • 1 tsp sugar
  • 1-2 tsp water
  • Pinch of salt
  • 2 tbsp olive oil
  • 1-2 tbsp balsamic vinegar
  • Optional: 1 tbsp poppy seeds
  1. Remove the stems from the strawberries and cut in half.
  2. In a small pot, combine the strawberries, sugar, salt, and water. Heat over medium heat until the strawberries begin to soften and release their juices.
  3. Blend the strawberries until they are smooth and then strain the mixture through a fine mesh sieve to separate the seeds.
  4. Allow the strawberry puree to cool then whisk together with the olive oil, balsamic vinegar, and poppy seeds. Add some extra salt and pepper to taste.
Candied Pecans
  • 2 cups pecan halves
  • 4 tbsp brown sugar
  • 4 tbsp (¼ cup) unsalted butter, cut into pieces
  1. In a large pan, roast the pecans for about two minutes, until they start to soften and become fragrant.
  2. Add the butter pieces and stir so all the nuts are well coated.
  3. Add the brown sugar and keep stirring so that the nuts do not burn. Continue lightly frying for about 3-5 minutes, until all of the butter has melted and the sugar has caramelized.
  4. Pour out the nuts on a parchment paper-lined plate and allow them to cool for 10 minutes so that the sugar can set.

Monday, March 31, 2014

Chocolate Chip Cookie Dough Cupcakes


In addition to making Nutella bomb cupcakes for my birthday Whistler trip with friends, I also made these cookie dough filled cupcakes. Ever since I made chocolate dulce de leche cupcakes back in January, I have been craving making another filled cupcake. I decided that between the two types that I made for my birthday at least one should have a filling.

This recipe was definitely more work than the average cupcake because it involved baking the cupcakes, making the filling, chilling the filling before cutting holes into the cupcakes and stuffing them, and finally frosting the cakes. I wish I could say that these cupcakes were truly amazing and worth all of that effort but the truth is that they were just okay. Personally, I felt that they were a little too sweet and I enjoyed the Nutella bomb cupcakes more. However my friends enjoyed both which just goes to show that everyone has different tastes. Regardless, I had a great time celebrating my birthday with my friends and I hope it was just the beginning of a great year to come.

Chocolate Chip Cookie Dough Cupcakes
Note: The original recipe was for 24 cupcakes, however I cut it in half and made only 12. The recipe below reflects the amounts I used. The original recipe can be found here.

For the cupcakes:
  • 1½ cups (16 tbsp) unsalted butter, room temperature
  • ¾ cups light brown sugar, packed
  • 2 large eggs
  • 1⅓ cups flour
  • ½ tsp baking powder
  • ½ tsp baking soda
  • ¼ tsp salt
  • ½ cup milk
  • 1 tsp vanilla extract
  • ½ cup chocolate chips 
  1. Combine the flour, baking powder, baking soda, and salt in a medium bowl. Stir together to blend and set aside.
  2. Beat the butter and brown sugar together on medium-high speed until light and fluffy, about 3 minutes.
  3. Mix in the eggs one at a time, beating well after each addition and scraping down the sides of the bowl as needed.
  4. Add the dry ingredients to the mixer bowl on low speed, alternating with the milk, beginning and ending with the dry ingredients, mixing each addition just until incorporated. 
  5. Blend in the vanilla and fold in the chocolate chips with a spatula.
  6. Divide the batter evenly in a well-greased or cupcake lined pan . Bake for 18-20 minutes at 350 degrees Fahrenheit, or until a toothpick inserted in the center comes out clean. 
  7. Allow to cool in the pan 5-10 minutes, then transfer to a wire rack to cool completely.
For the filling:
  • 2 tbsp unsalted butter, room temperature
  • 3 tbsp light brown sugar, packed
  • ½ cup + 1 tbsp flour
  • 3½ oz sweetened condensed milk
  • ¼ tsp vanilla extract
  • 2 tbsp mini chocolate chips
  1. Cream the butter and sugar in a mixing bowl on medium-high speed until light and fluffy, about 2 minutes. 
  2. Beat in the flour, sweetened condensed milk and vanilla until incorporated and smooth. 
  3. Stir in the chocolate chips. Cover with plastic wrap and refrigerate until the mixture has firmed up a bit, about an hour.
For the frosting:
  • ½ cup (8 tbsp) unsalted butter, room temperature
  • ¼ cup light brown sugar, packed
  • 1 cup powdered sugar
  • ⅓ cup flour
  • ¼ tsp salt
  • 1 tbsp milk
  • 1 tsp vanilla 
  1. Beat the butter and brown sugar together until creamy. 
  2. Slowly beat in the powdered sugar until smooth. 
  3. Beat in the flour and salt, then mix in the milk and vanilla until smooth and well blended.
To assemble:
  1. Cut a cone-shaped portion out of the center of each cupcake. Fill each hole with a chunk of the chilled cookie dough mixture.
  2. Remove the tip from the cupcake cones and press each top back onto the cupcake.
  3. Frost the cupcakes and sprinkle with some mini chocolate chips for garnish.

Nutella Bomb Cupcakes


I did something new for my birthday this year and took a trip with my closest friends from nursing school. Originally I wanted to take a week long trip to some sort of sunny destination but in order to be able to accommodate everyone's schedules and budgets I settled for a weekend trip to Whistler instead.

Rather than bake a cake and worry about transporting it to Whistler, I decided to make two different kinds of cupcakes and was able to get some plastic carriers from the local store. One of the recipes I had previously seen a few weeks ago and couldn't get out of my head due to its fun name: "Nutella Bomb Cupcakes".

At first I considered mixing it with another recipe that featured a Nutella filling, to really make it full of Nutella, however once I baked the cupcakes I saw that they were quite soft and moist and I wasn't too sure they could stand up to a filling. Nevertheless they were delicious and personally my favorite between the two types I baked. This cupcake experience confirmed that I prefer a Swiss meringue buttercream instead of regular American buttercream as I often find the latter too sweet while the Swiss meringue buttercream is just right, despite being more tedious to make.

Nutella Bomb Cupcakes
Makes about 12-13 cupcakes (The recipe actually is for 13 but I slightly overfilled my 12 and it turned out fine).

For the cupcakes:
  • 1 cup flour
  • 1¼ cups sugar
  • ¼ cup + 2 tbsp cocoa powder 
  • 1 tsp baking soda
  • ½ tsp salt
  • ½ cup vegetable oil
  • ½ cup sour cream
  • ¾ cups room temperature water
  • 1 tbsp white vinegar
  • 1 tsp vanilla
  • 1 large egg, at room temperature
  1. In a large bowl, whisk together the flour, sugar, cocoa powder, baking soda, and salt.
  2. Add the oil and sour cream and mix until blended.
  3. Add the water in ¼ cup at a time and mix until combined.
  4. Mix in the vinegar and vanilla to blend.
  5. Add the egg and mix until combined.
  6. Divide the batter equally in a well-greased or cupcake-lined tray.
  7. Bake for 18-20 minutes at 350 degrees Fahrenheit, or until a toothpick inserted into the center of the cupcakes comes out almost clean. 
  8. Cool for five minutes in the pan before removing and allowing to finish cooling on wire racks. 
For the Frosting:
Note: I made half of the original recipe because personally I don't like too much frosting and the recipe claimed to make more than enough. I actually did not have enough to frost the last cupcake but I was okay with that. The recipe below is the original amounts.
  • 4 large egg whites
  • 4 oz (113 grams) sugar
  • pinch of salt
  • 1½ cups (16 tbsp) unsalted butter, at room temperature and cut into 2" chunks
  • ½ cup Nutella
  1. Combine the egg whites, sugar, and salt in a large heat-proof bowl.
  2. Place the bowl over a pan of simmering water (making sure it does not actually touch the water). 
  3. Heat the egg white mixture until it reaches 145-150 degrees Fahrenheit, whisking frequently so as not to get scrambled eggs.
  4. Remove the bowl from the heat, and whip the egg whites on medium-high until they become fluffy and double in volume. The bowl should be cool to the touch (this will usually take several minutes).
  5. Turn the mixer down to medium low, and add the butter in one chunk at a time, until it has all been incorporated. If the mixture looks curdled at this point, this is normal. Just keep whipping for a few more minutes until it comes together. If the mixture looks soupy, you can add a few cubes of chilled butter, or stick the whole bowl in the refrigerator for about 15 minutes and then continue beating.
  6. Once the buttercream has become smooth, add the Nutella and beat until incorporated.
  7. Transfer the buttercream into a piping bag and pipe onto the cooled cupcakes.

Sunday, March 16, 2014

Coconut Brownies


About a month ago I made some black bean brownies as an experiment at home after a coworker had brought some in to work one day. While one of my brothers was horrified that I had tricked him with the brownies, the other was quite intrigued and asked if I could make some sort of dessert using coconut flour.

Shortly after I showed up to work and discovered that another nurse had brought some brownies that were made using coconut oil and flour. I immediately asked her for the recipe and excitedly brought it home. Last week my brother bought me some coconut flour and I finally had the chance to try out the recipe.

Although I tend to prefer fudgy brownies over more cakey ones, such as these, the brownies still tasted good. Both of my brothers enjoyed them and made suggestions of additions I could make next time, such as carob or chocolate chips or some nuts. I decided to leave additions out this time so that they could just taste the natural flavor of the brownie itself, which is quite coconut and almondy due to the coconut oil and almond butter. My one substitution was that I used half maple syrup and half honey because I didn't have the full amount of maple syrup called for in the recipe.

Because the recipe made a large amount I decided to bring some in to work the next morning to share with my colleagues. The brownies were well received and it felt nice to be able to spread a little extra cheer before the weekend. One of the nurses who is actually gluten-free fell in love with them and had three pieces! She raved about the brownies and begged me for the recipe, which I promised her would be posted on my blog.

Coconut Brownies
  • 1 cup coconut oil
  • 1 cup maple syrup (or 1 cup honey)
  • 5 oz (140 g) bittersweet chocolate
  • ¼ cup cocoa powder 
  • ¼ cup coconut flour
  • 4 eggs
  • 2 tsp vanilla
  • 1 tsp baking soda
  • 1½ cups almond butter
  1. In a small saucepan, combine the coconut oil, maple syrup/honey, and chocolate. Heat until the coconut oil and chocolate has completely melted.
  2. Remove from the heat an stir the cocoa powder into the mixture. Set aside to cool.
  3. In a large bowl, mix together the eggs, vanilla, and baking soda.
  4. Add the almond butter and mix well. Mix in the coconut flour.
  5. Add the chocolate mixture and mix until a uniform batter comes together.
  6. Pour the batter into a 9"x13" well-greased or parchment-lined pan.
  7. Bake for 30 minutes at 350 degrees Fahrenheit for 30 minutes or until a toothpick inserted into the center comes out clean. Allow to cool slightly before slicing and serving.

Tuesday, February 25, 2014

Orange Loaf


Last week I had to attend a workshop about perinatal loss. As you can imagine, spending eight hours talking about babies dying is not exactly anyone's idea of fun. Although the workshop was helpful in providing tools on how to help families experiencing perinatal loss, it was also extremely sad. Prior to attending, I decided to make some sort of baked good and bring it along so as to give a little cheer to people while discussing such a difficult topic.

The loaf that I originally baked was actually a lemon loaf studded with cranberries. However when I was baking it I seemed to run into some issues with the time and found the middle of the loaf not baked through. I cut around the questionable middle portion and had enough slices to bring to work. Everyone at the workshop, including those in charge, thanked me for my thoughtful gesture and appreciated the sweet treat.

Later that evening I brought home a few leftover slices and my mom and brother quickly ate them up. They both begged me to make it again and I obliged, but rather than use lemon I used orange instead and omitted the cranberries to see if that would solve my previous issue with the doneness of the loaf. Unfortunately, I had the same problem initially but by increasing the time I was able to bake the loaf all the way through. My mom and brother were so pleased when they found out I baked it again just for them.

Orange Loaf
Note: The orange can be substituted with lemon or even lime to make a different flavored loaf.

For the cake:
  • 1½ cups flour
  • 1 tsp baking powder
  • ¼ tsp baking soda
  • ½ tsp salt
  • 1 cup plus 2 tbsp sugar
  • 4 large eggs, room temperature
  • 2 tbsp grated orange zest (about 1 orange)
  • 2 tbsp freshly squeezed orange juice (about ½ an orange)
  • 16 tbsp (1 cup) unsalted butter, melted and cooled
  • ¼ cup sour cream
  • 1 tsp vanilla extract
  1. Whisk together the flour, baking powder, baking soda, and salt. Set aside.
  2. Combine the sugar, eggs, orange zest and juice and mix slowly with an electric mixer.
  3. With the mixer on low speed, blend in the melted butter. 
  4. Continue mixing and add half of the dry ingredients, then the sour cream and vanilla, and finally the remainder of the dry ingredients. Mix everything just until it is all incorporated evenly.
  5. Pour the batter out into a well-greased 9" x 5" pan. Bake for 20 minutes at 350 degrees Fahrenheit then rotate the pan and reduce the heat to 325 degrees. Continue baking for 45-50 minutes, or until a toothpick inserted into the center of the loaf comes out clean.
  6. Remove from the oven and allow the cake to cool in the pan for at least 15-20 minutes before taking it out and transferring to a wire rack to finish cooling.
 For the syrup:
  • 3 tbsp sugar
  • 3 tbsp freshly squeezed orange juice (about ½ an orange)
  1. In a small saucepan combine the sugar and orange juice. Cook over medium heat until the sugar is completely dissolved.
  2. Once the cake is baked but still warm from the oven, use a toothpick or skewer to poke holes all over and then pour the syrup on top.
For the glaze:
  • 1 cup powdered sugar
  • 2-3 tbsp freshly squeezed blood orange juice
  1. In a small bowl, whisk together the orange juice and powdered sugar until smooth. Add a little bit more juice or sugar if necessary to achieve the desired consistency.
  2. When the cake has cooled completely, pour the glaze over top. Allow it to stand for about 10 minutes so that the glaze sets before slicing and serving.