Thursday, October 18, 2012

Caramel Apple Pie Bars


I find it interesting how having time off of school actually leads to me being busier rather than actually taking time off. Somehow my mind plays tricks on me and convinces me that it's a good idea to try to get every little thing crossed off of my to do list that I have been putting off for one reason or another. The result is that I have set way too many goals of things I would like to accomplish by the end of the week, which is not a good thing considering that the weekend is about to start and then I'm back to school on Monday.

Regardless, today my friend came over and we spent time doing research for a big project we are working on. I know how much my friend loves my baked goodies, as does my family, and I thought I would use the occasion to bake these caramel apple pie bars which I first saw on my favorite food blog Annie's Eats about a month ago. The dessert seemed appropriate for fall with the lovely undertones of cinnamon, sweetness of the caramel, and the crunch provided by the nuts on top.

Although making the bars originally detracted from my research, once they were in the oven I got to work. Later on they provided the perfect little pick me up and boost of sugar we needed to keep ourselves going. I have to admit that we were a little impatient to wait for them to cool and slice, so we spooned them out of the pan and ate them as more of a crumble rather than a composed bar. My family enjoyed it too and my brother even said it was "glorious". By the end of the evening only a quarter of the pan was left. My conclusion: this recipe is definitely a keeper.

Caramel Apple Pie Bars

For the filling:
  • 4 large apples, peeled and sliced
  • 2 tbsp unsalted butter
  • 3 tbsp sugar
  • ¾ tsp ground cinnamon
  • 9 oz (252 g) caramel soft chews
  • 2 tbsp milk
For the dough:
  • 1½ cups all-purpose flour
  • 1 cup old-fashioned oats
  • cup sugar
  • cup brown sugar, lightly packed
  • ¾ tsp baking powder
  • ½ tsp salt
  • ¼ tsp ground cinnamon
  • 12 tbsp cold unsalted butter, cut into small pieces
  • 1 large egg yolk
  • 1 tsp vanilla extract
  • Optional: ½ cup chopped nuts, such as pecans or walnuts
  1. To prepare the filling, melt the putter in a large pan over medium heat. Stir in the apples, sugar, and cinnamon and mix to coat evenly. Continue to cook for about 15 minutes, stirring occasionally, and remove from the heat once the apples start to brown and the sugar caramelizes.
  2. To prepare the dough, combine the flour, oats, sugars, baking powder, salt, and cinnamon in a large bowl. Stir everything to blend then add the butter pieces. Use a pastry cutter or two knives (I actually used my hands) to cut the butter into the oat mixture until it resembles a course meal.
  3. Add the egg yolk and vanilla and knead just until a crumbly dough starts to come together. Press ⅔ of the dough into a 9" x 9" baking pan lined with aluminum foil or parchment paper. Bake for 12-14 minutes at 375 degrees Fahrenheit or until the dough is lightly golden.
  4. Meanwhile, while the dough is baking, finish preparing the filling by combining the caramel soft chews and the milk in a small saucepan over medium heat until completely melted and smooth.
  5. Once the dough is ready, pour the melted caramel and spread evenly over the surface. Strain the apple filling and spread over top the caramel layer. Crumble the remaining dough mixture evenly over the surface and sprinkle with chopped nuts if using. Return to the oven to bake for another 22-25 minutes or until the top is golden brown. Cool completely before slicing and serving (or spoon and serve if impatient like me ;)

Sunday, October 7, 2012

Roasted Beet Quinoa Salad


Back in the summer my brother and I went one out one evening to the Richmond Night Market which runs all summer long, every weekend from June to mid-September. The main attractions are the booths selling lots of cheap things such as phone cases, wallets, watches, and various gadgets as well as some clothes. They have other more obscure things but I can't remember it all. Also there are lots of food vendors selling street food, usually Asian themed though there are others as well.

Generally I don't go to the Night Market more than once each summer however my brother was looking for a pair of sunglasses to replace those he had broken and we figured that the Night Market would get us the best deal. While we were there we came across a booth that was sampling different flavors of Frank's RedHot Sauce. I love their commercials on TV with the grandma that says, "I put that sh** on everything!"

Despite the name "RedHot" it turns out they actually have eight different flavors ranging in spice level. After sampling a lot of the flavors my brother and I agreed that we both quite liked the mildest flavor "Chile n' Lime" and I ended up buying some at the store the following week.

The reason I tell this story is because this salad is not actually a new recipe. I have made this quinoa salad a few times in the past but generally I was the only one that ever ate it, therefore I always made small batches. Last weekend I decided to make the salad and use some of the "Chile n' Lime" sauce as part of the dressing. The addition of the hot sauce added a kick to the salad that was always lacking in the past and it totally put the salad on a new level. Both of my brothers loved it and by the next day it was gone. I hadn't anticipated how popular it would be and didn't even have a chance to take a picture for the blog so I ended up making it again later in the week. Now it makes me wonder what other dishes could benefit from a touch of Frank's RedHot.

Roasted Beet Quinoa Salad
  • 3 cups chicken or vegetable stock
  • 1½ cups quinoa, rinsed and drained
  • 2-3 medium sized beets
  • 1 cup feta cheese, crumbled
  • ½ red onion, finely diced
  • ¼-½ bunch cilantro, roughly chopped
  • 2 tbsp red wine vinegar
  • 2 tbsp rice wine vinegar
  • 2 tbsp Frank's RedHot Chile n' Lime
  • 2-3 tbsp olive oil
  • Salt and pepper
  1. Wrap the beets in aluminum foil and place on a sheet pan in the oven at 400 degrees Fahrenheit for about 40 minutes. Depending on the size it make slightly longer but generally they are roasted enough if they can be easily poked through with a fork. Once finished, unwrap the beets and allow to cool before peeling the skins and dicing into small pieces.
  2. While the beets are roasting bring the stock to a boil. Add the quinoa, cover, and reduce the heat to a simmer. Allow the quinoa to cook for 20-25 minutes, stirring occasionally, until little white rings appear around the quinoa and the liquid has been absorbed. Remove from the heat and allow to cool.
  3. Once the quinoa has cooled somewhat, add the beet, onion, cilantro, and feta cheese. Add the vinegars, olive oil, and hot sauce, starting with one tablespoon of hot sauce and adding more if you like more spice. Season with salt and pepper. Keep in mind the flavor will intensify after the salad sits for a while.
  4. Refrigerate the salad for at least two hours so that it can cool. Taste once out of the refrigerator and adjust any seasonings as necessary.
Note: The salad can be eaten right away but I like to serve it cold because the quinoa really absorbs the flavor. In fact, the salad often tastes better the next day.

Wednesday, October 3, 2012

Lemon Blueberry Cake


I spent this weekend happily baking and cooking away. I made a delicious quinoa salad which turned out to be a big hit but I didn't realize ahead of time how good it would be (my mistake) and therefore did not actually write down the recipe or take any pictures. However given how quickly it was eaten up I will be sure to make it again.

As for the baking, on Saturday I had my cousin over and we made the chocolate swirl buns I had made the previous weekend for the bake sale but did not have a chance to try. This time we made them for ourselves and they were so good...perfectly chocolatey and soft. She also helped me bake the cake layers for the lemon blueberry cake I was making for a big 4-in-1 birthday celebration. The cake featured two layers with a lemon curd filling and a lemon cream cheese frosting.

Since I don't tend to make many stacked and frosted cakes, usually choosing layered cakes that are all assembled in a single pan, I still tend to have technical difficulties. This time the process went pretty smoothly and I was quite pleased with the result. The cake traveled with me to school and thankfully the staff allowed me to store it in their fridge. After class we all went out to sushi for dinner and then enjoyed the cake for dessert. All of the birthday girls loved the cake and one friend even had seconds and thirds, despite being full. One of the birthday girls commented on the fact that the blueberries complimented the lemon flavor and created a good balance between tart and sweet. Overall I would say the celebration was a success and everyone left in happy spirits and with very full bellies.

Lemon Blueberry Cake
Note: The original recipe was for three 8" cakes. I kept the quantities the same and changed the baking time to make two 9" cakes. The original baking time was 25 minutes.
  • 2 cups + 6 tbsp flour
  • 2 tsp baking powder
  • ½ tsp salt
  • ½ cup sour cream
  • ½ cup milk
  • 1 tsp vanilla
  • 1 lemon, juiced and zested
  • 1 unsalted cup butter, room temperature 
  • 1½ cups sugar
  • 4 eggs 
  • 3 cups frozen blueberries (using frozen instead of fresh will help to keep the blueberries from sinking to the bottom of the cake)
  1. Sift together the flour, baking powder, and salt. Transfer one tablespoon of the mixture to a small bowl and coat the blueberries with it.
  2. Combine the sour cream, milk, vanilla, lemon juice, and zest. Mix well and set aside.
  3. Cream together the butter and sugar for about five minutes, or until pale yellow and fluffy. Beat in the eggs one at a time.
  4. Mix in the flour mixture and alternate with the milk mixture, starting and ending with the flour. Stir until just combined. Gently fold in the blueberries.
  5. Divide the batter evenly between two well-greased 9" pans. Bake at 350 degrees Fahrenheit for 55 minutes or until a toothpick inserted into the center comes out clean. Cool for 10 minutes in the pan before inverting the cakes onto wire racks to finish cooling.

Wednesday, September 26, 2012

Chocolate Swirl Buns


Wow, September has gone by in a flash! I can't believe that it's already the end of the month and yet it feels like it's still summer. Part of the reason is because we have been blessed with great weather that has lasted all month long. In fact I heard on the radio that apparently we broke the record for the longest streak of dry days. According to reports the streak went on for 51 days...not bad for a city known around the world for its rainy weather. This great weather coupled with my extensive summer wardrobe made me a very happy camper all month long, despite having to return to school.

I have to admit that another reason the month seemed to fly by is because my schedule was packed with activities. As a result I didn't actually spend too much time in the kitchen because I was simply too busy, though I'm sure others would still consider it a lot by their standards. Still, when some classmates called upon me to help them with their bake sale I immediately agreed to contribute.

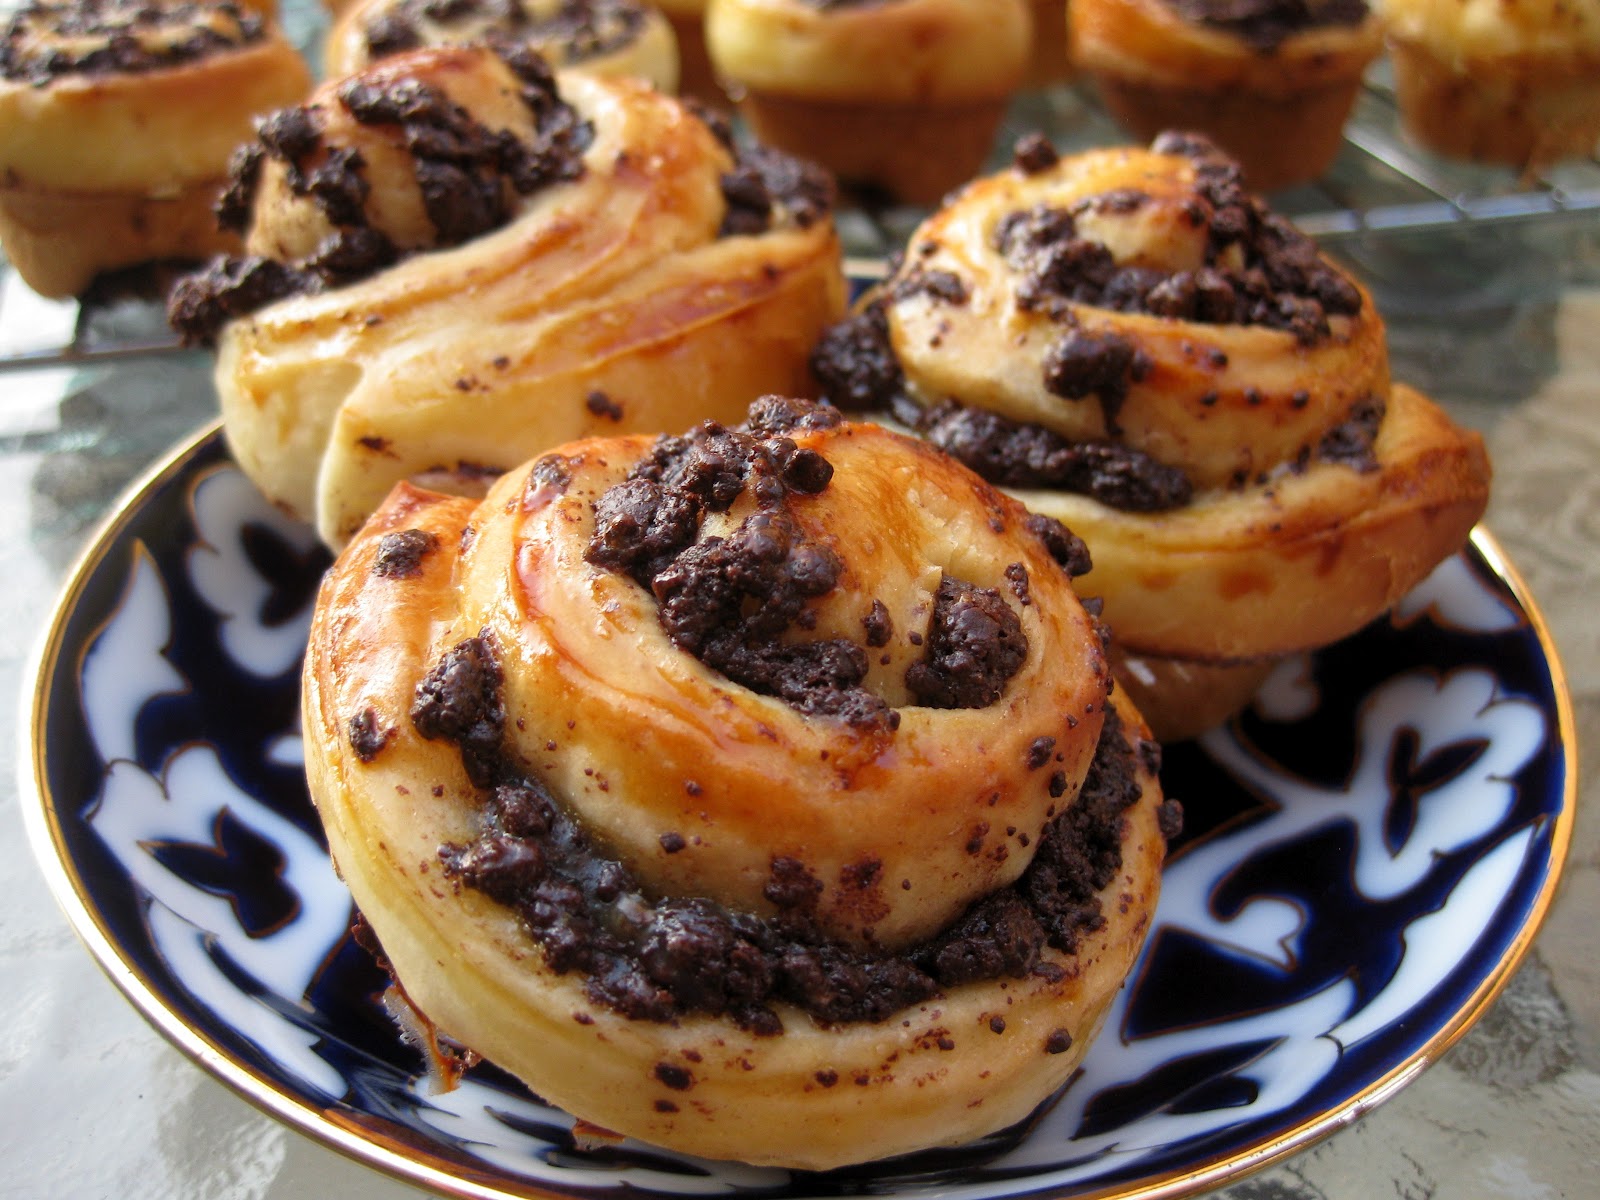
I decided to make these chocolate swirl buns that I saw not to long ago on my favorite food blog Annie's Eats. They are basically like a cinnamon bun, though with a chocolate filling, and by baking them in a muffin tin they are extremely easy to pop out and serve. Once again my family was disappointed that I was baking for someone else, though I did leave two for my mom and brother to try. They both enjoyed the little buns and I decided that I should make them again sometime soon, this time for the family, because they looked delicious but I didn't have a chance to try one.

Chocolate Swirl Buns
Note: The original recipe calls for making 12 rolls in a regular muffin tin. I made 24 in a mini muffin tin and the rolls were a great size. I also prepared the rolls a day ahead and kept them in the fridge then let them sit on the counter for a few hours the next day before baking them.

For the dough:
  • ½ cup warm milk
  • ¼ cup sugar
  • 2 tsp rapid rise (instant) yeast
  • 1 large egg, room temperature
  • 2 cups flour
  • ½ tsp salt
  • 3 tbsp unsalted butter cut into pieces, room temperature 
For the filling:
  • 8 oz (225 grams) dark chocolate, roughly chopped 
  • ¼ cup sugar
  • ½ tsp ground cinnamon
  • Pinch of salt
  • 3 tbsp unsalted butter, room temperature
  • 1 egg yolk + 1 tbsp water
  1. Using an electric mixer, combine the milk, sugar, and yeast. Add the egg, flour, and salt and mix until a sticky dough starts to form.
  2. Mix in the butter until incorporated. If using a stand mixer switch to the dough hook and knead on low speed for 10 minutes, otherwise just use your hands. The dough will still be extremely sticky.
  3. Transfer the dough to a well-greased bowl and cover with plastic wrap or a towel. Keep in a warm place until doubled in bulk, approximately 1-2 hours.
  4. While waiting, prepare the filling by combining the chocolate, sugar, cinnamon, and salt in the bowl of a food processor. Pulse several times until the chocolate is finely chopped and even somewhat powdery. Add the butter and continue pulsing until incorporated.
  5. Once the dough has risen place it on a well floured surface and punch it a little to deflate it. Let it rest for five minutes then split in half. Working with one half at a time, roll the dough out into a large rectangle about 12" long. 
  6. Sprinkle half of the chocolate filling over the rolled out dough then, working from the long end, roll it into a log. Cut the log into 12 individual pieces and place each into a well-greased mini muffin tin. Repeat with remaining dough and filling.
  7. Cover the muffin tins loosely with plastic wrap and allow the rolls to rise for at least 30 minutes. If not planning on baking right away simply cover and put them in the fridge, then allow them to proof twice as long before baking them later.
  8. Once ready to bake, brush the tops of the rolls with the egg wash and bake for 15-20 minutes at 350 degrees Fahrenheit, or until puffed and golden brown. If baking those that were refrigerated the bake time may be slightly longer.

Saturday, September 22, 2012

Macarons (Again)


I know that I have already blogged about macarons back when I made them for my friend's birthday at the end of April, but I feel like I should post an update. The truth of the matter is that since that time in April I tried to make macarons again for a baby shower and they turned out to be a total flop. However last week my mom and I attended a macaron making class at a local French cafe and I learned some new techniques.

I have to admit that I attend a lot of these "how-to" cooking classes but rarely do I actually learn new things, usually because I have already experimented so much on my own. I can happily say that this time was different and I definitely learned a lot...starting with how not to be afraid of my Kitchen Aid. Although I love my wonderful Kitchen Aid stand mixer dearly I am still hesitant to use it when it comes to whipping items such as egg whites for meringue or cream for whipped cream. After a few unsuccessful attempts I basically gave up and use my hand mixer instead, relying on the Kitchen Aid for less delicate things like cake batters, cookies, and doughs.

Despite my fear of the Kitchen Aid I saw how easily the teacher used it in our class to whip the egg whites and I wanted that confidence for myself. I intensely grilled her about everything related to the mixer, such as how long to go on each speed, and carefully observed the changes in consistency as she increased speeds. I asked so many questions in such great detail that at some point another person in the class asked if I owned a bakery. My mom laughed when she heard this and was quick to point out that although we did not technically own a bakery she sometimes felt as though we did given my frequency of baking for various occasions.

The macarons we made in class were of course picture perfect...exactly what you would expect from a bakery. As can be seen in the picture, they all had beautiful smooth tops and perfect little feet. We made two varieties, pink and purple, and two different butter cream fillings; raspberry-vanilla for the pink macarons and lemon-lavender for the purple ones. My mom was not thrilled with the lavender filling because she said it reminded her of body wash and made her feel like she was eating soap.

Obviously I wanted to test all of the new things that I learned at home and luckily for me I was invited to a birthday party the following week. I specifically went to a special kitchen store to buy the food coloring that we used in our class, a gel-based color that would not interfere with the moisture content of the macaron shells. Even after coming off my third eight hour clinical shift in a row (PS 5 AM wake-ups are no fun) I was too excited to try making the macarons.

My macarons did not turn out as picture perfect as the ones we made in class but they were definitely an improvement on my previous attempts. Initially I had some problems with getting the oven temperature just right for the first batch of red shells; this resulted in a tray of cracked shells. With the yellow ones I had the right temperature but I had not mixed the batter enough and therefore the shells came out a little bumpy on top instead of smooth. Nonetheless, I was extremely proud of the shells I baked and, more importantly, for getting over my fear of my Kitchen Aid.

Macarons
Note: This recipe makes about 40 shells, 1" in diameter. I highly suggest drawing out a template and placing it underneath the parchment paper in order to be able to pipe all the shells into equal sizes.
  • 120 grams egg whites, room temperature
  • 40 grams granulated sugar
  • 140 grams ground almonds
  • 240 grams icing sugar
  • Optional: Gel-based food coloring
  1. In the bowl of an electric mixer, whisk the egg white on medium speed until frothy. Add the granulated sugar and then whisk on full speed for 6-8 minutes. Note: this may seem like a long time but it really is necessary for the egg whites to be shiny and stiff therefore 6 minutes is a minimum. If desired, add food coloring about 3-4 minutes in, scraping the bowl as necessary.
  2. Meanwhile, sift the icing sugar and ground almonds together in a bowl then add to the stiffened egg white mixture with a rubber spatula. 
  3. Mix the batter by folding from the bottom up and around the sides (called macronnage) but try not to overmix. The mixture should fall back on itself and form ribbons at the bottom of the bowl.
  4. Pipe out 1" sized circles onto a baking tray lined with parchment paper, leaving about ½" between the macarons as the batter will spread. Once the tray is full, tap the tray a couple of times on the counter to release air bubbles and then let the tray sit on the counter for at least 20 minutes before baking.
  5. Once ready, bake at 325 degrees Farenheit for 10-11 minutes. I recommend trying a small test batch to check your oven for the right time and temperature. If your oven has a hot spot you might want to turn the tray 180 degrees halfway through to ensure even baking. 
  6. Allow the macarons to cool completely (I really do mean completely) before removing them from the parchment paper otherwise they will stick. 
  7. The macarons can be filled and stored in an airtight container in the freezer for 2-3 months. To defrost place them on the counter with the lid to the container removed to prevent condensation.
Butter Cream Filling
Note: For my macarons I used a raspberry vanilla butter cream for the red shells and a lemon butter cream for the yellow shells. I used ⅔ cup sugar and ½ cup butter for each filling and still had leftovers.

There are a variety of flavors that macarons can be filled with. To make a simple butter cream filling use the ratio of ¾ cup butter to 1 cup of icing sugar and then add whatever flavor you desire. Just make sure the butter is at room temperature.

Possible suggestions:
  • Vanilla (2 tsp vanilla extract)
  • Raspberry Vanilla (1 tsp vanilla extract, 1 tbsp raspberry jam)
  • Lemon (2 tbsp lemon zest, 1 tbsp lemon juice)
  • Chocolate (35 grams chocolate, melted and cooled)
Beat the butter and icing sugar until light and fluffy and pale in color. Add whichever flavor you are using and continue to beat until incorporated. Leftover butter cream can be stored in an airtight plastic bag (like a Ziploc freezer bag) for 2-3 months.

Saturday, September 15, 2012

Chipotle-Peach Barbecue Chicken with Cilantro Chimichurri


This barbequed chicken is yummy I promise! Unfortunately none of my pictures seemed to do it justice and I was too eager to eat it to concentrate on taking a lot of photos, but the taste was well worth it! I found the recipe not too long ago and decided to make it while summer fruit are still around. The original recipe actually called for mango but I couldn't find any at the grocery store and we already had peaches at home so that's what I used.

I decided to use the grill pan that I bought way back in February in order to cook the chicken. I hate to admit it but I have actually only used it twice since buying it, once on the grill side for grilled chicken satays with a peanut sauce and once on the griddle side for making pancakes. The problem with using the grill is that it takes so long to clean afterward! Not only are you left with little pieces of chicken on the grill but, as I've just found out, you are not supposed to use soap on cast iron as it ruins the finish. What the heck! To top it off, you are not supposed to scrub too hard either otherwise that can ruin the finish as well. It seems my mom may have been wise when she warned me of the inconvenience of my purchase.

Regardless of my cleaning difficulties, I don't regret using the grill to cook the chicken because it turned out delicious. It was juicy and moist and the flavor was amazing. The kick from the chipotle balanced perfectly with the sweetness of the peaches and the cilantro added extra freshness. After eating the chicken my mom asked if I could just make the sauce on its own and use it for dips or other dishes. I agreed and will probably make another batch to try with a vegetable stir-fry.

Chipotle-Peach Barbeque Chicken with Cilantro Chimichurri
  • 1½ cups peaches, chopped in large pieces
  • ¾ cup (about ½ bunch) cilantro, roughly chopped
  • 2 chipotle peppers in adobo + 1 tbsp adobo sauce (can use less if not wanting it to be too spicy)
  • 2 tbsp rice wine vinegar
  • 4 cloves garlic
  • 2 tbsp lemon juice
  • 1 tbsp olive oil
  • 2 tsp salt
  • 1 tsp pepper
  • 2 lbs chicken (breast, thighs, or drumsticks)
  1. Combine the peach, cilantro, chipotle, rice wine vinegar, garlic, lemon juice, oil, salt, and pepper in a food processor and puree until smooth. Adjust the seasonings to taste.
  2. Set aside half of the mixture into a small container for a sauce. Coat the chicken with the other half of the mixture and cover and refrigerate for at least 4-6 hours, though preferably overnight to allow the chicken to absorb more flavor.
  3. Once ready to cook, grill the chicken on a grill or grill pan pre-heated over medium-high heat. Turn and reposition the chicken pieces about every 5 minutes for 20-25 minutes or until the chicken is cooked through and is no longer pink inside.
  4. While the chicken is cooking, put the reserved mixture into a small saucepan and simmer over low heat until thickened, about 15 minutes. Serve the sauce alongside the grilled chicken.

Tuesday, September 11, 2012

Chocolate Fudge Oatmeal Cookies


Last week was the first week of school and I officially went to my last first day of undergraduate classes. I can't believe that in eight months I will have graduated from university and be on my way to working as a nurse! In the midst of all the first week excitement our nursing undergrad society had our first meeting since going on break. Obviously I did not pass up on the opportunity to bring a yummy treat and decided to bake these chocolate fudge oatmeal cookies.

Needless to say my mother and brother were disappointed when they learned the cookies were not for them, though I did save a few and gave them some. The cookies were extremely chocolatey as one would imagine with almost a cup of cocoa powder. Although highly sticky and hard to handle I think the end result was worth it. I'll probably make them again soon, no doubt for one of the upcoming bake sales I have agreed to participate in.

Chocolate Fudge Oatmeal Cookies
Note: This recipe makes about 40 small 2" cookies.
  • 2 cups rolled oats
  • 1 cup sugar
  • ¾ cup cocoa powder
  • ¼ tsp salt
  • 1 tsp vanilla
  • ½ cup olive oil
  • 4 egg whites
  1. In a large bowl combine the oats, sugar, cocoa powder, and salt.
  2. In a separate bowl combine the vanilla, olive oil, and egg whites.
  3. Add the dry ingredients to the wet and mix well to combine. Refrigerate the mixture for at least 30 minutes, though longer is better, to make it easier to handle.
  4. Plop mounds of dough onto a baking tray covered with parchment paper. The cookies should be about 2" in size and you can use your hands to flatten them out. The cookies will not spread so don't worry about spacing them too far apart.
  5. Bake at 350 degrees Fahrenheit for 12-14 minutes or until the edges are crisp and the centers look set. Remove from the oven and cool for 5 minutes on the tray before moving to a wire rack to finish cooling. The cookies will continue to harden on the tray and as they cool.