Wednesday, June 30, 2010

Monkey Bread


I loved this recipe the minute I heard its name...monkey bread. Also known as pull apart bread, monkey bread gets its name from the fact that you eat it by pulling apart the little balls just like a monkey. When I first saw the recipe, I knew that fate was calling my name because the recipe called for one packet of quick rise yeast, and that's exactly how much I had in my pantry.

The dough is easy is to make and the process of rolling the balls in butter and then sugar coating them is fun. Be warned though: this recipe is not for impatient people. After making the dough initially, you must let it rise for 20 minutes before proceeding to sugar coat the balls. Then, you have to wait another hour for the dough to rise in the pan before baking for 30 minutes. Overall, the process is time consuming simply because you end up waiting for so long...but the taste is worth it.

The first time I made monkey bread, I did it with my brother after dinner one night. By the next morning the whole family had devoured it over breakfast. This time, I decided to do it with some friends and their kids...the monkey bread was consumed within 20 minutes of coming out of the oven. The great part about this recipe is that you can do it with kids and let them go crazy...there's no measuring involved when it comes to rolling the balls in butter and then sugar coating them. Also, the recipe leaves room for experimenting. For example, the first time I prepared the monkey bread I followed the recipe as stated. However, the next time I decided to put little chocolate chips into the center of each of the dough balls before sugar coating them. Each time the monkey bread tasted great, and the chocolate inside was a great surprise the second time around. The recipe can also be altered by sugar coating them with sugar and chocolate instead of sugar and cinnamon. The possibilities are endless!

Monkey Bread

For the dough:
  • 2 tbsp unsalted butter, room temperature
  • 1/4 cup warm water
  • 1/4 cup sugar
  • 1 envelope instant yeast
  • 3/4 cup warm milk
  • 1 tsp salt
  • 3 1/4 cups flour
  • 1 large egg
  1. Lightly grease a 10" bundt pan and large bowl.
  2. Put the warm water and a pinch of sugar into a small bowl and pour yeast on top. Stir until the yeast softens and completely dissolves.
  3. In the large bowl, mix the butter, sugar, milk, salt, and egg. Once evenly mixed, add the yeast mixture and fully incorporate.
  4. Gradually add the flour and mix until a dough forms. Cover with a towel and set aside in a warm place for 20 minutes.
For the coating:
  • 1/2 cup unsalted butter, melted
  • 3/4 cup brown sugar
  • 3 tsp cinnamon (you can play around here and add what you like...be creative)
  1. Tear off the dough into roughly 1" pieces and roll into a ball.
  2. Dip the dough ball into the melted butter and let excess liquid drip off before rolling around in sugar cinnamon mixture.
  3. Pile all of the sugar coated dough balls on top of one another in the prepared bundt pan. Cover with a towel and set aside in a warm place for an hour, or until the dough rises and fills the pan.


Note: If you want to use chocolate chips, simply flatten the piece of dough that you tear off, put 3-4 chocolate chips in the middle and then cover with the rest of the dough and shape into a ball before sugar coating.


Bake for 30-35 minutes at 350 Fahrenheit. Cool for 5 minutes in the pan before inverting onto a plate and devouring to your heart's delight.

Eggs Poached in Tomato Sauce


The other day I came across this great recipe for poached eggs, middle eastern style. I am a true egg lover and have them every single day for breakfast. Usually I have them hard boiled, but occasionally I eat them poached, scrambled, or fried. Still, I love to look for new ways to prepare my eggs, and this recipe intrigued me. 

I showed the recipe to my mom and she agreed that it sounded tasty and that we should try it. We already had most of the ingredients, and decided to wing it with some that we were missing. The recipe called for jalapeno peppers, but since we had none, we decided to use chili flakes instead. We both like spicy food and agreed that one teaspoon of chili flakes would give the dish a nice kick. Not only did the dish have a kick, but it had a punch and a head butt too...the sauce turned out to be extremely spicy. Luckily, by the time we finished the entire dish the eggs and the cheese helped to soften the spice level. Still, we learned our lesson and will be more cautious next time with the use of our substitute ingredients.

Eggs Poached in Tomato Sauce
  • 4 eggs
  • 1/2 red bell pepper, cut into thin strips
  • 1/2 small onion, diced
  • 3-4 garlic cloves, finely chopped
  • 1 tsp cumin
  • 1 tsp coriander
  • 1/4 tsp chili flakes (even this may be a little much, so just use your judgement)
  • 1 14 oz. can diced tomatoes
  • 1/4 cup water
  • 1/2 cup feta cheese
  • 1/2 cup chopped dill
  • Salt and pepper to taste
  1. Heat some oil in a large skillet on medium heat until hot. 
  2. Add the onions and cook for 6-8 minutes, or until softened.
  3. Add the bell pepper strips and cook for an additional 3-5 minutes, stirring often.
  4. Add the chili flakes, garlic, cumin, coriander, salt, and pepper. Stir and cook for another 30 seconds.
  5. Stir in the tomatoes and water and reduce the heat to low. Continue to simmer sauce for about 20 minutes, stirring occasionally, until it is slightly thickened.
  6. Create four wells in the sauce and break an egg into each well. Cook the sauce and eggs until the egg whites set and the yolks are still slightly runny.
  7. Turn off the heat and sprinkle the feta cheese and dill over the sauce and eggs. Remove from the stove and enjoy!
Note: We halved the original recipe and changed some of the ingredients. If you are curious, the original can be found here. We also served it in the pan and simply tore off pieces of pita bread and dipped it in the eggs and sauce...it was messy but delicious.

Monday, June 28, 2010

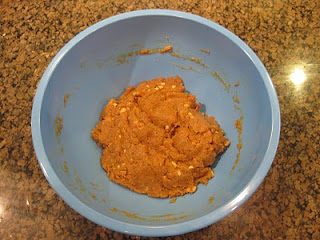
Peanut Butter Cookie Taste Off


I love to bake, I really do...but no matter how much I bake I can never seem to make the most simple dessert in the world: cookies. I don't know what it is about cookies that seems to elude me; I bake cakes all the time, as well as shortbread cookies and biscuits, but I cannot make something as basic as a chocolate chip cookie. Up until this point, I had pretty much accepted the fact that drop cookies did not like me, and therefore I avoided them.

For the most part, I was okay with this flaw of mine, making up for it by baking more elaborate cakes. However, every once in a while I would come across a recipe for a cookie and wonder whether it could be the one to break my cookie curse. And then one day....magic! I finally managed to bake a batch of delicious peanut butter chocolate chip cookies and my unsuccessful cookie streak was broken.

In the past my problems with the cookies usually involved over baking them. I know that you're supposed to take them out of the oven before they look done, but somehow I still ended up keeping them in there for too long. As a result they would taste good for the first five minutes, fresh from the oven, but once they cooled they would harden and lose that crumbly softness that everyone loves.

At last I was able to conquer my over baking tendencies and managed to make cookies that tasted good not only fresh from the oven, but even days later. All of a sudden, I became delighted and decided to see how far I could take my new found cookie confidence. I decided to try baking a different type of chocolate chip cookie and compare the two. The second recipe was for a healthier version of the cookie, with no butter and no flour. In the end, I learned that there is a reason why people still make unhealthier recipes even though there are alternatives: they simply taste better. Although the second batch of cookies looked more attractive, their taste did not stand up to the buttery richness of the first batch. Still, it was fun to make both cookies and learn that I can make cookies after all.

Peanut Butter Chocolate Chips Cookies

  • 1 cup flour
  • 1 tsp baking soda
  • 1/4 tsp salt
  • 1 cup brown sugar
  • 1 cup crunchy peanut butter
  • 1/2 cup unsalted butter (8 tbsp)
  • 1 tsp vanilla extract
  • 1 large egg
  • 1/4 cup honey
  • 1 cup chocolate chips
 
  1. Preheat the oven to 350 Fahrenheit.
  2. In a small bowl, mix together the flour, salt, and baking soda. Stir in the chocolate chips.
  3. In a large bowl, beat the brown sugar, peanut butter, butter, vanilla, egg, and honey.
  4. Add the dry ingredients to the large bowl and mix together until a uniform dough forms.
  5. Shape the dough into 1 1/4" balls and place on an a slightly greased cookie sheet, about 2" apart.
  6. Bake for 12 minutes and remove from the oven. Cool for 5 minutes before transferring cookies to a plate.
Flourless Peanut Butter Cookies


  • 1 cup crunchy peanut butter
  • 1/2 cup brown sugar
  • 1 tsp baking soda
  • 1 large egg
  • 1 bag chocolate disks


  1. Preheat the oven to 350 Fahrenheit.
  2. Combine the peanut butter, sugar, and baking soda in a large bowl. 
  3. Add the egg and mix until well incorporated.
  4. Roll the dough into 1" balls. Place on an ungreased cookie sheet and space about 2" apart.
  5. Flatten each dough ball and place a chocolate disk in the center.
  6. Bake for 10 minutes and remove from the oven. Cool for 5 minutes before transferring cookies to a plate.
Note: Each recipe has been slightly altered. The original recipe for the first cookie can be found here; the second recipe can be found here.

Sunday, June 27, 2010

Fruit Galette


My wonderful friend got me a birthday present a couple of months ago for a pastry making class at the Pacific Institute of Culinary Arts, located on Granville Island in Vancouver. My birthday was actually in March, but the class was scheduled for the end of May and I patiently waited in anticipation of all the delicious things I was going to learn to make. I actually stuck her card on the fridge and wistfully admired it and the gift I was due to enjoy as I continued to study and prepare for my exams.

Eventually May came and I had the pleasure of attending my pastry class. It was a fantastic experience which left me mesmerized and on cloud nine. During the course of five hours, I learned how to make several different pastry doughs and tart fillings such as ganache, lemon curd, and almond creme. At the end of the class I left with my very own lemon meringue pie, six mini chocolate ganache tarts, half of a ganache and berry tart, and plenty of extra dough.

As I was browsing tastespotting.com, I noticed some very beautiful pictures of various fruit galettes. As I clicked on the recipes, I found that these rustic french tarts were actually quite easy to make, and that the hardest part was making the dough, which I already had. Thus I decided to make my own fruit galette using my leftover dough and whatever fruit we had lying around. The result was delicious and great on a nice summer day.

Fruit Galette 

For the dough:
  • 1 3/4 cup flour
  • 1 tsp salt
  • 1 tbsp sugar
  • 3/4 cup unsalted butter, cold
  • 5-6 tbsp water, cold
  1. If you have a food processor: Combine the flour, sugar, and salt and pulse a couple of times. Add the chunks of butter into the processor and pulse until the butter pieces are roughly the size of walnuts.
  2. If you don't have a food processor: Dissolve the sugar and salt in the water and set aside. Cut the butter into large chunks and add to the flour, and continue cutting the butter through the flour until only walnut size pieces remain.
  3. Transfer the dough mixture into a bowl and moisten with the water, starting with just a couple of tablespoons at first. Work the mixture until it forms a dough, adding water by the tablespoon only as needed if it feels dry.
Tip: Make sure your ingredients are cold before you start preparing your dough, as this will make the process much easier.

For the filling:
  • 2 tbsp sugar, plus 1 tsp for sprinkling
  • 1 tbsp corn starch
  • 1 egg yolk
  • 2-3 cups fresh fruit, cut into bite size pieces
  1. Preheat the oven to 425 Fahrenheit. Roll out the dough into about a 9" circle.
  2. In a bowl gently mix the sugar, corn starch and fruit.
  3. Strain the mixture then pour into the center of the dough, leaving about a 2" border.
  4. Fold the uncovered border over the edge of the fruit and pinch into pleats.
  5. Add a little water to the egg yolk to create an egg wash and brush onto the crust. Sprinkle the crust with the remaining teaspoon of sugar.
  6. Bake for 12-15 minutes until crust is lightly browned.
Alternative: To make this even faster and easier, you can buy a pre-made pie crust and simply fill it and bake it. It may not be as authentic, but it still tastes great and the pleating usually looks nicer with the even edges.

Friday, June 25, 2010

Grilled Chicken Breast and Pasta Salad


This year we celebrated Father's Day with a day-long picnic together with many friends. Despite the great atmosphere, I still wanted to do something special for just our family. As a solution, we agreed that the next day our family would celebrate our own, more intimate Father's Day by having a nice dinner outside. We were actually quite lucky on both days because the weather turned out great, despite gloomy forecasts.

I had previously made this chicken recipe a month prior, while my parents were away on vacation. It was my first time making chicken, other than shake-and-bake, and I was quite proud of the result. I decided that upon their return I would make it again, and Father's Day seemed the perfect opportunity to do so. The first time I made it was definitely a long and tedious process, simply because I don't know how to use the grill and had to resort to our little panini maker. As you can imagine, grilling six pieces of chicken breast one at a time can be time consuming. This time, I had the benefit of someone else showing me how to grill the chicken, which sped up the process and added to the flavor.

I found the original recipe for the chicken here and changed it slightly to better suit my family's tastes. The recipe also featured a great pineapple salsa, which I made but unfortunately forgot to take a picture of, and a pasta salad. Again, I altered each recipe a little but I like the overall concept of pairing the three things together to make a lovely summer meal. The salsa, especially, went extremely well with the chicken and left everyone singing my praises.

Grilled Chicken Breast
  • 6 skinless, boneless chicken breasts
  • 1 cup sour cream
  • 1/4 cup extra virgin olive oil
  • 3-4 garlic cloves, chopped
  • 1/2 tsp dried basil
  • 1/2 tsp dried oregano
  • 1/2 tsp thyme leaves
  • 1 tsp dill weed
  • 1 lemon, zested
  • 2 tsp salt
  • 2 tsp hot sauce
  1. Combine all of the ingredients together in a bowl.
  2. Toss the chicken in the marinade, one at a time, making sure to coat well.
  3. Place the chicken breasts side by side in a large dish and pour excess marinade over top. Refrigerate for a minimum of 4 hours, preferably over night.
  4. Preheat the grill over high heat for 5 minutes and then reduce to medium. Grill the chicken breasts for about 7-8 minutes on each side, or until there is no more pink.
Red Pepper and Tomato Pineapple Salsa
  • 2 Roma tomatoes, diced
  • 1 red bell pepper, diced
  • 1 20 oz can pineapple tidbits, drained
  • 1 1/2 tsp hot sauce
  • Salt to taste
Combine all of the ingredients together and mix well. Tip: if you want the salsa to be sweeter rather than spicy, add only one teaspoon of hot sauce and add some of the pineapple juice from the tidbits.

Pasta Salad
  • 1 lb fusilli pasta
  • 1 lemon, juiced
  • 1 pint grape tomatoes (one small container should be plenty)
  • 1/4 cup chopped cilantro
  • 1/4 cup extra virgin olive oil
  • Salt and pepper to taste
  1. Cook the pasta through, about 10-12 minutes.
  2. Rinse under cold water until pasta has cooled.
  3. Slice the tomatoes into halves and add to pasta.
  4. Add cilantro, lemon juice, and olive oil. Mix well and season to taste with salt and pepper.

Wednesday, June 23, 2010

Walnut and Raisin Biscuit


I think that there are few women out there who don't have some early kitchen memories involving mothers or grandmothers and delicious smells. I am lucky enough to not fall into that category as I have plenty of lovely memories of my mom and grandma baking and cooking and letting me help with the occasional task. Of course, as you grow up and try to recreate those once loved recipes, you find that they never turn out quite the same way. Still, the process of going through those same steps and coming out with a great product brings a certain sense of pride and happiness.

To this day my mom still makes these yummy biscuits which are known as mazurka in Russian. Although I have helped her many times, somehow doing it on my own leads to them tasting slightly different. A couple of weeks ago my economics class was set to have a lecture on the beach, and girls were responsible for bringing food. I decided that I would make these biscuits because they are very light and easy to make ahead.

As with many of my mom and grandma's recipes, this one was in Russian and required me to translate it before I began. I will admit that my Russian reading skills are elementary at best, but I do have them and occasionally use them. After translating the recipe, I decided I would call my mom to double check that I had gotten the ingredients and portions correct. When I read off my translation, my mom informed me that I had mistaken one tablespoon of flour for one cup. I replied by telling her that I was pretty sure the word on the page said cup, but she insisted that it was one tablespoon and that I must not have understood the abbreviation correctly. I thanked her for pointing out my mistake and proceeded to prepare the biscuits.

While making the biscuits, I kept having a nagging feeling that something wasn't right. My mixture was quite liquidy and not at all the thick consistency that I knew it should be. As I folded in the walnuts and raisins and poured the mixture into the pan, I knew that something had gone wrong. Still, I continued to follow the instructions and baked the biscuits. In the end, all of the walnuts and raisins sank to the bottom and the biscuit turned out more spongy than crispy.

I showed my biscuits to my mom and she agreed that they had not turned out correctly. Although the taste was the same, the texture was definitely different. I relayed to her step-by-step everything I did and she confirmed that I had done everything right. So what was the problem? We decided to consult the original recipe and decided that apparently it was my mother's memory and not my Russian skills that had led me askew. The recipe did indeed call for one cup of flour, not one tablespoon, and would have led to a much thicker mixture had I added the one cup. We laughed about the mix-up and my mom apologized for mistrusting my translating abilities. I still ended up bringing the biscuits to the picnic because they still tasted good...and I had nothing else prepared anyway. However, I'm pleased to say that I tried making the biscuits again for Father's Day, this time using one cup of flour, and they turned out just right with a crunchy texture.


Walnut and Raisin Biscuits
  • 4 eggs
  • 1 cup sugar
  • 1 cup flour
  • 1 1/2 cup walnuts, chopped
  • 1 cup raisins
  • Dash of vanilla
  1. Preheat oven to 325 F. Line a 13" x 9" pan with parchment or wax paper. Make sure to create crisp and defined edges, otherwise the biscuits will sink into the folds in the cracks. If you want, you can sprinkle some flour over the paper for ease of peeling it off later, but it's not necessary.
  2. Beat the eggs and sugar together on high speed until the mixture is nearly doubled in size and a pale yellow, almost white. Add the vanilla, about a cap full. Keep beating until you notice the mixture cannot get any thicker, between 5-7 minutes.
  3. Reduce the speed to low and gradually add the flour to the mixture. Beat until all of the flour is incorporated and the mixture is white in color.
  4. Once all of the flour has been thoroughly mixed in, gently fold in the walnuts and raisins.
  5. Pour the mixture out into the pan and, using a spatula, spread and smooth it out. Make sure that you spread it into the corners evenly because the mixture will not spread on its own.
  6. Bake for 45-50 minutes, or until it is a light, golden brown on top.
Once out of the oven, immediately invert the pan and peel off the paper. It is easiest to do this while it is still hot. Invert once again onto a cutting board so that the top is facing up.


Cut the biscuit lengthwise with each strip measuring approximately two fingers in width.


Sunday, June 20, 2010

Pesto Pinwheels


I have recently become inspired by puff pastry and all of its wonders. Coming off of my success with the asparagus and goat cheese tart, I decided to see how else I could employ this marvelous product. After scouring the internet for ideas, I decided I would attempt to create pinwheels using this ever-versatile dough.

Although the idea of pinwheels may not be original, I have never used puff pastry to make them and was anxious to see how it would turn out...would it really be as flaky as promised or would my little pinwheels refuse to puff out? I am pleased to report that the puff pastry did not disappoint on either count; the pinwheels were quite flaky and all of them puffed up into round little circles, despite my uneven cutting at first.

As for the filling, this was where I truly let my creative juices flow. For the first time in a long time, I actually came up with the recipe all on my own, based on ingredients that I thought would go well. I knew that I wanted to create a pesto type filling but I didn't want to make the traditional basil pesto, mainly because my family isn't too crazy about basil. Instead, I opted for a spinach pesto, and also added cilantro to create a second flavor complementary to the spinach. I also decided to use feta cheese instead of the traditional Parmesan cheese because my family loves feta. Lastly, I took a chance and added some walnuts into the mix, more out of curiosity than anything else.

At first I was a little nervous to push the button and actually create the pesto...after all, I am a recipe follower, not creator. However, I was extremely pleased with the result. The pesto tasted wonderful, both in the pinwheels and as a bread spread. Also, the addition of the walnuts gave it a very interesting nutty flavor which complemented the spinach and cilantro well. Looking back, I think that this successful experiment will definitely get my creative juices going and has inspired me to create more of my own, original recipes.

Pesto Pinwheels
  • 1 sheet puff pastry, thawed
  • 4 cups spinach leaves, washed and dried
  • 1 cup cilantro, roughly chopped
  • 1 cup feta cheese
  • 1/2 cup walnuts
  • 1/2 lemon, juiced
  • 1/3 cup extra virgin olive oil
  • Salt and pepper to taste
Note: This recipe makes for a lot more pesto than is needed to spread over the dough. Extra pesto can be served cold alongside bred or crackers as a spread, or heated up and used as a pasta sauce.

Saturday, June 19, 2010

Asparagus and Goat Cheese Tart


A couple of months ago I went down to Seattle over Easter weekend to visit my former neighbors. The trip was great, filled with lots of fun and surprisingly little shopping. On Easter Sunday we were invited to have dinner at one of the other neighbors' house and that is where I stumbled upon this amazing tart. I asked her in great detail how she came up with the idea, and she admitted that she read it in a magazine. I spent the entire evening captivated by this simple, yet delicious, idea and vowed to make it upon my return home.

Fast forward two months and voila....my very own asparagus and goat cheese tart. I must admit that when I arrived home raving about this tart my mother was quite surprised, namely because I do not like cheese. I don't know why, but something about the flavor of most cheeses does not appeal to me. However she assures me that it's something I will grow into, and I guess I am doing so gradually. I was intrigued by the flavor of the goat cheese and how soft it was, something I noticed is true of most spreadable cheeses. I guess that's why I prefer soft cheeses such as Brie and Camembert when it comes to cheese and crackers.

The actual tart was quite easy to make, despite a couple of setbacks I had. Firstly, when rolling out the dough I was afraid of rolling it out too thin and not being able to transfer it to the baking pan without ripping it. My fear was unfounded and made for two smaller tarts instead of one large one. Second, I forgot to prick the dough with holes before I put it in the oven. As you can imagine, the dough puffed up into a big pillow and I had to take it out halfway through to poke holes and deflate it. Lastly, I let my excitement over trying the tart get the best of me, and started cutting it as soon as I took it out of the oven. As a result it was extremely difficult to cut and the puff pastry on the borders kept breaking because I didn't allow it to cool. Eventually once we devoured the first tart, the second one had cooled and cutting it was much easier. Still, I don't regret eating it right away because it was so delicious!

Asparagus and Goat Cheese Tart
  • 1 sheet frozen puff pastry, thawed
  • 1 10 oz. log goat cheese
  • 1 bunch asparagus, ends trimmed
  • 1 tbsp. olive oil
  • 1/2 a lemon, zested
  • Salt and pepper
  1. Preheat oven to 400 F. Roll out the puff pastry dough into a rectangle. Don't worry about how long it is, just making sure its wide enough so that you can lay out the asparagus length wise across.
  2. Leaving a 1" border, prick the dough all over with a fork. (Don't forget this step like I did)
  3. Bake in the oven for 15-20 minutes, or until golden brown, and remove from the oven.
  4. Spread the pastry with the cheese and then lay out the asparagus on top.
  5. Brush lightly with olive oil and then sprinkle the lemon zest, salt, and pepper over top.
  6. Return the pastry to the oven for 20-25 minutes. Let cool before slicing and serving.
Alternative: If you want to eat it the pastry while it's still hot but don't want the headache of cutting into it warm, divide the rolled out puff pastry into individual squares before baking them. Follow the rest of the directions, except cut the asparagus into thirds and divide evenly among the squares. Granted, it is more time consuming, but if you have the time I would highly suggest it as the tart tastes amazing when it is still hot from the oven.

Thursday, June 17, 2010

Olive Bread


As my tap class was getting ready for our annual year-end party, I volunteered to bring something that could be considered "real food"...ie. something that was not dessert. I decided to try and make this olive bread since it would go well with the pasta that someone else was bringing.

This was actually not my first time making this recipe, but it was the first time that I carefully read through the directions instead of briefly looking at them and being convinced that I had them memorized. The first time, after so confidently heading into my kitchen with the recipe committed to memory, I not only forgot to add the melted butter but I added the ingredients backwards. The result was an extremely dry looking bowl of ingredients, I can't even call it a dough or a batter. Once I figured out I was missing the batter I added it in, but it was too late. The dough clumped into pieces and refused to allow the butter to be incorporated completely. My friend and I decided to bake it anyways, since we already put the effort into assembling it, and ate it regardless.
 
This time I followed the correct order and I remembered to add the melted butter. I substituted some of the ingredients from the original recipe but I think the concept was still the same. Unfortunately, when I mixed the ingredients together the result was more of a dough than a batter as the recipe described. As a result, the bread was quite dense and now light and airy as I imagined it to be. I might try just using one cup of flour next time and see how that changes the texture. Luckily, it was still widely received in my tap class. Below is my adaptation of the recipe; the original recipe is courtesy of Laura Calder of the Food Network show French Food at Home, and can be found here.

Olive Bread

  • 1-1/2 cups flour
  • 1-1/2 tsp. baking powder
  • 1/2 tsp. ground pepper
  • 3 eggs, lightly beaten
  • 1/2 cup melted butter
  • 1/3 cup green olives, sliced and pitted
  • 1/3 cup Kalamata (black) olives, sliced and pitted
  • 1 cup feta cheese, lightly crushed, plus a little extra for sprinkling
  • Pinch of salt
  1. Heat the oven to 350ºF/180ºC. Butter and flour a loaf pan. (I used a 9" x 5" and sprayed it with Pam)
  2. Sift the flour and baking powder into a mixing bowl, and stir the salt and pepper through. 
  3. Beat the eggs into the flour. Beat in the melted butter. 
  4. Stir through the remaining ingredients to distribute evenly. 
  5. Transfer the dough into the pan, making sure it is spread evenly across. Sprinkle some feta cheese over the top and bake 55 minutes or until a toothpick inserted in the center comes out clean. 
  6. Cool slightly. Remove from pan. Slice, and serve.

Wednesday, June 16, 2010

My First Post

Hello blogging world! I have recently become addicted to food blogs and tastespotting.com, resulting in many a late night sitting at my computer salivating over recipes and delicious pictures. I love clicking on all of the beautiful pictures and reading people's stories of how they came across the recipes. Inspired by all of the food, and encouraged by friend, I have decided to start my own blog. Who knows...maybe one day some other foodie will be sitting at their computer late at night, knowing that really they should go to bed, but instead decide to look at pictures of my food and enjoy my stories.Generally when I look at all of these recipes and I try to decide which I am going to attempt, I follow two rules:
  1. The recipe needs to be easy...or at least it needs to look that way. Although I love to spend time in the kitchen, I'm also a full time student and have a part time job. That said, there is only so much time I can devote to trying to figure out the detailed instructions of any given recipe. Therefore, I enjoy recipes that look and sound easy and employ techniques that I already know, or can figure out quickly. I also love recipes that include step-by-step pictures, but that's just an added bonus, not a requirement.
  2. I need to have most of the ingredients already in my kitchen. Let's face it: there are a million different ingredients in the world and although my local grocery store caries most of them, that doesn't mean I want to have to run out to get some obscure ingredient that will cost a ridiculous amount of money and I will probably not use again anytime soon. Therefore, when I look up a recipe I mentally calculate how much I already have and how much I need to go out and buy. If I feel that I have an ingredient that is equivalent, I usually substitute it for the one in the recipe.
Hopefully my blog can showcase some good recipes and if not, at least people can get a laugh at all of my food-related stories. Somehow it turns out that each recipe I try always comes with some sort of hiccup, making for some fun stories to tell afterward.